EdisonStandardOwnersManual-RevA-20170818B.pdf - 第169页
Edison Printer User Manual (Part Number 1023838) M AINTENANCE Rev. A 169 Copyright © 2017 ITW EAE All rights reserved. No part of the contents of this manual ma y be reproduced, copied or transmitted in any form or by an…
MAINTENANCE Edison Printer User Manual (Part Number 1023838)
168 Rev. A
Copyright © 2017 ITW EAE
All rights reserved. No part of the contents of this manual may be reproduced, copied or transmitted in any form or by any
means including graphic, electronic, or mechanical methods or photocopying, recording, or information storage and
retrieval systems without the written permission of ITW EAE, unless for purchaser's personal use.
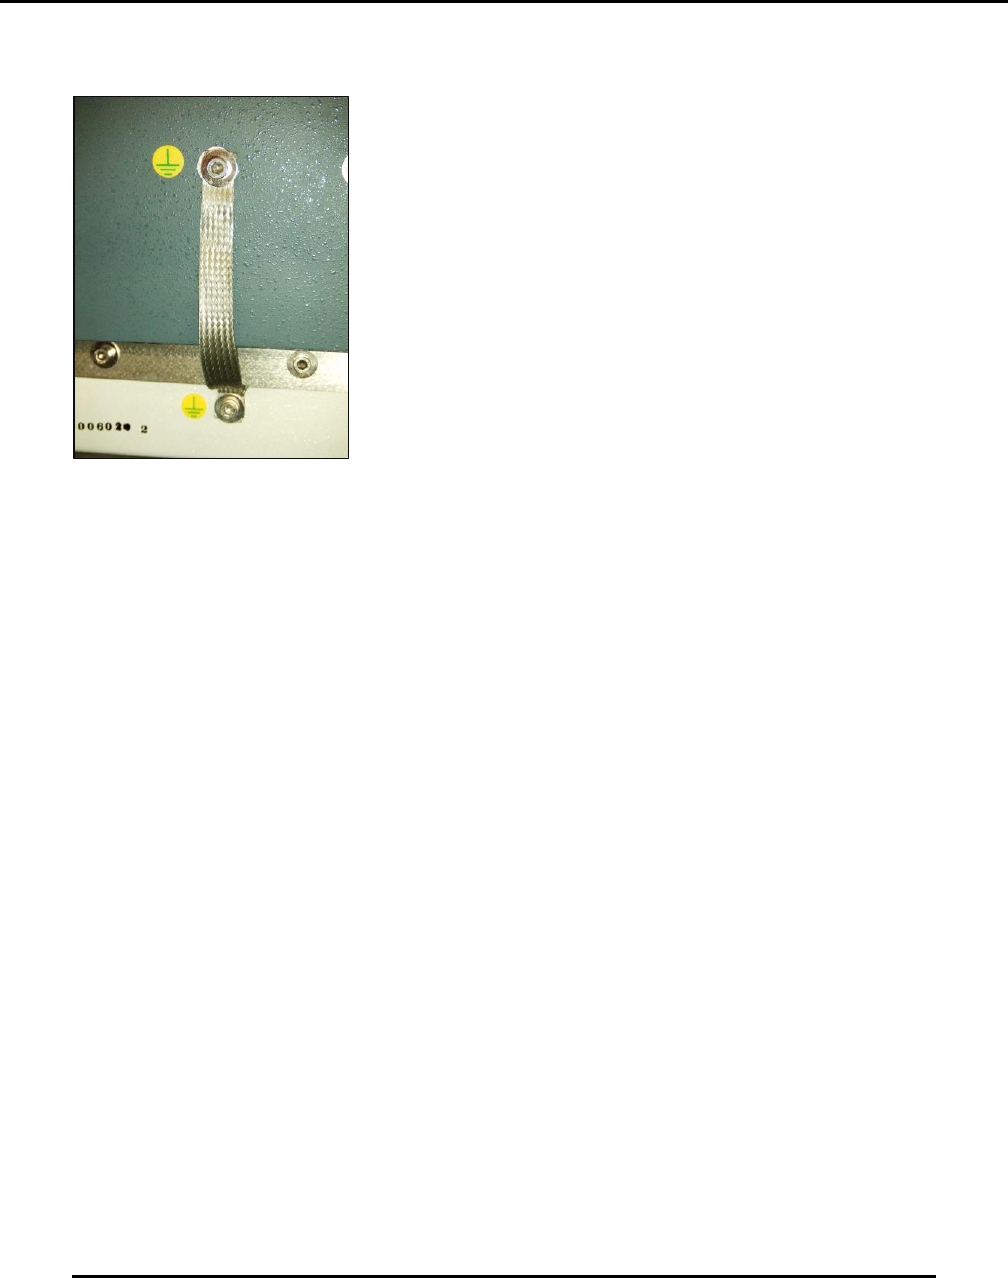
6.2.32. Inspect Hood To Hoop Roll Ground Strap–180 Days
Figure 166. Inspect hood to hoop roll ground strap.
Introduction
Inspect the hood to hoop roll ground strap (Figure 166).
Estimated Completion Time
Less than 5 minutes.
Procedure
Open the hood.
Examine the small braided strap from the hood to the hoop roll frame.
This electrostatic discharge (ESD) strap should not show any fraying or deterioration and/or
metal strand breakage.
o Replace strap if any strands are frayed.
6.2.33. Clean Work Table–Daily
Introduction
Clean the work table.
Estimated Completion Time
Less than 5 minutes
Procedure
Navigate to View (pull-down) > Diagnostics, then click the Motion Control tab to display the
Motion Control dialog.

Edison Printer User Manual (Part Number 1023838) MAINTENANCE
Rev. A 169
Copyright © 2017 ITW EAE
All rights reserved. No part of the contents of this manual may be reproduced, copied or transmitted in any form or by any
means including graphic, electronic, or mechanical methods or photocopying, recording, or information storage and
retrieval systems without the written permission of ITW EAE, unless for purchaser's personal use.
Select the WORKNEST Z axis.
o Click Home (bottom of the screen).
Clean the board support (lifters) using a clean lint-free cloth and cotton swabs (both
dampened with approved cleaning solvent).
o Pay special attention to the underside of the lifters when cleaning.
Make sure to remove all paste build-up.
Ensure all tooling and foreign objects are removed from the underside of the rails or damage
can occur.
If you have the Edge Lok option, inspect the assembly for loose, damaged, or missing parts.
o Check for paste build-up and other debris.
o Clean as required using a clean lint-free cloth and cotton swabs (both dampened with
approved cleaning solvent).
Clean the work table surface using a clean lint-free cloth dampened with approved cleaning
solvent.
o Make sure to wipe the table area under the front and rear track assemblies as well.
6.2.34. Clean Stencil Shelves—Daily
Introduction
Clean the stencil shelves.
Estimated Completion Time
Less than 5 minutes.
Procedure
Remove the stencil from the shelf (if present).
Caution: Safety Glasses
Wear protective safety glasses when handling solvent or
printing media. These chemicals can cause eye injury. Review
Safety Data Sheet before use.
Caution: Safety Gloves
Wear protective gloves when handling solvent or printing media.
Solvent can cause skin irritation. Review Safety Data Sheet
before use.
MAINTENANCE Edison Printer User Manual (Part Number 1023838)
170 Rev. A
Copyright © 2017 ITW EAE
All rights reserved. No part of the contents of this manual may be reproduced, copied or transmitted in any form or by any
means including graphic, electronic, or mechanical methods or photocopying, recording, or information storage and
retrieval systems without the written permission of ITW EAE, unless for purchaser's personal use.
Clean the entire right side shelf assembly using a clean lint-free cloth dampened with an
approved cleaning solvent.
o Repeat for the left side assembly.
Replace the stencil (if previously removed).
6.2.35. Clean Solvent Pan–As Necessary
Introduction
Solvent Pan Cleaning
Estimated Completion Time
Less than 30 minutes
Procedure
All Edison machines are equipped with a solvent leak sensor mounted to the stencil wiper. The
sensor is located at the rear of the wiper on the, mounted on the lower area of the wiper
backplane. When this sensor detects liquid solvent in the wiper pan, the machine will stop and
power will be automatically shut off.
Remove solvent from the pan and sensor before powering the machine up and returning to
service.
There are two procedures for removing solvent from the wiper pan (Table 18):
Table 18. Two procedures for removing solvent from wiper pan.
Procedure
Section
When to Use
Solvent Pan Cleaning
(Machine Power Off)
The leak sensor has detected
solvent and shut power off to the
machine
Solvent Pan Cleaning
(Machine Power On)
Machine power is on when a leak or
spill is noticed but the leak sensor
has not detected it.