00191297-02.pdf - 第226页
6 Vision functions User Manual S-23 HM 6.5 Teach Fiducial Software Version SR.405.xx 05/99 Issue 224 6.5.6.4 PCB to Center Conv eyor Opti on Click on the PC B to center conveyor button and the followin g actions will be …
User Manual S-23 HM 6 Vision functions
Software Version SR.405.xx 05/99 Issue 6.5 Teach Fiducial
223
6
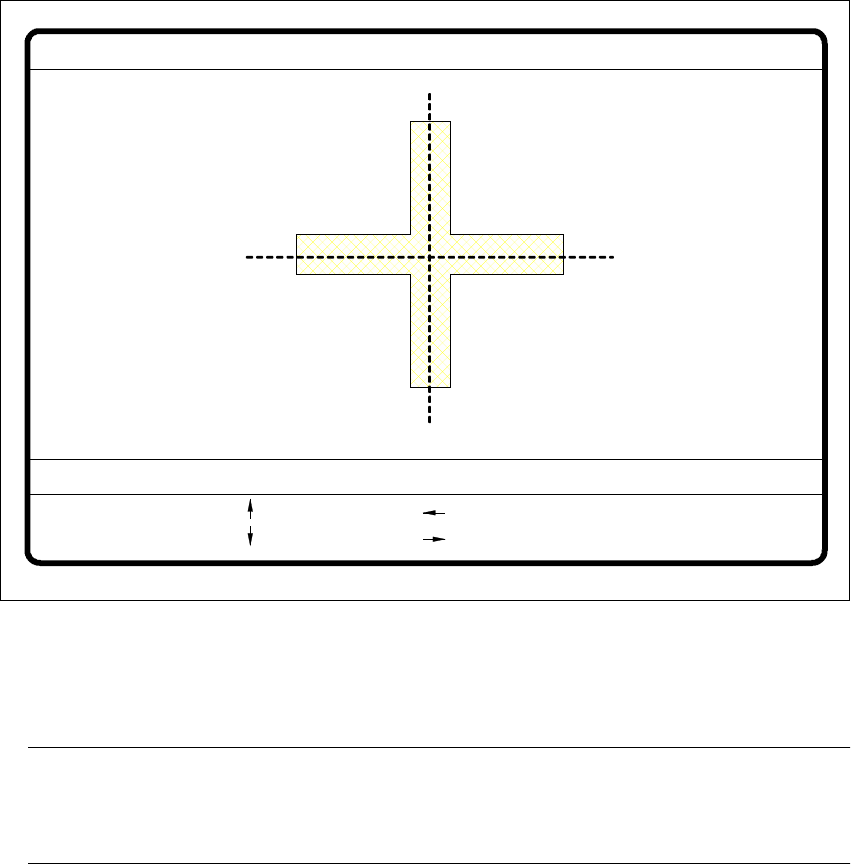
Fig. 6.5 - 26 Test fiducial menu, Move x/y axes video image
È After selecting the step width (by choosing a number between 1 and 6) you can use the arrow
keys to change the camera position of gantry 1.
NOTE 6
The default teaching gantry is always Gantry 1. You can, however, select Gantry 2 for this by
using the Select gantry option (see Section 6.5.3.1 on page 199). 6
È With Esc you can quit the option. The Test fiducial menu will be displayed again.
: x axis +
: x axis -
: y axis +
: y axis -
1..6: x/y step
x pos. cam = y pos. cam =
Move x/y axes
x/y step width =

6 Vision functions User Manual S-23 HM
6.5 Teach Fiducial Software Version SR.405.xx 05/99 Issue
224
6.5.6.4 PCB to Center Conveyor Option
Click on the PCB to center conveyor button and the following actions will be executed: 6
(1) There is a board on the input conveyor.
– The conveyor belt starts and conveys the board as far as the stopper.
– The board will be clamped.
(2) There is no board on the input conveyor.
– The message appears: ’No PCB on the input conveyor’.
– Insert a board.
– Click on the PCB to center conveyor button.
– The conveyor belt starts and conveys the board as far as the stopper.
– The board will be clamped.
NOTE 6
If there is already a board on the center conveyor, this function will be blocked. You will then
see a message informing you that there is already a board on the center conveyor. 6
NOTE 6
If a twin conveyor is installed you can use the buttons in the option box ’Conv. selection’ to
select conveyor 1 or conveyor 2. 6
6.5.6.5 PCB to Output Conveyor Option
This function will only be executed when there is a board on the center conveyor. 6
NOTE 6
When you quit the menu, the board will be transported automatically onto the output conveyor. 6
NOTE 6
If a twin conveyor is installed, you can use the buttons in the option box ’Conv. selection’ to select
conveyor 1 or conveyor 2. 6
User Manual S-23 HM 6 Vision functions
Software Version SR.405.xx 05/99 Issue 6.6 Test Component
225
6.6 Test Component
6.6.1
Test Component
Flow Chart
The Test component flow chart shows in graphic form all menu options together with their sub-
functions. The menus are indicated by being bordered with a solid line, while the option boxes use
a dash-dotted line and the input boxes a dotted line. 6
6.6.2 Information on the
Test Component
Flow Chart
6.6.2.1 Menus
The Test component option includes the following menus: 6
– Select package form
– Test component
The Save component name option box will drop down every time you wish to quit the Test com-
ponent menu, having previously generated or modified GF data. This gives you the choice of ei-
ther saving or discarding the GF data in question. 6
You can quit the individual menus by clicking on either the icons of another menu or on the Main
view icon. 6
6.6.2.2 Input Boxes, Option Boxes
For data input, displaying values and initiating actions the system offers the following input
boxes: 6
– Measure mode
– Adjust contrast sensitivity
– Select component type (80F
4
, 80F
4
-6 or 80F
5
machines only)
You can quit the input boxes by clicking on OK, Accept or Cancel. 6
È Click on OK or Accept to have the program save the data. The box will then close.
È Click on the Cancel button to discard the data, after which the input box will close.