CM88Maintenace2x.PDF.pdf - 第100页
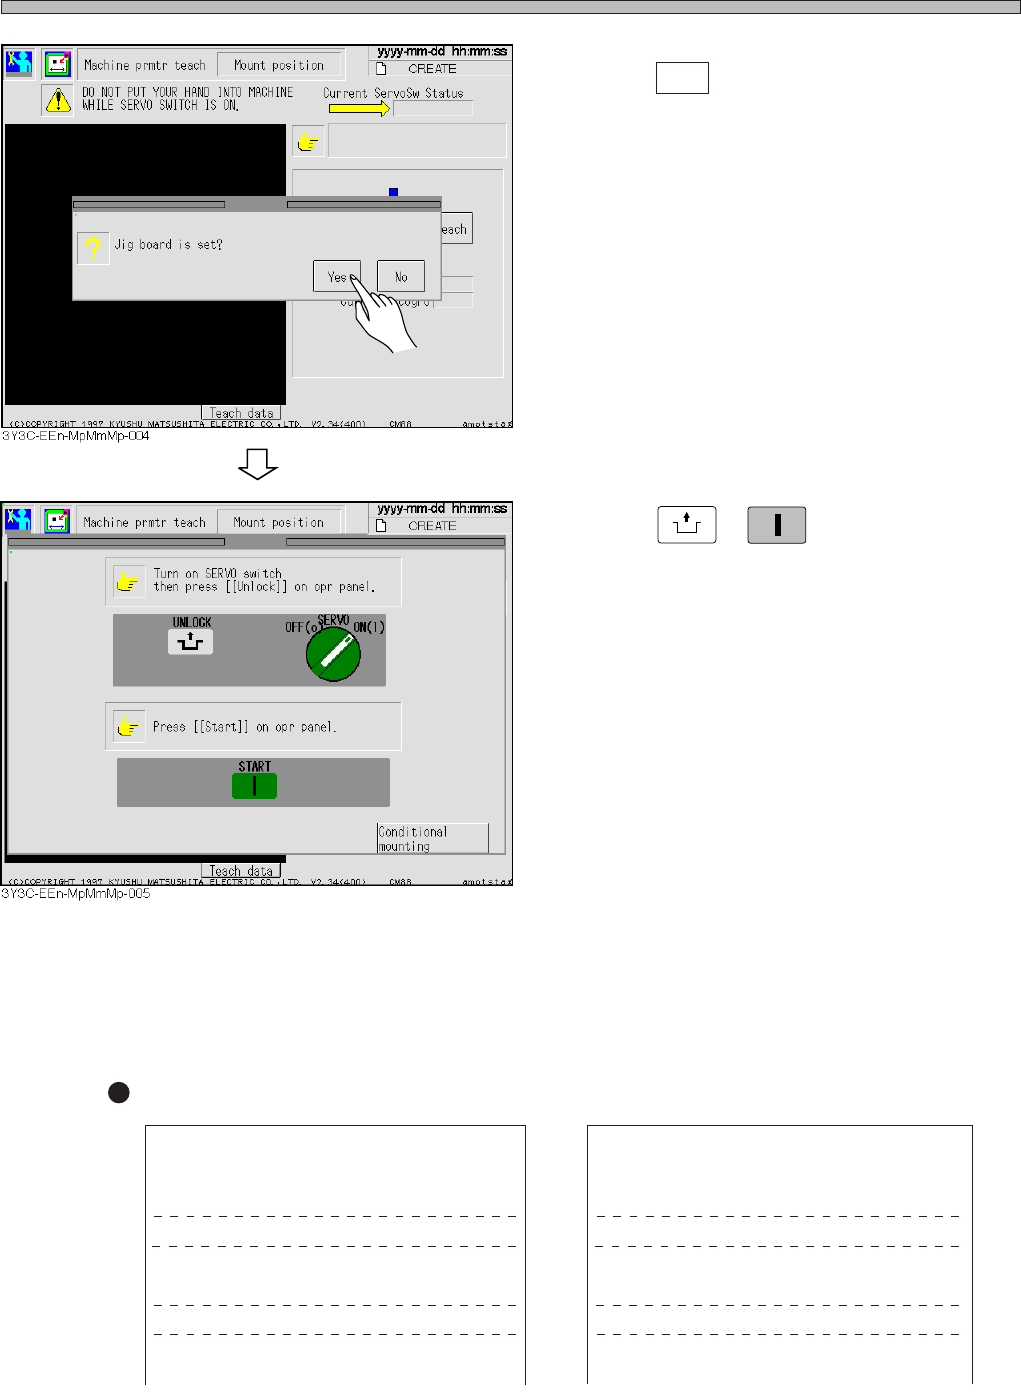
Page 1-8 3Y3C-E-MMZ0A-A01-00 Mounting Position Calibration 5. After the board setting is completed, press Y es . 6. Press UNLOCK + START . • The mounting position calibration starts. ∗ After the calibration is completed,…
Page 1-7
CALIBRATION
3Y3C-E-MMZ0A-A01-00
Mounting Position Calibration
4. Calibration
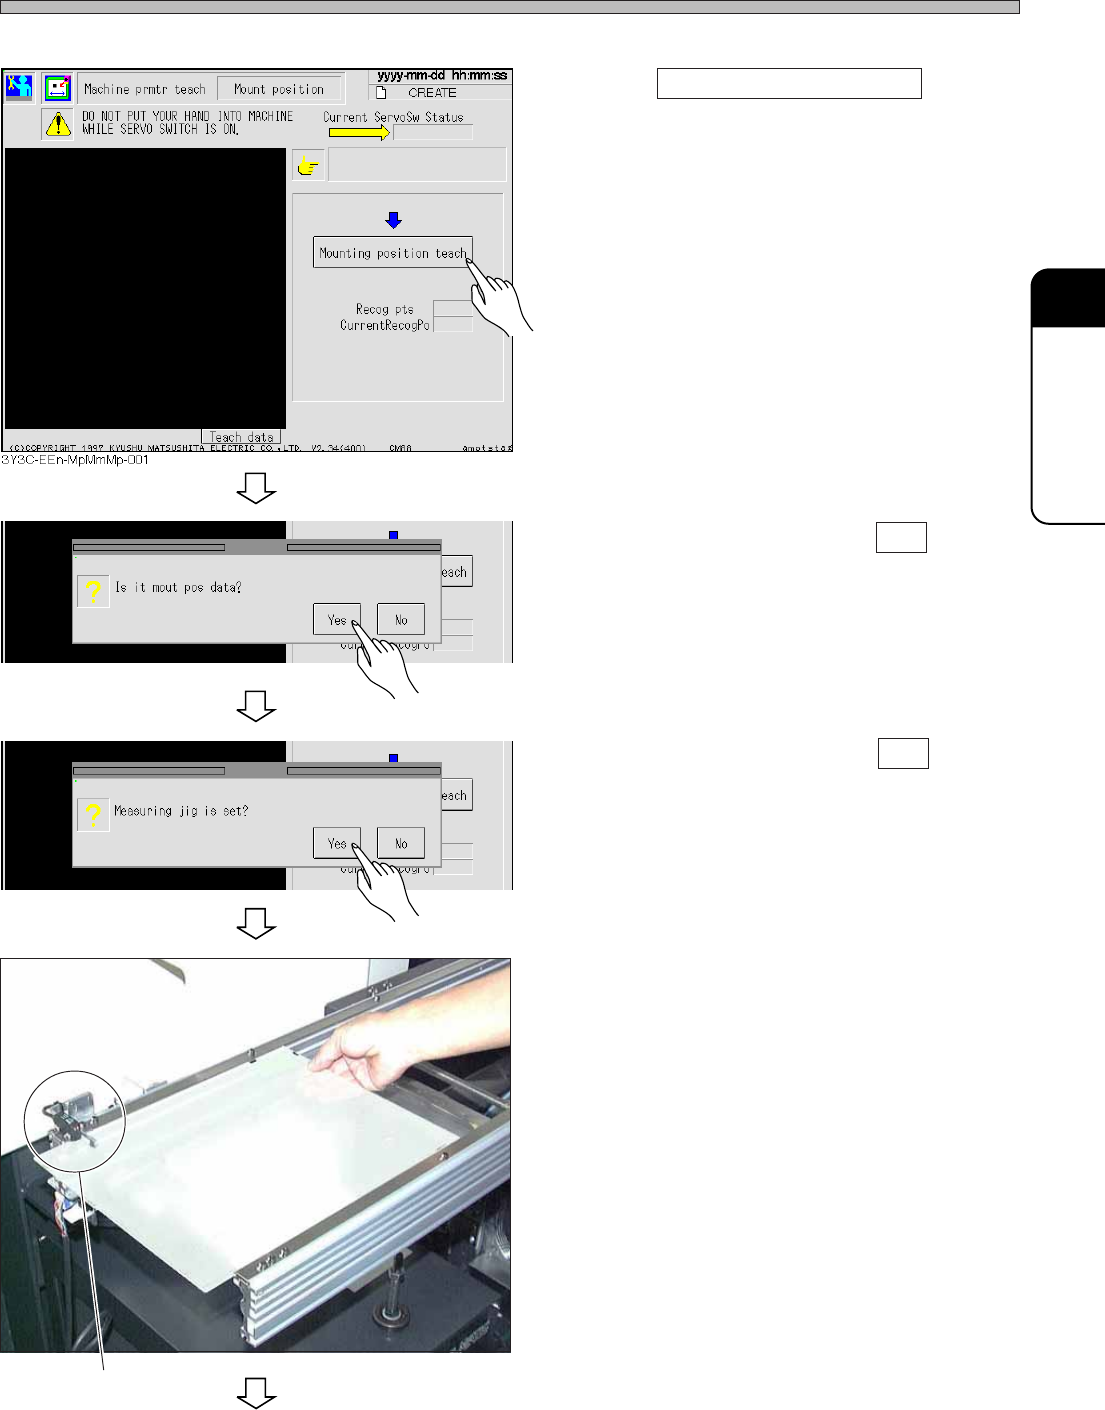
1. Press Mounting position teach .
• The confirmation message appears.
2. After confirmation, press Yes .
• The confirmation message appears.
3. After confirmation, press Yes .
• The message “Measuring jig is set?” appears.
4. Set the exclusively reserved board
onto the front conveyor.
∗ Put the board onto the position where the
sensor will be blocked.
Sensor
3Y3C-139P
3Y3C-EEn-MpMmMp-002
3Y3C-EEn-MpMmMp-003
To the next page
Page 1-8
3Y3C-E-MMZ0A-A01-00
Mounting Position Calibration
5. After the board setting is completed,
press Yes .
6. Press
UNLOCK
+
START
.
• The mounting position calibration starts.
∗ After the calibration is completed, the mounting accuracy result is printed out automatically.
The accuracy is corrected based on the current mounting result. So, when checking the mounting
accuracy after the calibration result, perform the calibration again, then check the mounting
result.
Printout Sample
YYYY-MM-DD (
∗∗∗
) hh:mm:ss CM88S
∗.∗∗
(
∗∗∗
)
File name :CREATE Machine serial No :
∗∗∗∗∗∗∗∗
[ standard = 0.05 mm]
[ Nozzle name = 2125]
I X Y THETA
Average I 0.016 -0.013 0.172
Renge I 0.080 0.090 2.020
Cp I 1.100 1.050
Head no. I Renge(X) Renge(Y) Cp(X) Cp(Y)
01 I 0.090 0.080 1.200 1.101
YYYY-MM-DD (
∗∗∗
) hh:mm:ss CM88S
∗.∗∗
(
∗∗∗
)
File name :CREATE Machine serial No :
∗∗∗∗∗∗∗∗
[ standard = 0.10mm]
[ Nozzle name = 2125]
I X Y THETA
Average I 0.160 -0.013 0.172
Renge I 0.110 0.120 2.000
Cp I 1.400 1.340
Head no. I Renge(X) Renge(Y) Cp(X) Cp(Y)
01 I 0.100 0.100 1.100 1.101
Page 1-9
CALIBRATION
To the next page
3Y3C-E-MMZ0A-A01-00
Mounting Position Calibration
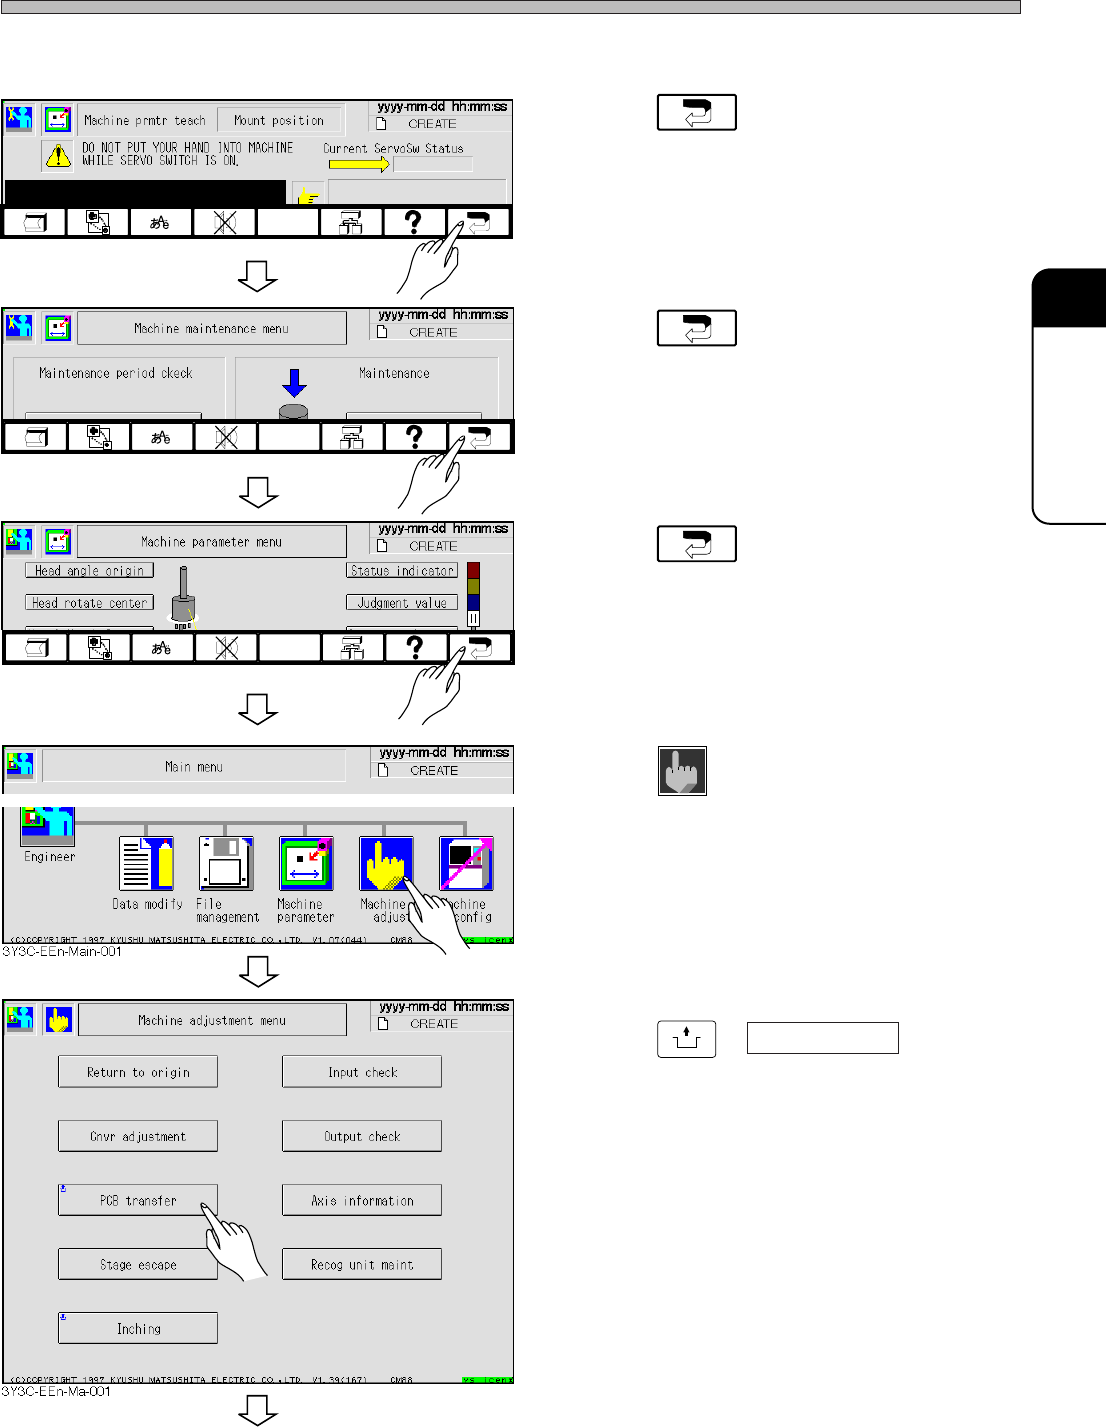
5. Ejecting the Exclusively Reserved Board and Removing the Jigs
1. Press .
• The “Machine maintenance menu” screen is
displayed.
2. Press .
• The “Machine parameter menu” screen is
displayed.
3. Press .
• The “Main menu” screen is displayed.
4. Press
Machine
adjust
.
• The “Machine adjustment menu” screen is
displayed.
5. Press
UNLOCK
+ PCB transfer .
• The “PCB transfer” screen is displayed.
3Y3C-EEn-MpMm-002
3Y3C-EEn-MpMmMp-001
3Y3C-EEn-Mp-003