CM88Maintenace2x.PDF.pdf - 第111页
Page 1-19 CALIBRA TION 3Y3C-E-MMZ0A-A01-00 Pickup Position Calibration 2. Calibration 1 . Press UNLOCK + T each start . • The confirmation message appears. 2 . After confirmation, press Y es . • The confirmation message …
Page 1-18
Pickup Position Calibration
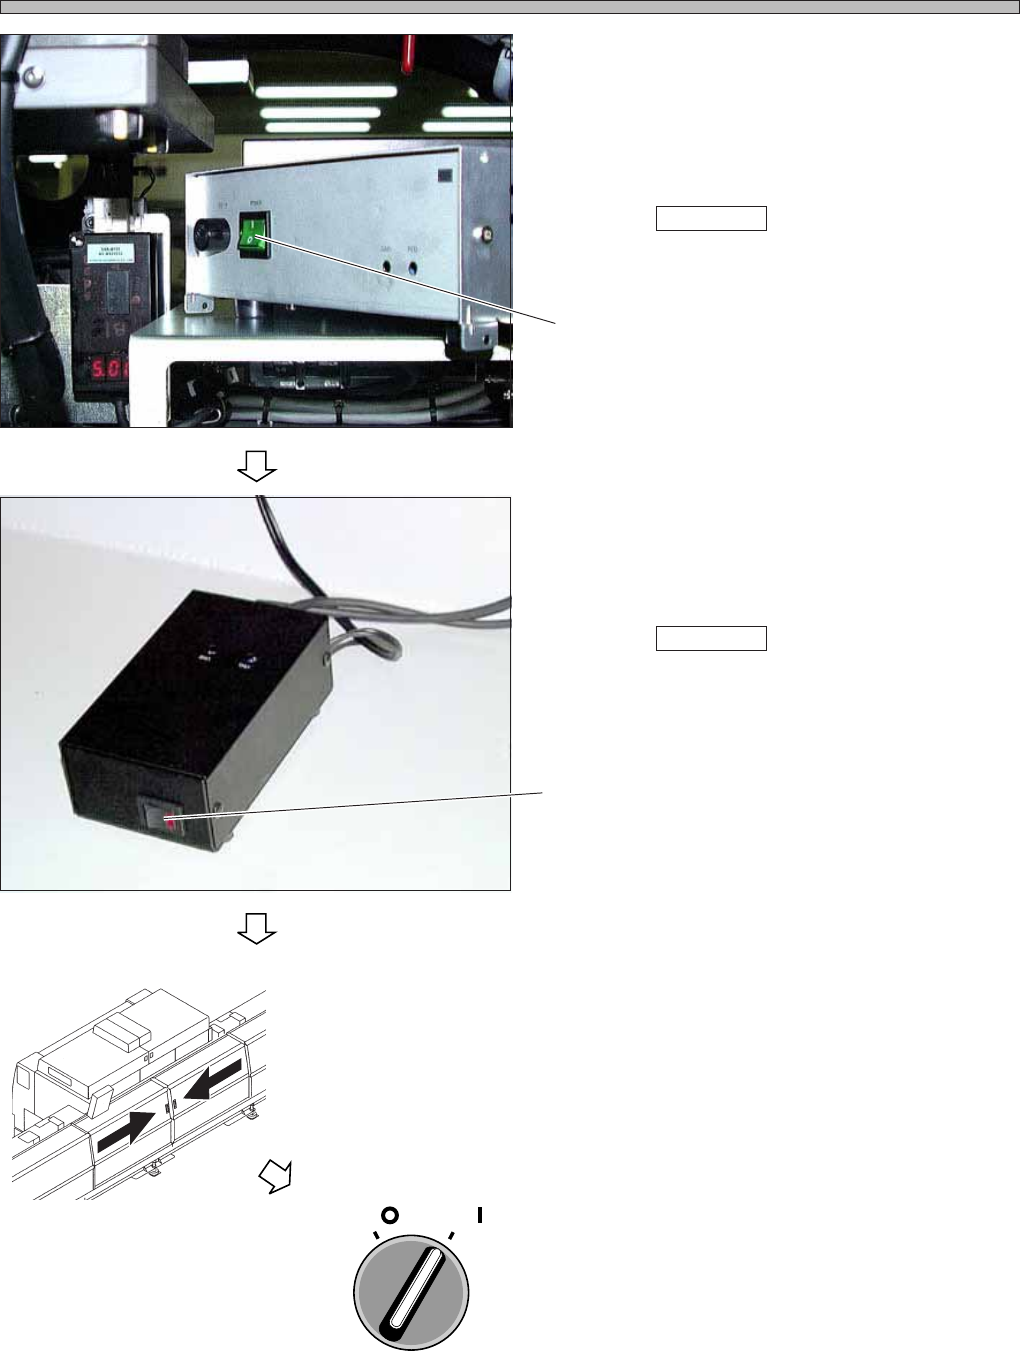
5. Turn ON the power supply.
1. Turn ON the power supply of the CCU.
∗ However, the power is not supplied from the
machine.
When Teach start is pressed, the power is
supplied from the machine.
2. Turn ON the power supply of the power supply
box.
∗ However, the power is not supplied from the
machine.
When Teach start is pressed, the power is
supplied from the machine.
6. Close the rear center safety cover.
7. Turn ON the servo switch.
3Y3C-E-MMZ0A-A01-00
Switch
3Y3C-158P
3Y3C-159P
OFF ( )
ON ( )
SERVO
Switch
3Y3C-AG01
Page 1-19
CALIBRATION
3Y3C-E-MMZ0A-A01-00
Pickup Position Calibration
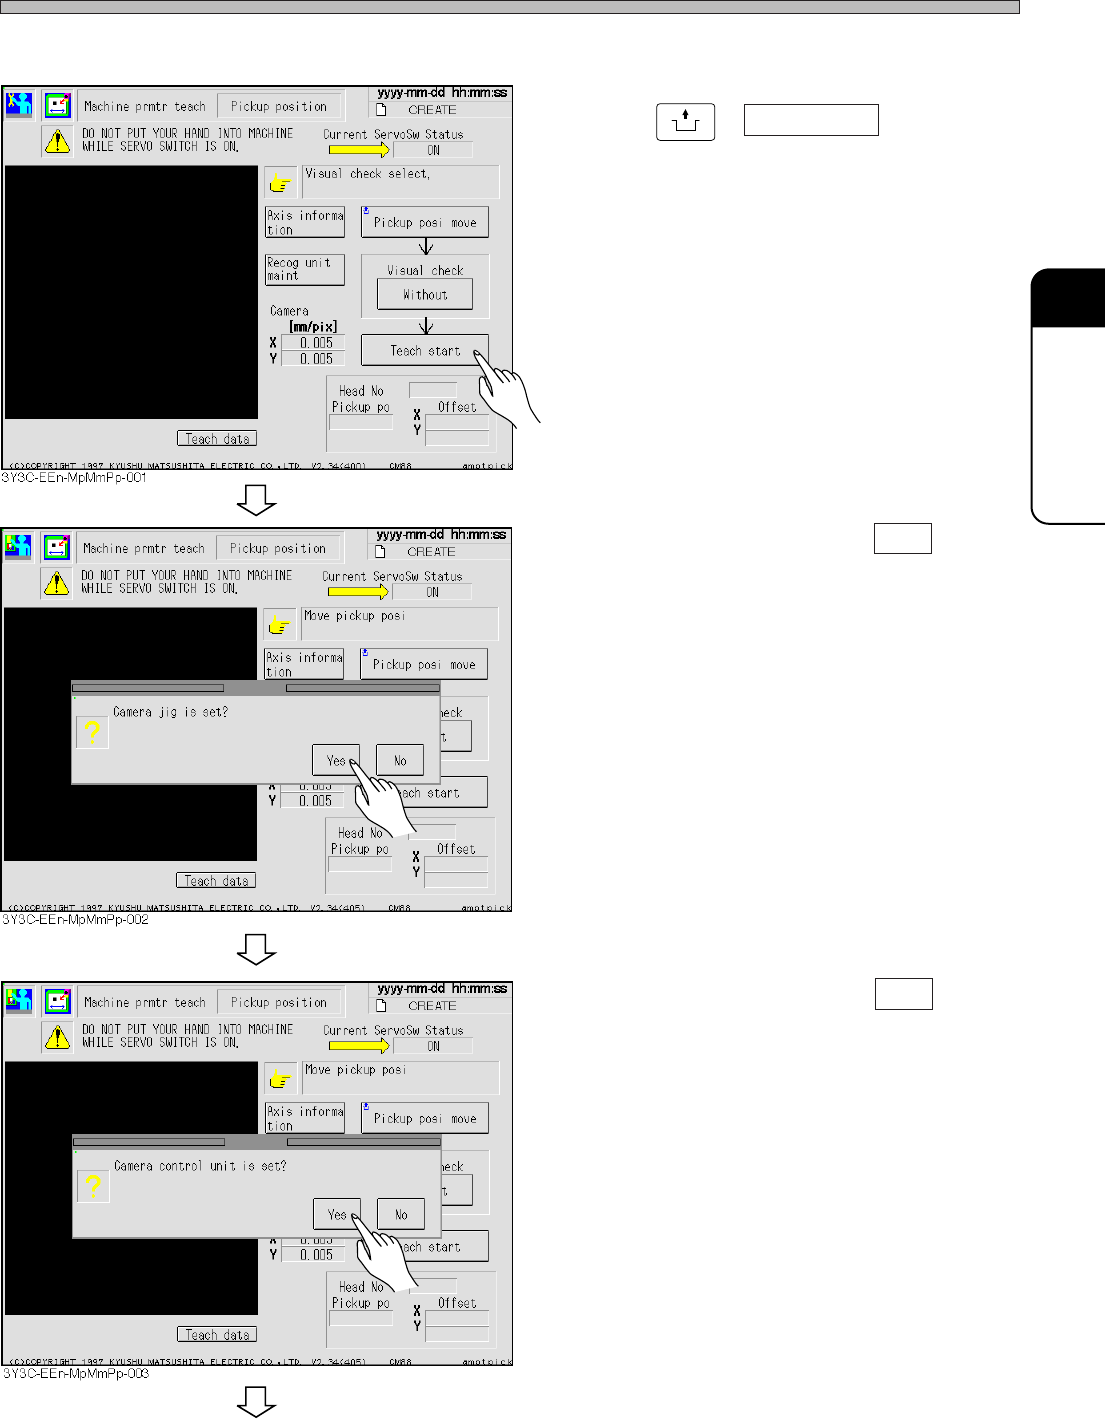
2. Calibration
1. Press
UNLOCK
+ Teach start .
• The confirmation message appears.
2. After confirmation, press Yes .
• The confirmation message appears.
3. After confirmation, press Yes .
To the next page
Page 1-20
3Y3C-E-MMZ0A-A01-00
Pickup Position Calibration
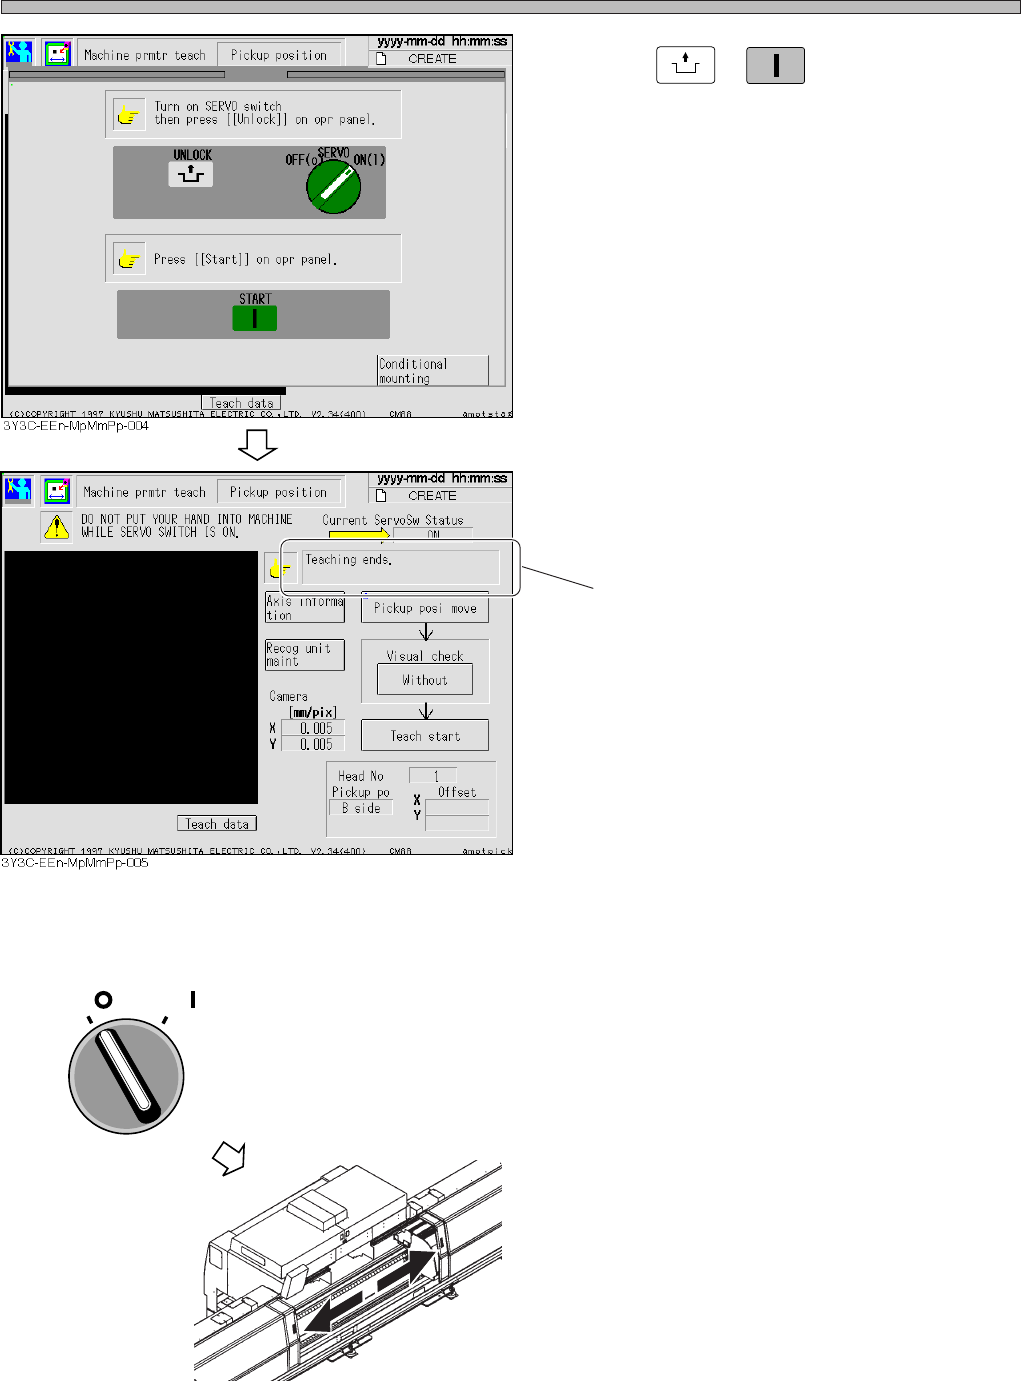
4. Press
UNLOCK
+
START
.
• The calibration starts.
• After the calibration is completed, the message
appears.
3. Removing the Jigs
1. Turn OFF the servo switch.
2. Open the rear center safety cover.
3.
Remove the jigs by performing the
procedure opposite to the setting one.
1. Turn OFF the power switches of the CCU and
the power supply box.
2. Remove the power supply cord, then remove
the other cables.
∗ When setting and removing the camera jig, be
careful that the jig does not interfere with the
nozzles on the head.
4. Return the wiring to what it was.
Message
3Y3C-AI01
OFF ( )
ON ( )
SERVO