CM88Maintenace2x.PDF.pdf - 第49页
Page 3-21 SOLUTIONS FOR ERROR 3 Check and Solutions 3Y3C-E-MMD03-A02-01 3-2-16 PCB Recognition Error 1 Move the mark to be re-recognized. (Fig. 1) First, check the error screen. If the recognition mark is not at the cent…
Page 3-20
Check and Solutions
3Y3C-E-MMD03-A02-01
3-2-15 Chip Recog LED Reflect Light Error
Chip Recog LED Pass Light Error
Board Recog LED Coaxial Light Error
Board Recog LED Side Light Error
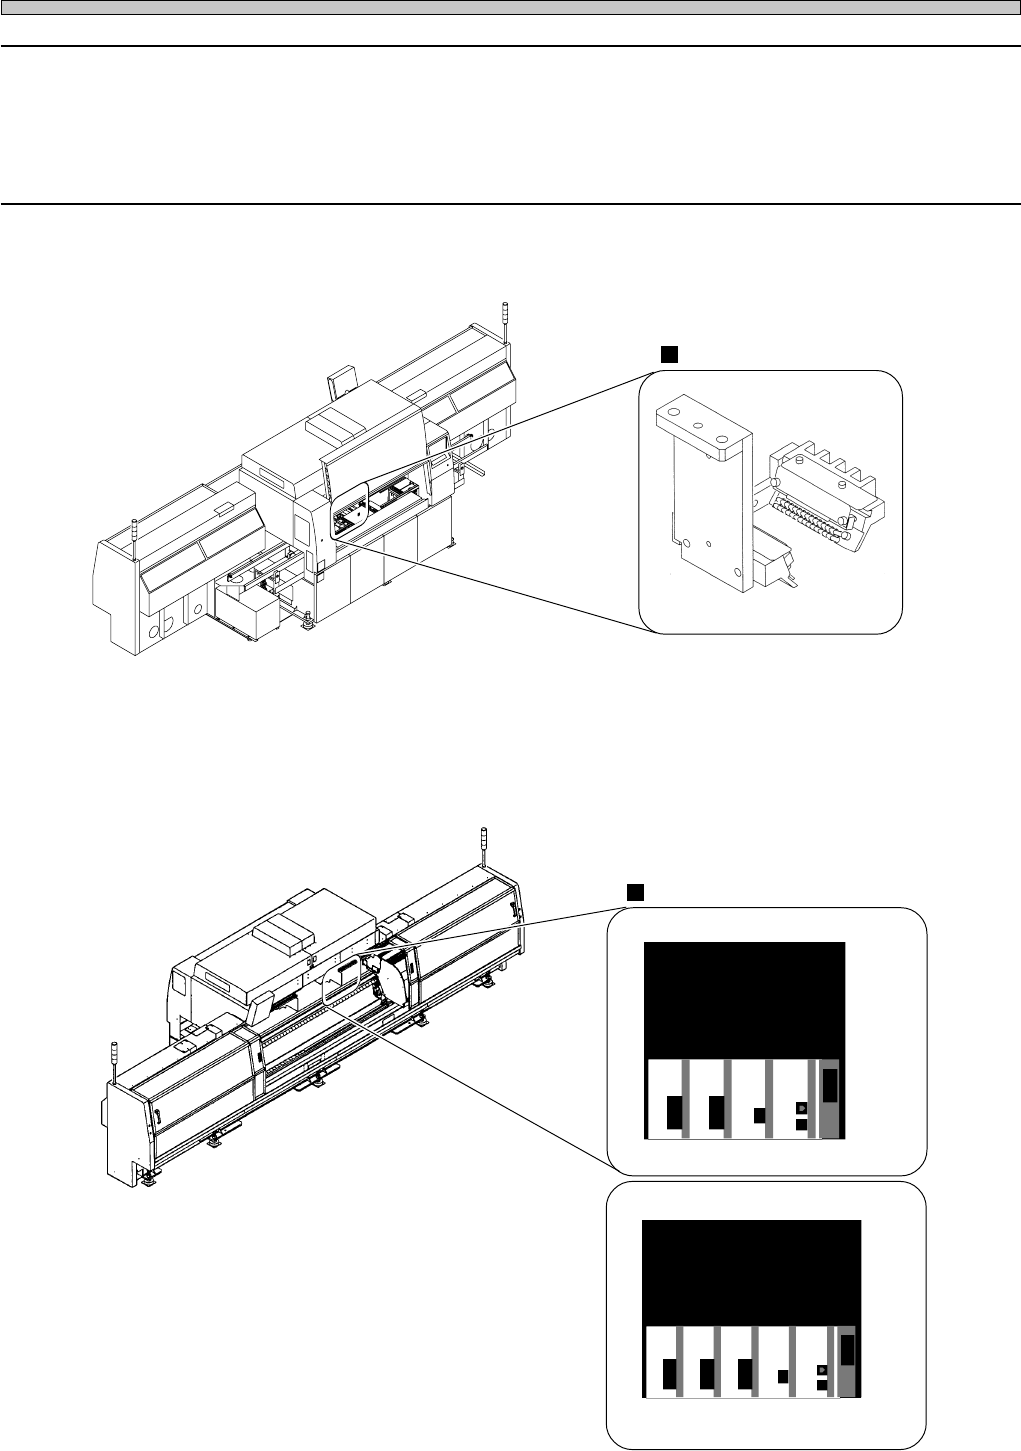
1. Removing chips at the chip recognition light
Remove chips if they are at the LED light emitting part.
Chip lighting
Connector
2. Connecting connectors
Check the state of connector, and recover the trouble if necessary. After operation, turn off the
power, and restart the machine.
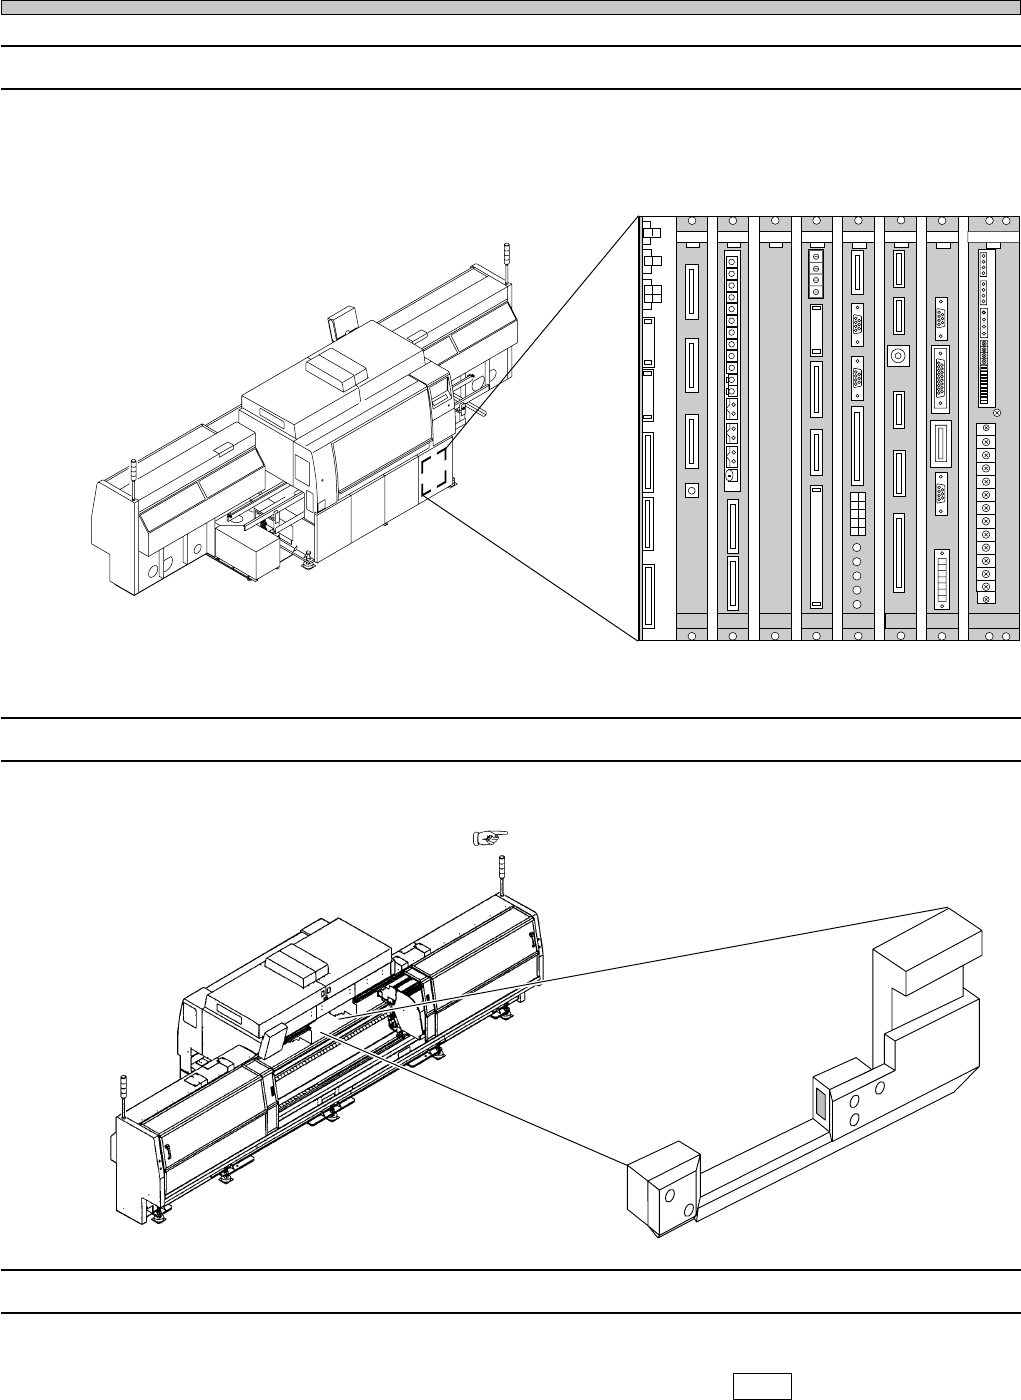
4G3C-AB01
3Y3C-AI01
16EYC0AA
3Y3C-165E
CH7 . 8 CH6 CH2 CPU
RS232C
CM88C
3Y3C-166E
CM88S
CH6 CH4 CH2 CPU
RS232C
CH7 . 8
Page 3-21
SOLUTIONS FOR ERROR
3
Check and Solutions
3Y3C-E-MMD03-A02-01
3-2-16 PCB Recognition Error
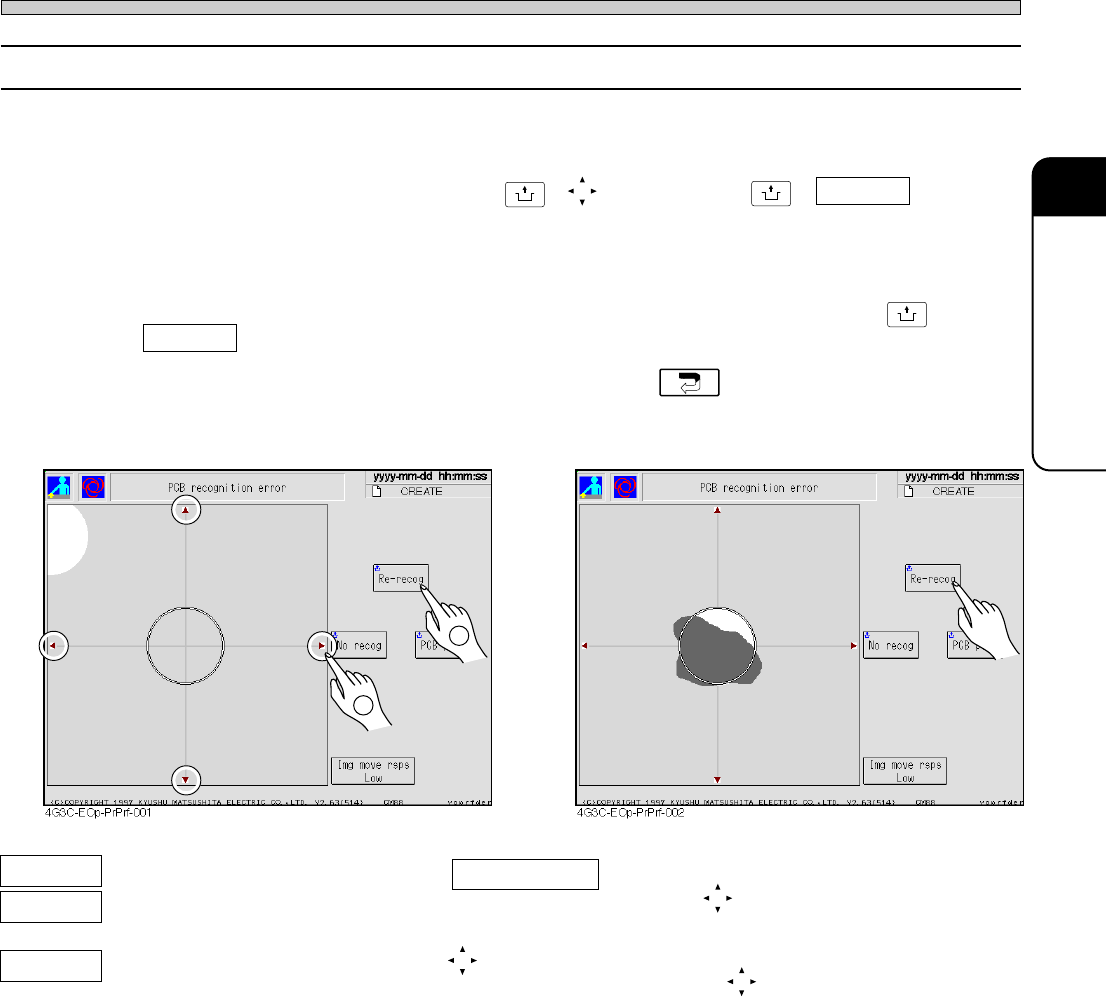
1 Move the mark to be re-recognized. (Fig. 1)
First, check the error screen. If the recognition mark is not at the center of recognition screen,
move the mark to the center by pressing
UNLOCK
+ , and then press
UNLOCK
+ Re-recog to restart
the operation.
2 Clean the mark to be re-recognized. (Fig. 2)
First, check error screen. If recognition mark is dirty, clean the mark, and then press
UNLOCK
+
Re-recog to resume operation.
∗ If you cancel automatic operation and teaching, press .
2
Img move rsps You can set the moving distance of one
pressing .
Low: 0.01mm, Middle: 0.1mm, High: 2.00 mm
(Red arrow marks)
The recognition screen can be moved to the
direction of (red arrow marks).
Re-recog The board is recognized again.
No recog Next workings are carried out without
recognizing the board.
PCB pass The recognition error board is
passed during the automatic opera-
tion.
(Fig. 1)
(Fig. 2)
1
Page 3-22
Check and Solutions
3Y3C-E-MMD03-A02-02
3-2-17 Recog Communication Error
1. Connecting connectors.
For the CM88S-M/M1/MU and CM88C-D, check the connection of CPU box board (PRM9EA)
connector. If there is some trouble at the connection of the connector, restore to its normal state.
3-2-18 Height Sensor Dust Error (Nozzle Height Error)
1. Cleaning the sensor
As the sensor may be dirty, clean it. ( Maintenance Manual)
3-2-19 Height Calculation Partial
1. Check the detection height
Change the display to mm at “Axis info” in “Machine adjust” (press (mm) ), and check the detec-
tion height within the range from 5.00 to ± 0.20. If it is out of the range, or the value changes
extremely, make contact with us, as it may be the disconnection of connectors.
CN21
CN22CN17
CN11
CN12
CN9CN10CN15
CN1CN2CN3
OPT1OPT2OPT3OPT4OPT5
OPT6OPT7
CN1CN2CN3
CN1CN2CN3CN4
CN4CN2CN1CN3CN5
CN
10
CN
9
CN
7
CN
6
CN1CN2
CN3
CN4CN5CN6
CN2CN3
CN4CN5
CN
8
NC
GND1
12V
GND2
GND1
+5V
+24V
-12V
+12V
+5V
GND3
+24V
-12V
+12V
GND2
GND1
+5VC
NC
GND3
+24V
-12V
GND2
+12V
GND1
+5V
NC
L
N
FG
EC55CA NFM0CK
MCMAER
PRM8EB
ELLZEA
SCMLEH
PU02E1
GND
+5V
NC
GND1
GND
+5V
4G3C-AA01
3Y3C-010E
3Y3C-AI01
3Y3C-011E
∗ The description is for the CPU BOX for CM88S-M.