SIPLACE OIS Version 13.1 Getting Started.pdf - 第32页
3 Practical Examples Getting Started with SIPLACE OIS 05/2016 EN Edition Software Version 13.1 32 3.2 Example 2: Exporting Data 3.2.1 Step 1: How to Export Data in Excel Format Description: 3 T o enable data to be used b…

Getting Started with SIPLACE OIS 3 Practical Examples
Software Version 13.1 05/2016 EN Edition
31
Most recent PCBs Here you can enter the number of the most recently assembled
PCBs that are to be included in the representation of reject rates.
The value entered here is also specified in the main view. 3
Note
If you choose a very large observation period, changes to the reject rate will appear comparatively
small. It is thus advisable to activate the separate observation period for the reject rate. 3
3 Practical Examples Getting Started with SIPLACE OIS
05/2016 EN Edition Software Version 13.1
32
3.2 Example 2: Exporting Data
3.2.1 Step 1: How to Export Data in Excel Format
Description: 3
To enable data to be used by other analysis routines, it must be formatted in a certain way. The
data supplied in table form can also be saved to files. In order to analyze the data in user-friendly
table evaluation systems and create statistics, the data must be formatted for export. 3
Action: 3
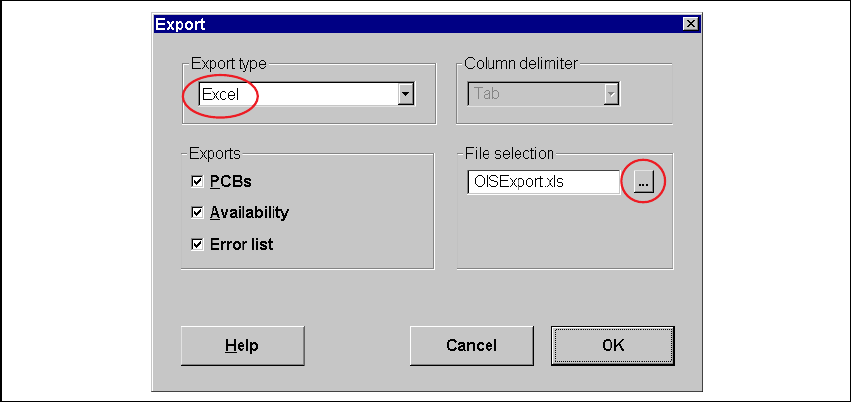
Click Export... in the File menu.The following dialog appears:
3
Fig. 3 - 2 "Export"dialog
Choose the Excel format in the Export type field.
In the Exports field, choose the data types you want to export.
Click the ... button in the File selection field and choose the appropriate folder.
Confirm your directory selection by clicking OK.
Start the data export procedure by clicking OK.
Getting Started with SIPLACE OIS 3 Practical Examples
Software Version 13.1 05/2016 EN Edition
33
3.2.2 Step 2: How to Save the Dta in Text Format
Action: 3
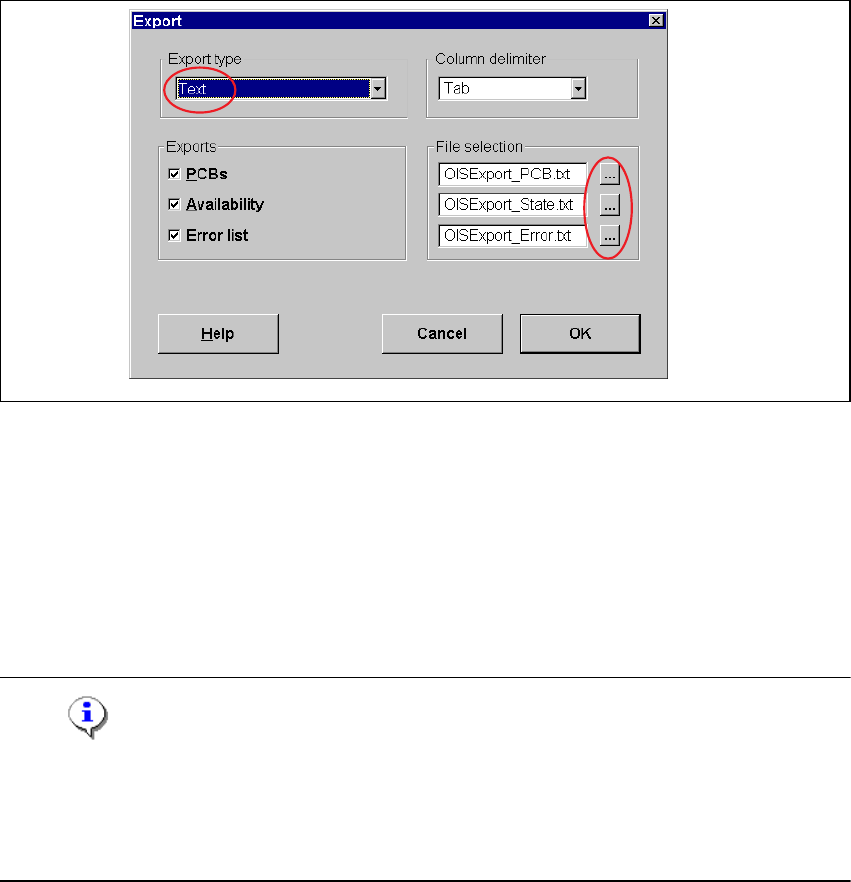
Click Export... in the File menu.The following dialog appears:
3
Fig. 3 - 3 "Export" dialog
Choose the Text format in the Export type field.
In the Exports field, choose the data types you want to export.
Click the ... button in the File selection field and choose the appropriate folder.
Confirm your directory selection by clicking OK.
Start the data export procedure by clicking OK.
3
Note
The selected data is saved as text files in the current directory under the specified file name:
PCBs OISExport_PCB.txt
Availability OISExport_State.txt
Error list OISExport_Error.txt 3