00194307-01_SAHF_Intern_1203_ENG.pdf - 第16页
3 Serv ice Gan tri es SIPLACE HF Replacing the Gantry [030 06781-xx ] 3-6 0019 4307- 01 Iss ue 12/2 003 Copyr igh t © 2 003 S ie mens D em atic SD EA 1 Disassemb ly 1 1 1 1 2 1. 8 fastening screws at the top (M 6 x 14 ) …
SIPLACE HF
Replacing the Gantry [03006781-xx]
Service
Gantries
3
Copyright © 2003 Siemens Dematic SDEA 1 00194307-01 Issue 12/2003 3-5
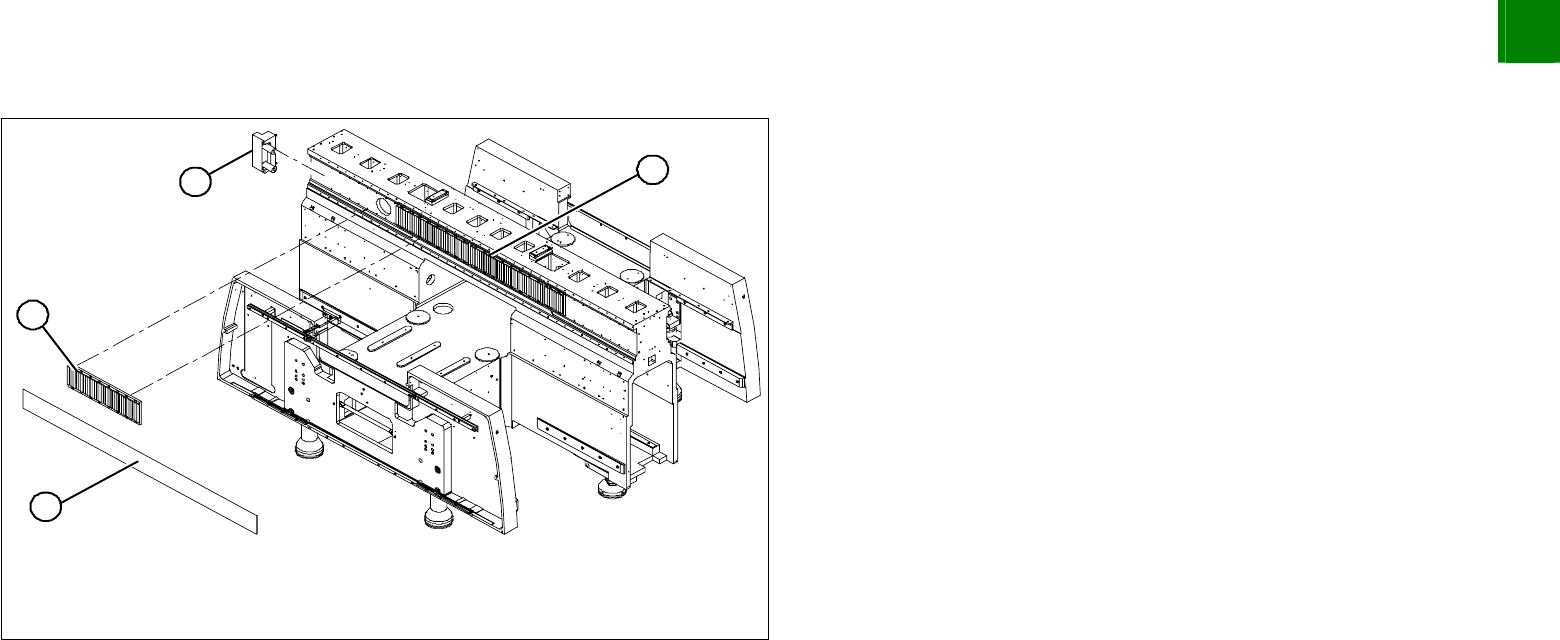
Dismantling the Magnet Cover and the Magnetic Strip
1
4
3
2
Remove the magnet cover (1). You might need to enlist the help
of a second person.
Lift both sides of the cover plate at the same time.
Pull it out on one side, until it reaches the groove between two
magnet plates.
Insert the notch of the shorter end into the groove on the
magnetic strip (2).
Move the gantry over this groove, until the cover plate is
accessible and can be removed.
Remove the buffer (3) from the side with the large magnetic
strip (4).
Lever off the blue covers and undo the 16 screws fastening the
magnetic strip (4).
NOTE
If the blue cover is damaged (kinks, cracks etc.), replace it during
reinstallation. White or pale patches in the plastic indicate areas of
damage.
Remove the magnetic strip (4) and push the gantry outside the
magnetic strips's area of influence.
3
Service
Gantries
SIPLACE HF
Replacing the Gantry [03006781-xx]
3-6
00194307-01 Issue 12/2003 Copyright © 2003 Siemens Dematic SDEA 1
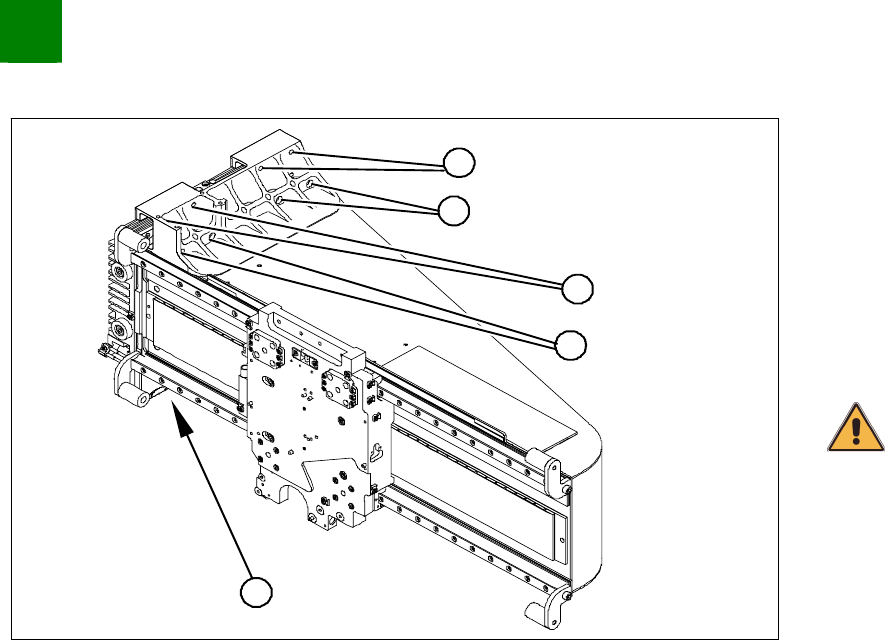
Disassembly
1
1
1
1
2
1. 8 fastening screws at the top (M6 x 14)
2. 8 fastening screws at the bottom (M6 x 22)
First remove 14 of the 16 screws (6 from the top and 8 from the
bottom).
Please note that the screws are of different lengths. Mark the
positions of each screw to ensure that they are correctly
replaced after service work.
CAUTION
The gantry is heavy (approx.37 kg).
Enlist the help of a second strong person.
Stand firmly next to the gantry and hold it with both hands, while
the other person removes the remaining two screws.
Lift the gantry off the guide slide and carry it out of the machine.
SIPLACE HF
Replacing the Gantry [03006781-xx]
Service
Gantries
3
Copyright © 2003 Siemens Dematic SDEA 1 00194307-01 Issue 12/2003 3-7
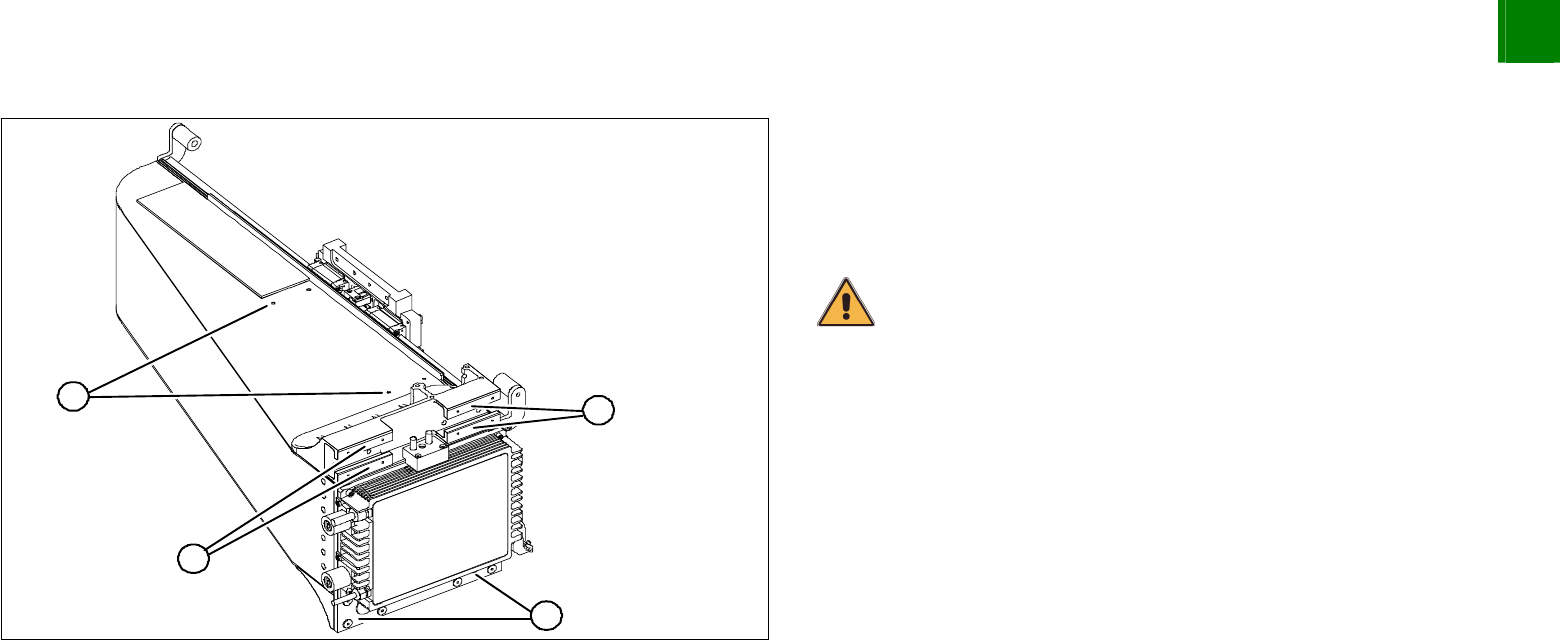
Installation
2
2
1
2
Check whether the holes (4 x M3) for the trailing cable pressure
plates (1) on the new gantry have been properly drilled through.
If not, drill through with the aid of a 2.5 mm drill and then cut a
M3 thread.
CAUTION
Take care not to damage the surface of the gantry during drilling.
Carefully rub the contact surfaces (2) of the new gantry with a
dressing stone and wipe clean with a cloth and ethanol.