00194307-01_SAHF_Intern_1203_ENG.pdf - 第25页
SIPLACE HF Replacing the T railing Cable [03003706 -xx] Serv ice Gan tri es 3 Copy ri ght © 2 00 3 S iem ens D emat ic SDEA 1 0019 4307- 01 Iss ue 12/2 003 3-15 1 1 2 Undo the 4 screws (1) fast ening t he tr ailing ca …

3
Service
Gantries
SIPLACE HF
Replacing the Trailing Cable [03003706-xx]
3-14
00194307-01 Issue 12/2003 Copyright © 2003 Siemens Dematic SDEA 1
5
5
1
4
3
2
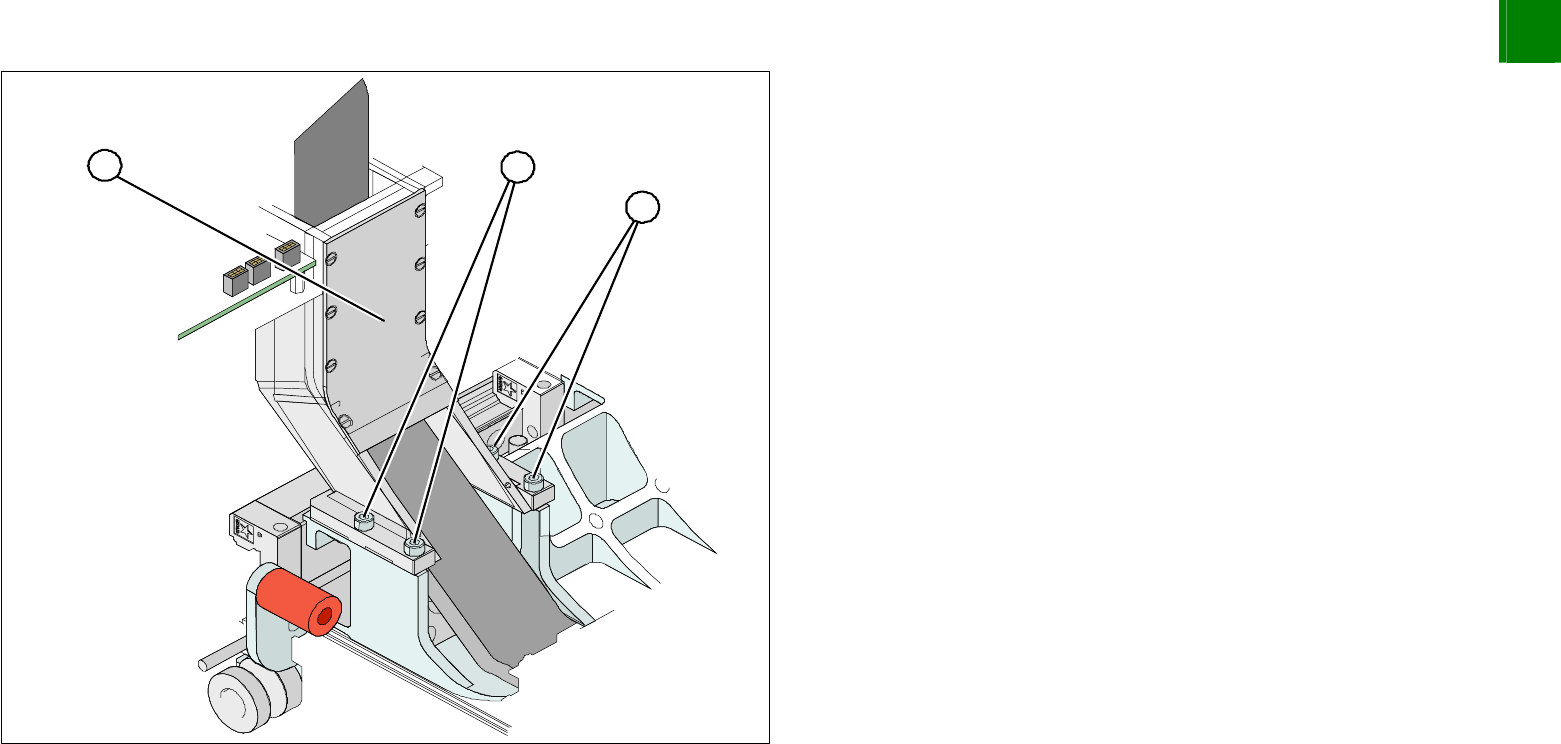
Disconnect the flat ribbon cable from the head board (1).
Undo the screws fastening the pressure plate (3) to the head
mount and the two screws on the gantry (5).
NOTE
Only undo the fastening screws. The clamps for the flat ribbon cable
remain in place.
Remove the head board (1). This provides access to the
pneumatic distributor (2) below.
NOTE
Mark the installation position of the contact disks and spacer bolts
and take care not to lose them. These will need to be correctly
replaced later.
Remove the hoses from the pneumatic distributor (2).
WARNING
Risk of injury to hands. Press the lock in with a suitable tool and
extract the hose out with hose pliers.
TIP
Cut the hoses with wire cutters and then dismantle the
pneumatic distributor. It is easier to disconnect the hoses when
they are no longer installed.
SIPLACE HF
Replacing the Trailing Cable [03003706-xx]
Service
Gantries
3
Copyright © 2003 Siemens Dematic SDEA 1 00194307-01 Issue 12/2003 3-15
1
1
2
Undo the 4 screws (1) fastening the trailing cable console (2)
and carefully remove the complete trailing cable from the
machine.
If you have dismantled the pneumatic distributor, now
disconnect the hoses.
3
Service
Gantries
SIPLACE HF
Replacing the Trailing Cable [03003706-xx]
3-16
00194307-01 Issue 12/2003 Copyright © 2003 Siemens Dematic SDEA 1
Installation
2
5
1
4
3
2
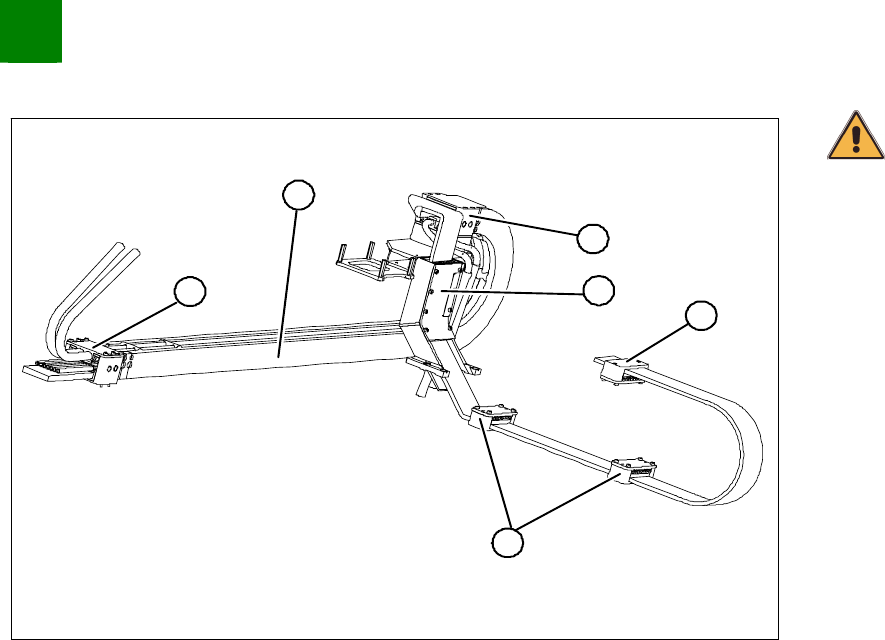
CAUTION
Handle the new trailing cable with care and enlist the help of a
second person. Make sure that the flat ribbon cable and the
pneumatic hoses are not rubbed against any parts or kinked. Look
out for sharp edges.
1. Complete trailing cable unit
2. Pressure plates on the power track chain
3. Pressure plates on the gantry
4. Pressure plate on the head mount
5. Trailing cable console
Carefully insert the new trailing cable (1) into the prescribed
position. Make sure you do not twist it.
Temporarily fasten the ends to the machine frame (by tying
them etc.).