00194307-01_SAHF_Intern_1203_ENG.pdf - 第31页
SIPLACE HF Replacing the X -Drive (Prima ry) [00375245 -xx] Serv ice Gan tri es 3 Copy ri ght © 2 00 3 S iem ens D emat ic SDEA 1 0019 4307- 01 Iss ue 12/2 003 3-21 3.1.4 Replacing the X-Dri ve (Primary ) [0037 5245-x x]…
3
Service
Gantries
SIPLACE HF
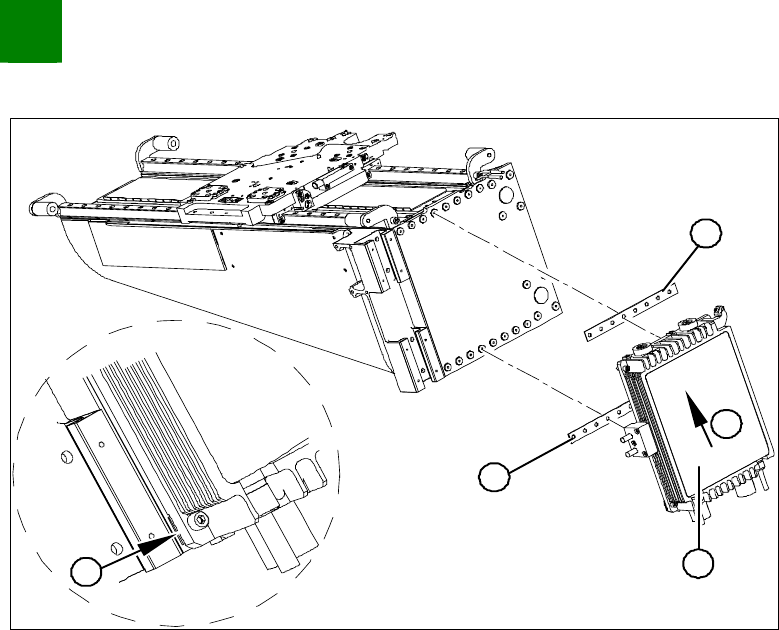
Replacing the Y-Drive (Primary) [03006768-xx]
3-20
00194307-01 Issue 12/2003 Copyright © 2003 Siemens Dematic SDEA 1
Installation
2
1
4
3
2
Loosely fasten the new Y-drive (1) with the screws and
insulating plates (2) provided. Use Loctite 241 to secure the
screws.
Press the motor upwards (3) and tighten the two middle screws
(at the top and bottom).
Check that the ends of the insulating plates (4) do not jut out. If
necessary, press these back in with a suitable tool (e.g.
screwdriver) and then tighten the screws.
Tighten all 16 screws with a torque wrench (5.5 N).
Install the proximity switch mount and proximity switches.
Fasten the connection cable so that it will not be in the way
when installing the gantry.
Install the gantry and the trailing cable.

SIPLACE HF
Replacing the X-Drive (Primary) [00375245-xx]
Service
Gantries
3
Copyright © 2003 Siemens Dematic SDEA 1 00194307-01 Issue 12/2003 3-21
3.1.4 Replacing the X-Drive (Primary) [00375245-xx]
Required Equipment
X-drive service pack (00375245-xx)
X-drive
4 x forcing screw
8 x locking screw (M4x60)
Metal templates for twin head and DLM2
6 grub screws M4x6-ST
Thickness gauge (plastic) 0.4 mm (approx. 50 cm long and 10 cm wide)
Foam mat 500 mm x 50 mm x 20 mm
Xenon flashlight (nonmagnetic)
Torque wrench with Allen key adapter
Loctite 241
3
Service
Gantries
SIPLACE HF
Replacing the X-Drive (Primary) [00375245-xx]
3-22
00194307-01 Issue 12/2003 Copyright © 2003 Siemens Dematic SDEA 1
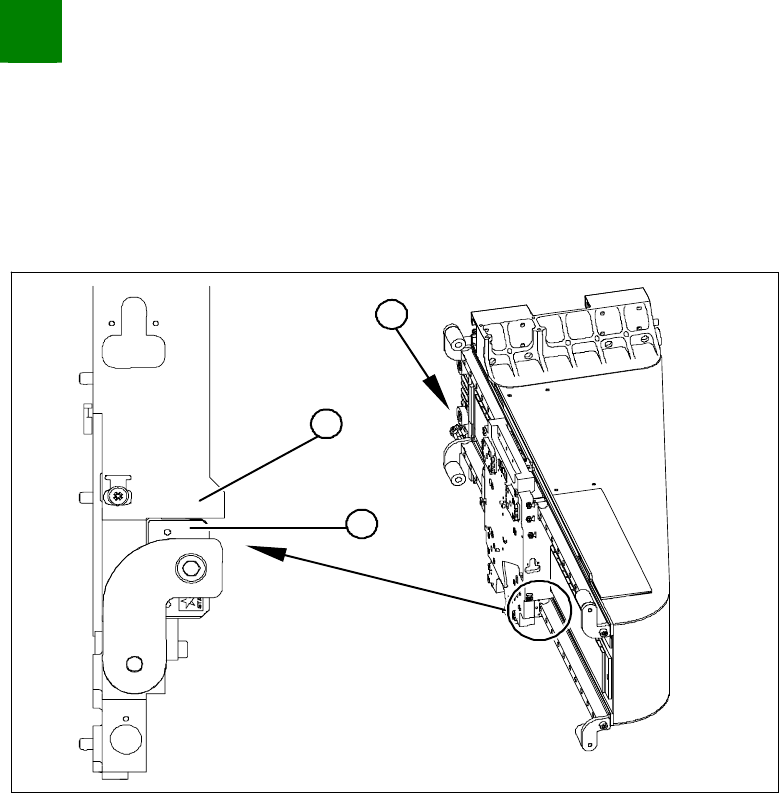
Prior Checks
Check whether the machine is equipped with a diaphragm gland or not.
Machines without diaphragm gland should not show any gap.
Machines with diaphragm gland must show a gap next to the stopper edge.
1
3
2
From behind, shine a nonmagnetic Xenon flashlight between
the X-drive and the magnetic strip (1).
Check the gap between the motor support (2) and the guide
slide (3).