YSP10_Mainte_E.pdf - 第41页
2. The daily inspection and cleaning 2-3 Chapter 2 Daily maintenance items 2.2 Boar d camera 1 Put a mirror under th e board camer a to ch eck tha t there are not the dust and dirt o n the c amera light ings or the half …
2. The daily inspection and cleaning
2-2
Chapter 2 Daily maintenance items
2. The daily inspection and cleaning
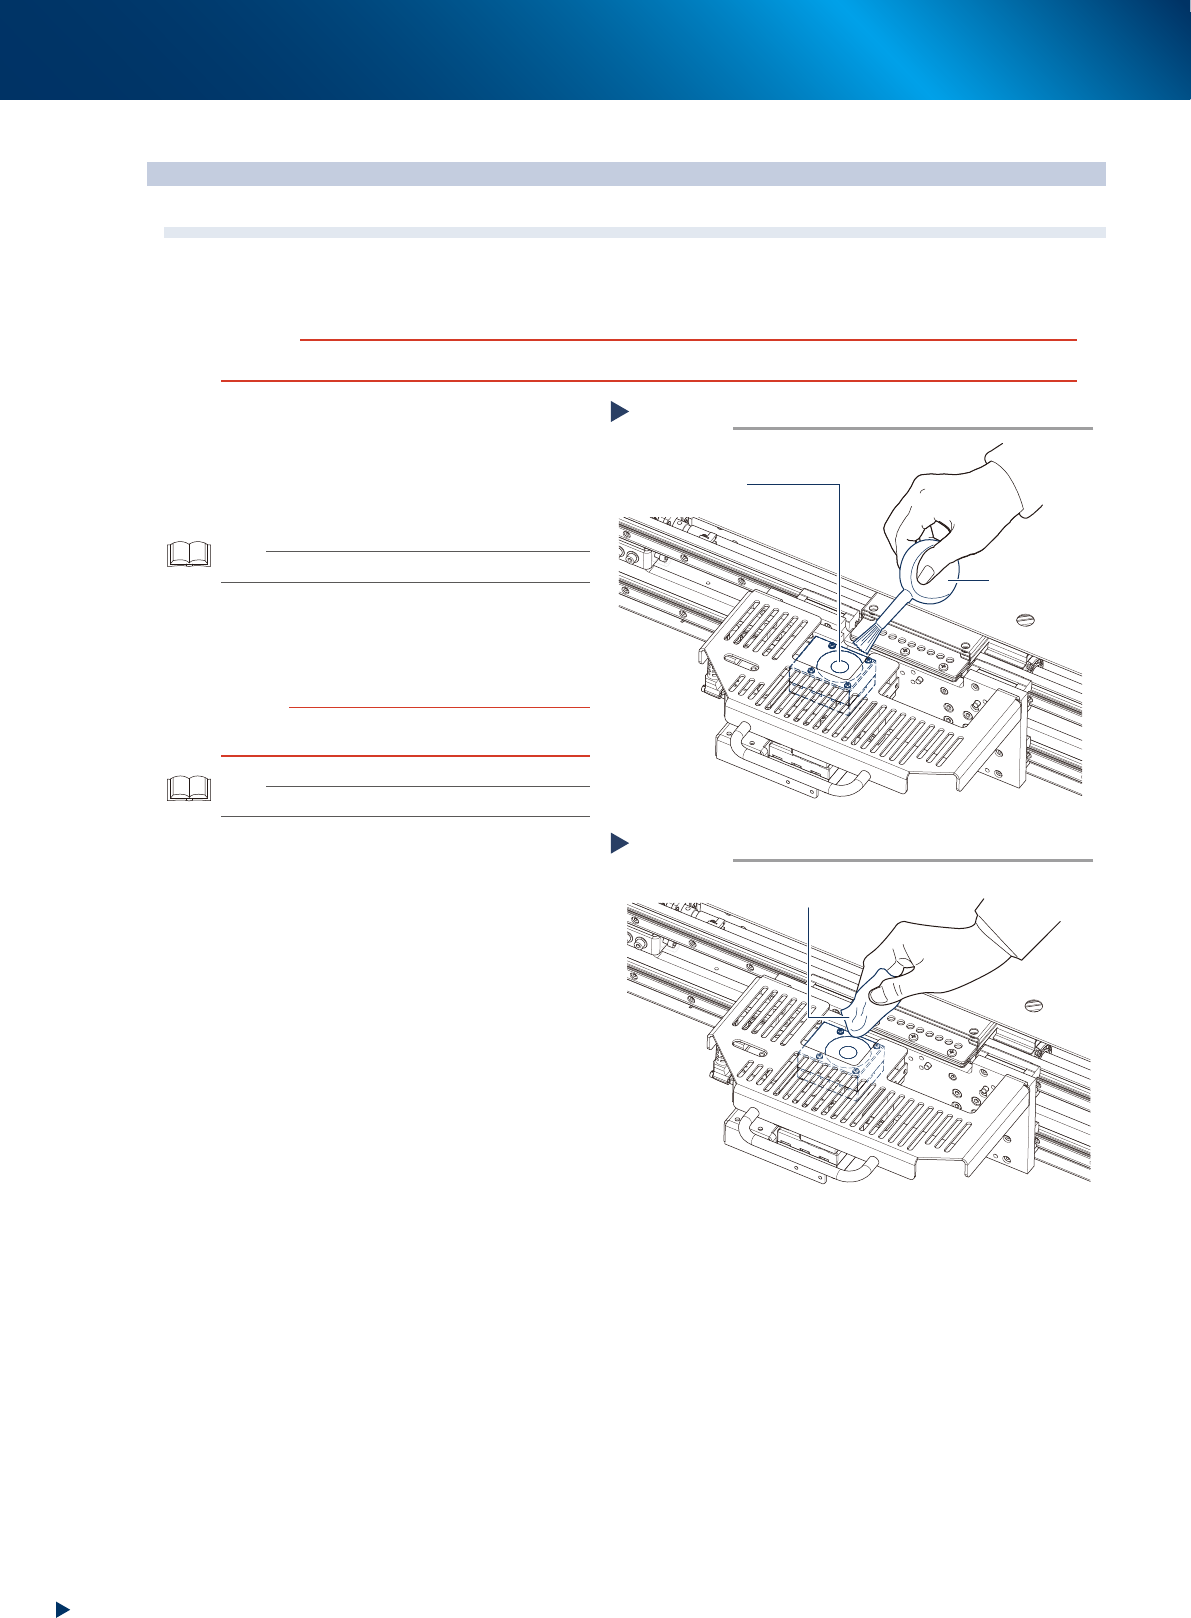
2.1 Mask camera
Adhered dust, etc., on the mask camera's protective glass can cause recognition errors. To prevent this, it is
recommended to inspect and clean in a periodic manner.
c
CAUTION
To ensure safety, make sure that the machine is in an emergency stop state, or that the power switch is turned off.
1
Check that the protective glass and
around it are free of dust and dirt.
2
Clean with the lens blower brush when
the dust is on the protective glass.
TIP
The lens blower brush is an optional parts.
3
When the protective glass is not clean,
wipe it softly using the lint-free cloth
with a few drops of lens cleaner.
c
CAUTION
Avoid using solvent or rubbing hard, so that the camera
protective glass can be damaged.
TIP
The wiper and lens cleaner are optional parts.
1
Clean with the lens blower brush.
Step 2
Protective glass
Lens blower brush
53201-KMJ-00
1
Wipe with lint-free cloth.
Step 3
Lint-free cloth
53202-KMJ-00
2. The daily inspection and cleaning
2-3
Chapter 2 Daily maintenance items
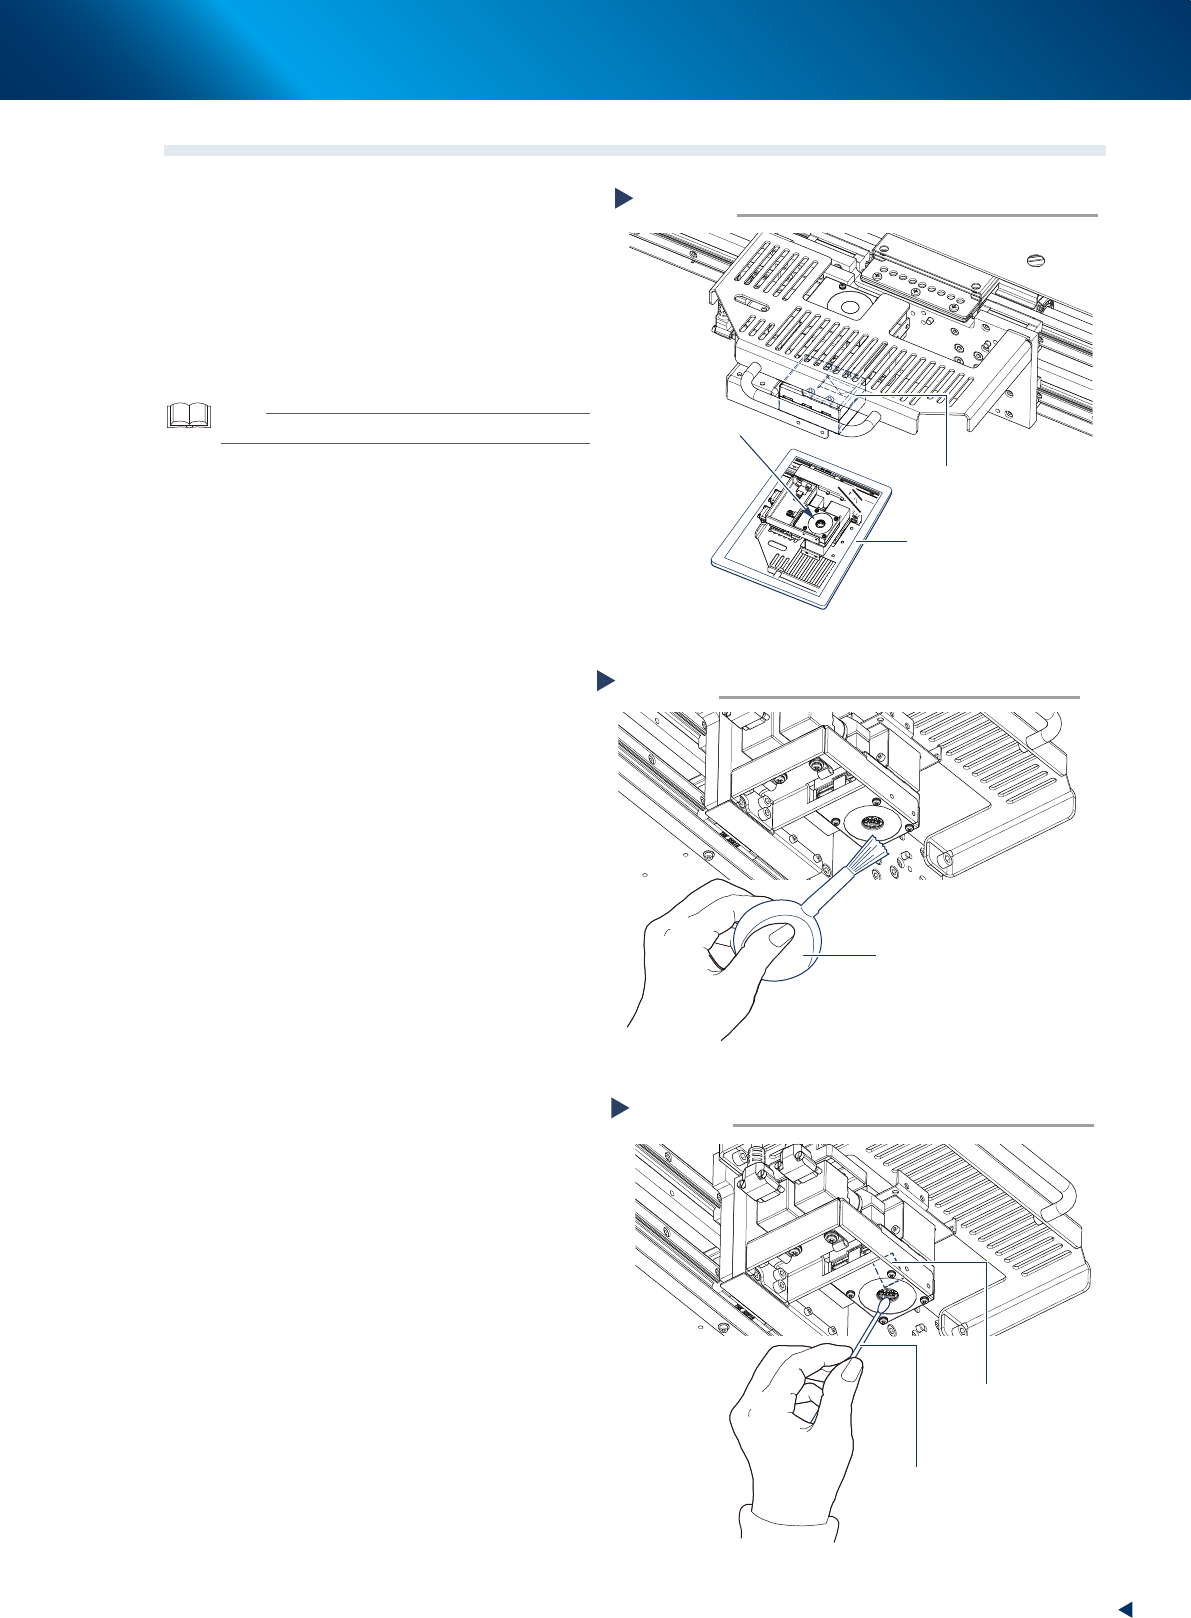
2.2 Board camera
1
Put a mirror under the board camera to
check that there are not the dust and
dirt on the camera lightings or the half
mirror unit.
2
Clean the dust using the lens blower
brush when the lighting unit is not
clean.
TIP
The lens blower brush is an optional part.
3
When the half mirror unit is not clean,
wipe it softly using the cotton swab
with a few drops of lens cleaner.
Check the board camera lighting.
Step 1
Board camera
Mirror
Check here.
53203-KMJ-00
Blow the dust with the lens blower brush.
Step 2
Lens blower brush
53204-KMJ-00
Clean the half mirror unit.
Step 3
Cotton swab
(with a few drops of lens cleaner)
Half mirror
53205-KMJ-00
2. The daily inspection and cleaning
2-4
Chapter 2 Daily maintenance items
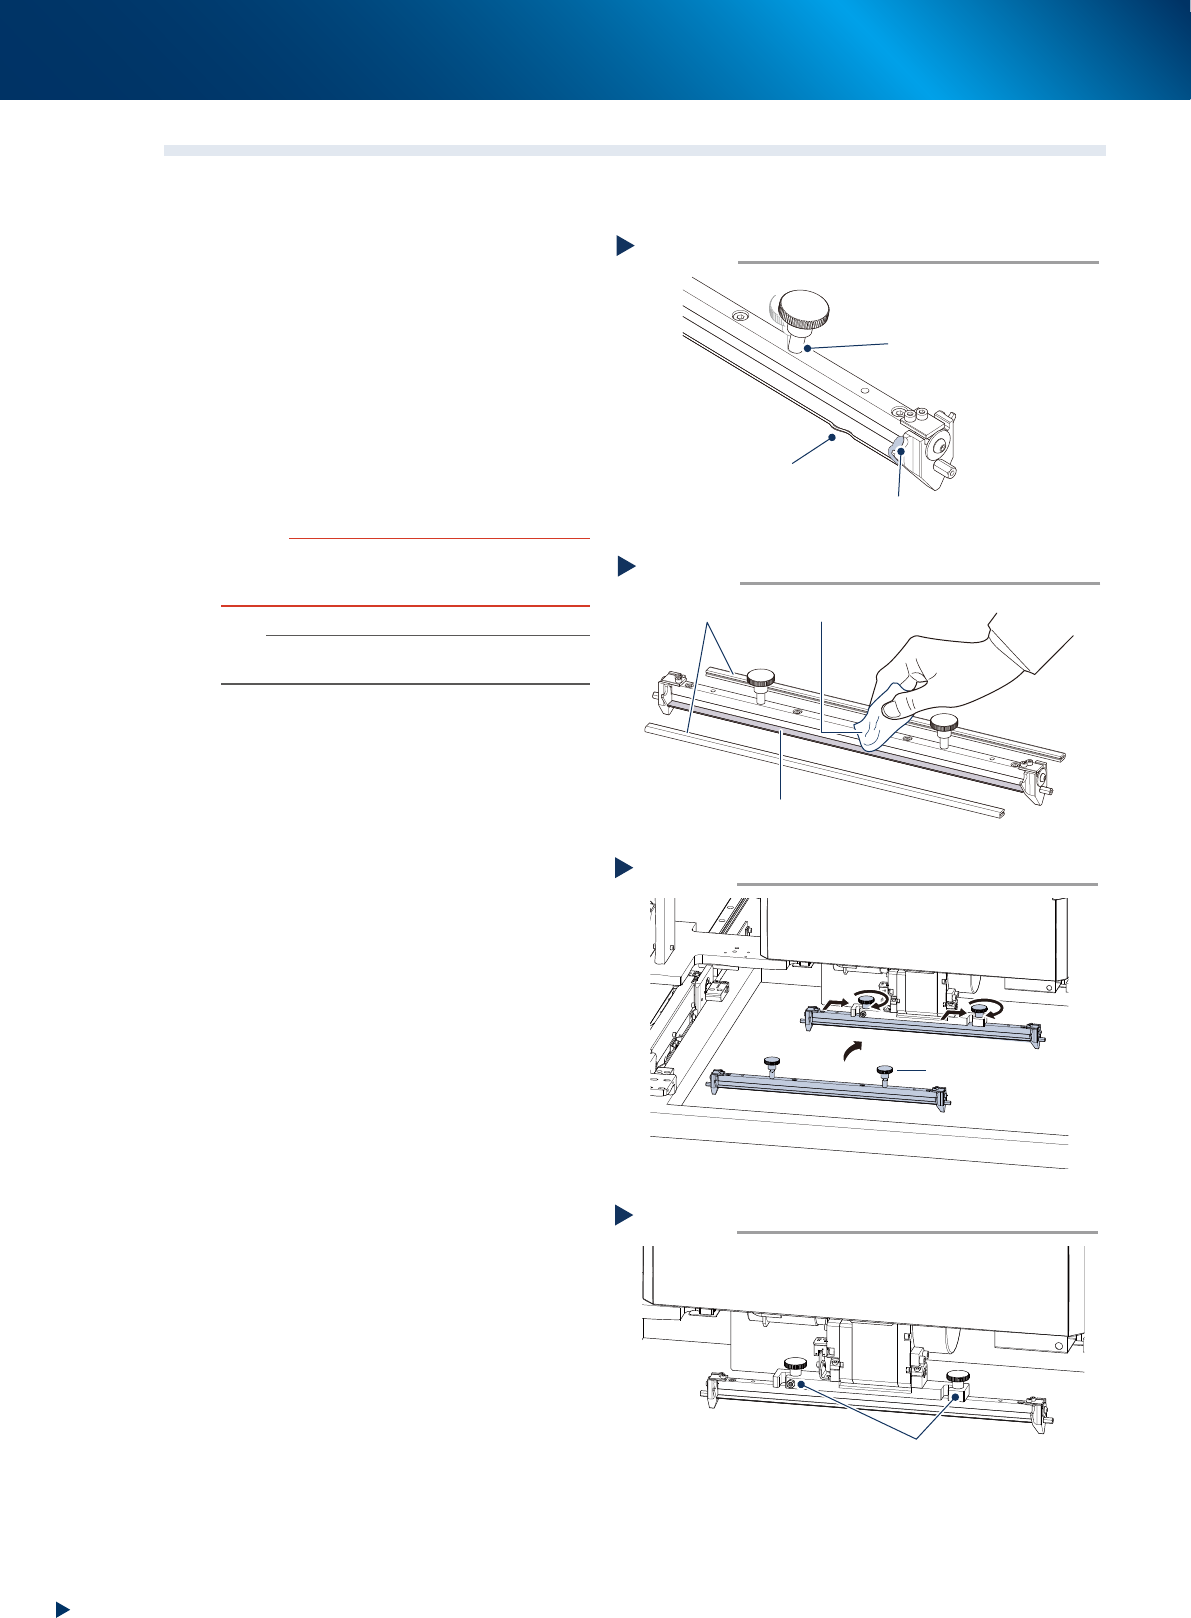
2.3 Squeegee
Check always the squeegee unit status when it is attached to machine.
1
Check the squeegee unit.
Before attaching the squeegee, check
the following three items.
1. No wounds, cracks or wears on the scraper
unit of squeegee.
2. No solder or other foreign matter.
3. The squeegee mounting knob is in correct
position and not loosen.
2
Clean the squeegee by using a lint-free
cloth when there are some adherence
of the solder etc.
c
CAUTION
Do not soak the urethane squeegee for long time in
alchohol etc., as it may cause the expansion of the scraper
unit.
n
NOTE
Upon storing the squeegee after cleaning, be sure to
attach the protective covers.
3
Attach the squeegee by tting in the
squeegee holder and tightening the
squeegee mounting knob by hand.
4
Check that the squeegee is mounted
rmly to its holder.
►
Wounds, cracks or wears
When the scraper unit has wounds, cracks or
wears, it needs to be replaced. See Ch.4 "1.
Scraper unit" for details of how to replace the
scraper unit.
Checking the squeegee status
Step 1
in correct position and not loosen
No adherence of solder or foreign object
No wounds, crack or wears
53206-KMJ-10
Cleaning squeegee
Step 2
Lint-free cloth
Protective cover
Scraper unit
53207-KMJ-00
Attaching squeegee
Step 3
Squeegee mounting knob
53214-KMJ-00
Check the squeegee mounting status
Step 4
The squeegee is not loosen on its holder
53215-KMJ-00