YSP10_Mainte_E.pdf - 第95页
3. Conveyor transfer belt 4-6 Chapter 4 The parts to be replaced and its procedures 3 Using the perma nent marker , mark the positions of the pulley brac ket or pulley mounti ng bolt whic h sta y at th e tension adj ustm…

3. Conveyor transfer belt
4-5
Chapter 4 The parts to be replaced and its procedures
3. Conveyor transfer belt
The conveyor transfer belt (hereinafter referred to as belt) should be replaced when the significant
wounds, dirt or pilling is found at the periodic inspection. Follow these steps to replace the belt.
n
NOTE
The conveyor of flow direction of "R to L" is described as example in this document. The basic procedure and required
parts are also the same for "L to R" conveyor.
█
Replacement procedure
1
Change the conveyor width to a
convenient width for maintenance
work.
1. Read any board data.
2. Press the [Width] button on [Unit] -
[Conveyor] screen to display "Conveyor
Width" screen.
3. Enter a width wide enough for a hex wrench
to be inserted in the "Target Width" box and
press the [OK] button.
2
Prepare for work.
1. Press the [Cleaner Connect] button on [Unit]
- [Cleaner] screen to connect the cleaning
unit and camera unit.
e
2. Press the emergency stop button and open
machine safety cover.
3. Move the cleaning unit and camera unit to
machine rear side grabbing one of their
handles.
4. Open the lower door and lift up the
maintenance cover.
Preparing for work
Moving the cleaning unit and camera unit
Covers
Step 2
Press the [Cleaner Connect] button
Handle
Camera unit
Cleaning unit
Move to machine rear side
Maintenance cover
Safety cover
Lower door
54402-KMJ-00
3. Conveyor transfer belt
4-6
Chapter 4 The parts to be replaced and its procedures
3
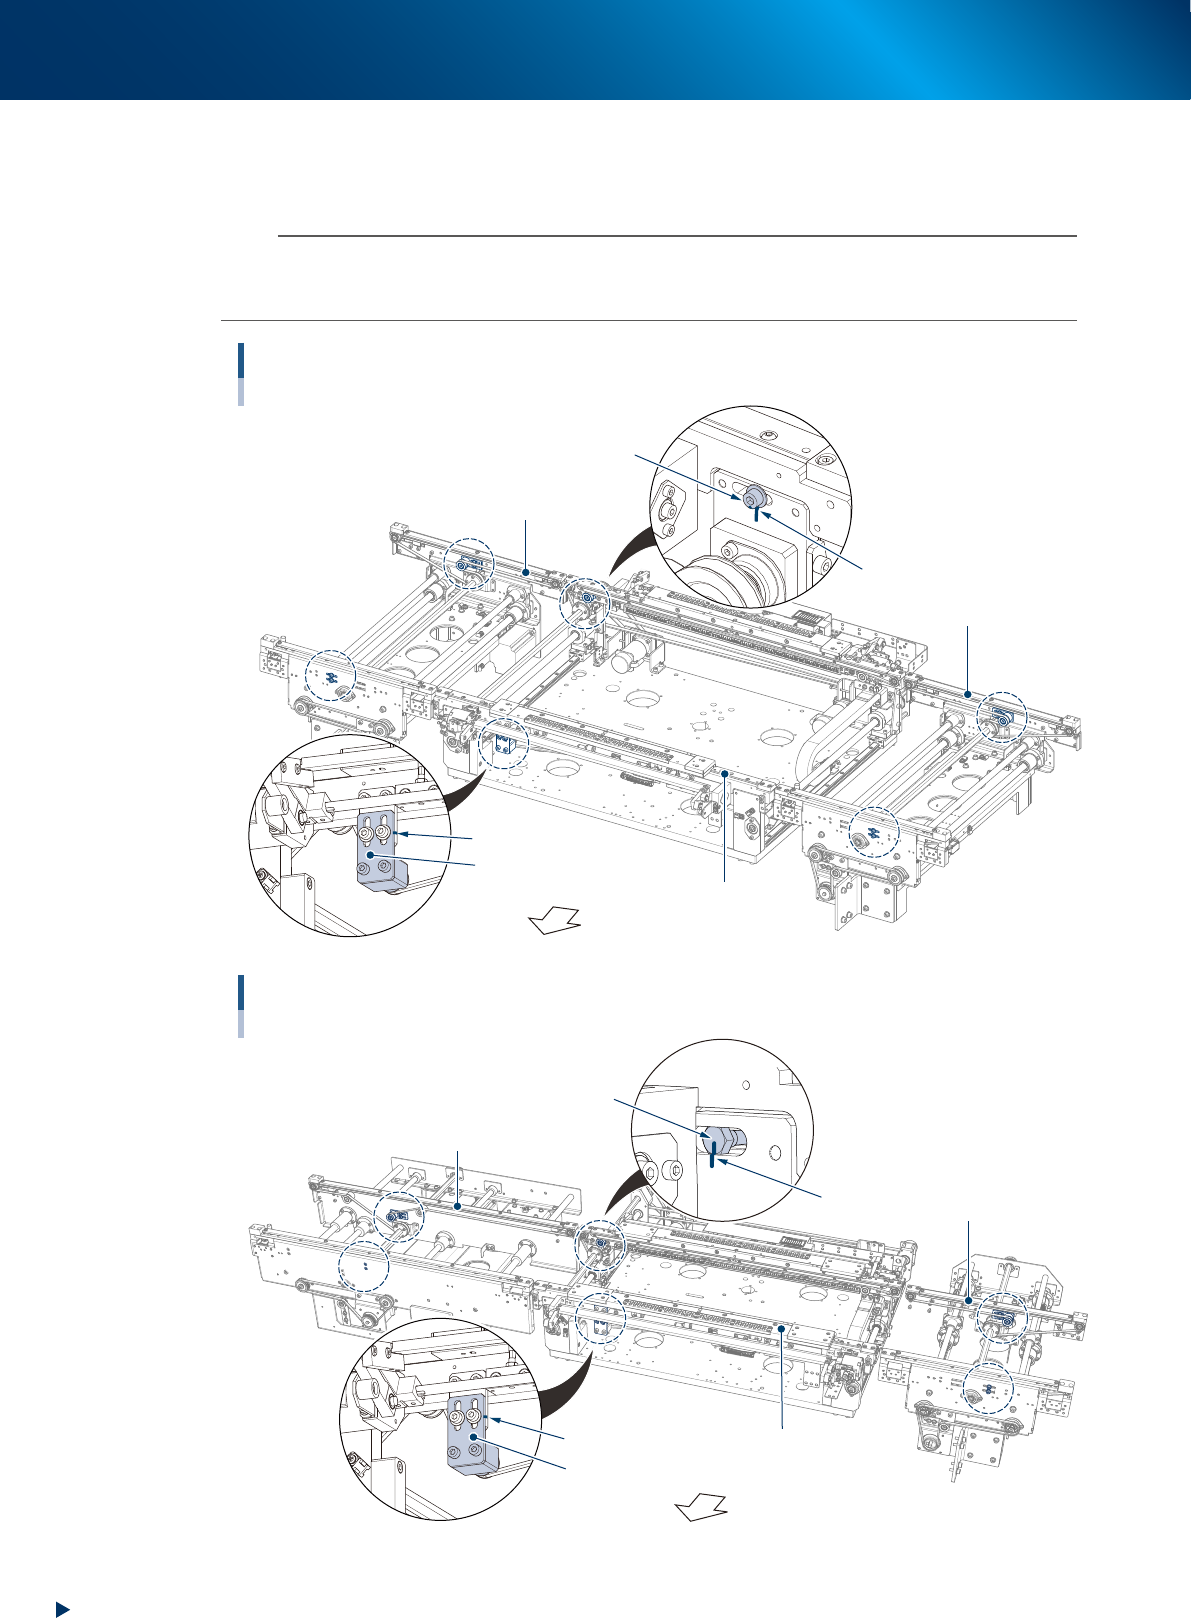
Using the permanent marker, mark the positions of the pulley bracket or pulley
mounting bolt which stay at the tension adjustment position shown below before
loosening the belt tension.
n
NOTE
As to tension pulley and pulley bracket:
The pulley on the moving side conveyor of center conveyor (both standard and L650 type) and the fixed side conveyor of
entrance/exit conveyor is directly fixed by the bolt. The pulley position of other conveyor is adjusted by the pulley bracket.
Tension marking points (R to L flow, standard conveyor type)
Circled by dash line (6 points)
Pulley fixing bolt
Pulley bracket
Marking
Fixed side
Moving side
Machine front side
Marking
Exit conveyor
Center conveyor
Entrance conveyor
53422-KMJ-00
Bolt on the opposite side of the pulley
Tension marking points (R to L flow, L650 type machine with extention conveyor)
Circled by dash line (6 points)
Pulley bracket
Extension conveyor of exit side
Marking
Fixed side
Moving side
Machine front side
Marking
Entrance conveyor
Center conveyor
53440-KMJ-10
3. Conveyor transfer belt
4-7
Chapter 4 The parts to be replaced and its procedures
█
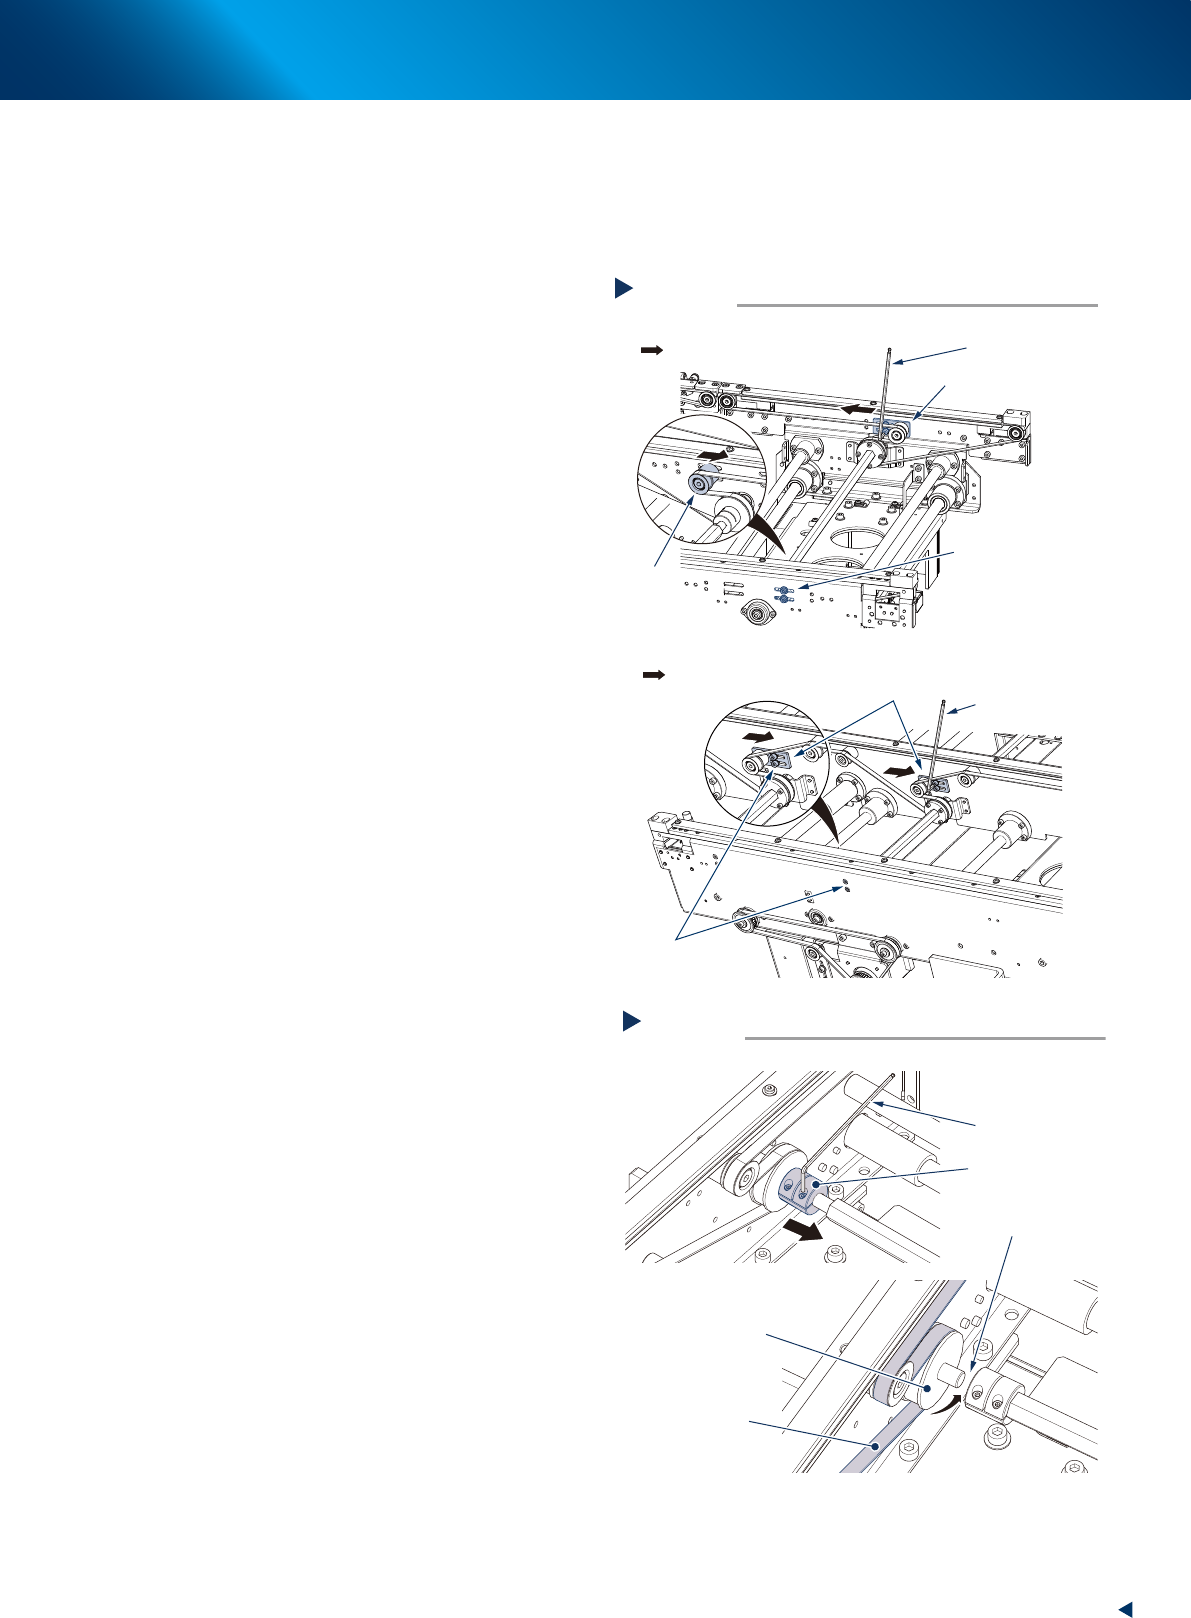
Replace the entrance/exit conveyor belt (or extension conveyor belt)
The replacement procedure of entrance/exit conveyor belt (or extension conveyor belt) is different from that
of center conveyor belt. This section describes each procedure from Step4. See "Replace the center conveyor
belt" described later to replace the center conveyor belt.
4
Using the 3mm hex wrench, loosen the
xing bolt of the tension plate and slide
it to the belt loosening direction.
5
Remove the belt.
1. Loosen the coupling fixing bolt with the 2mm
hex wrench and slide the coupling to the
rear side of the machine.
2. Remove the belt from the pulley and pull it
through the gap between the pulley and the
shaft.
Loosening belts
Step 4
Pulley mounting bolts
Pulley bracket
Direction to loosen belt
Pulley bracket
Pulley
■ Entrance/exit conveyor
■ Extension conveyor of exit side
Hexagon wrench
(3mm)
Hexagon wrench
(3mm)
Pulley bracket
mounting bolts
Direction to loosen belt
53423-KMJ-10
Remove the belt
Step 5
Belt to be removed
Driving pulley
Coupling
Gap
Hexagon wrench
(2mm)
53424-KMJ-00