YSP10_Mainte_E.pdf - 第81页
3. 3-month maintenance 3-34 Chapter 3 Periodic maintenance items 9 Inject t he grease t o the gui de using a grease gun. 1. Ch ange th e nozzle to the bent type nozzl e and inj ect the prescribed grease (NSL) to the grea…

3. 3-month maintenance
3-33
Chapter 3 Periodic maintenance items
6
Wipe away the grease or soiling from
the SZ-axis ball screw (1 position), its
shaft guides using a lint-free cloth.
n
NOTE
Carefully wipe the lead grooves of the ball screw.
Additionally, make sure that any dirt is not remained.
7
Apply the prescribed grease (NSL) by
hand uniformly to the surface of the
shaft guides (2 positions).
8
Inject the grease to the ball screw using
a grease gun.
1. Using a grease gun (standard type nozzle),
inject the prescribed grease (NSL) to the
grease nipple of ball screw until the grease
seep out from the gap.
2. Wipe away the excess grease from the ball
screw.
Cleaning SZ-axis ball screws
Step 6
Viewed from rear side
Ball screws
Access from here
Lint-free cloth
Machine front side
53374-KMJ-10
Greasing up SZ-axis shaft guide
Step 7
Shaft guide
Prescribed grease
53375-KMJ-10
Lubricating SZ-axis ball screw
Step 8
Grease gun (standard type nozzle)
Viewed from front
Grease nipple of
ball screw
53384-KMJ-00
3. 3-month maintenance
3-34
Chapter 3 Periodic maintenance items
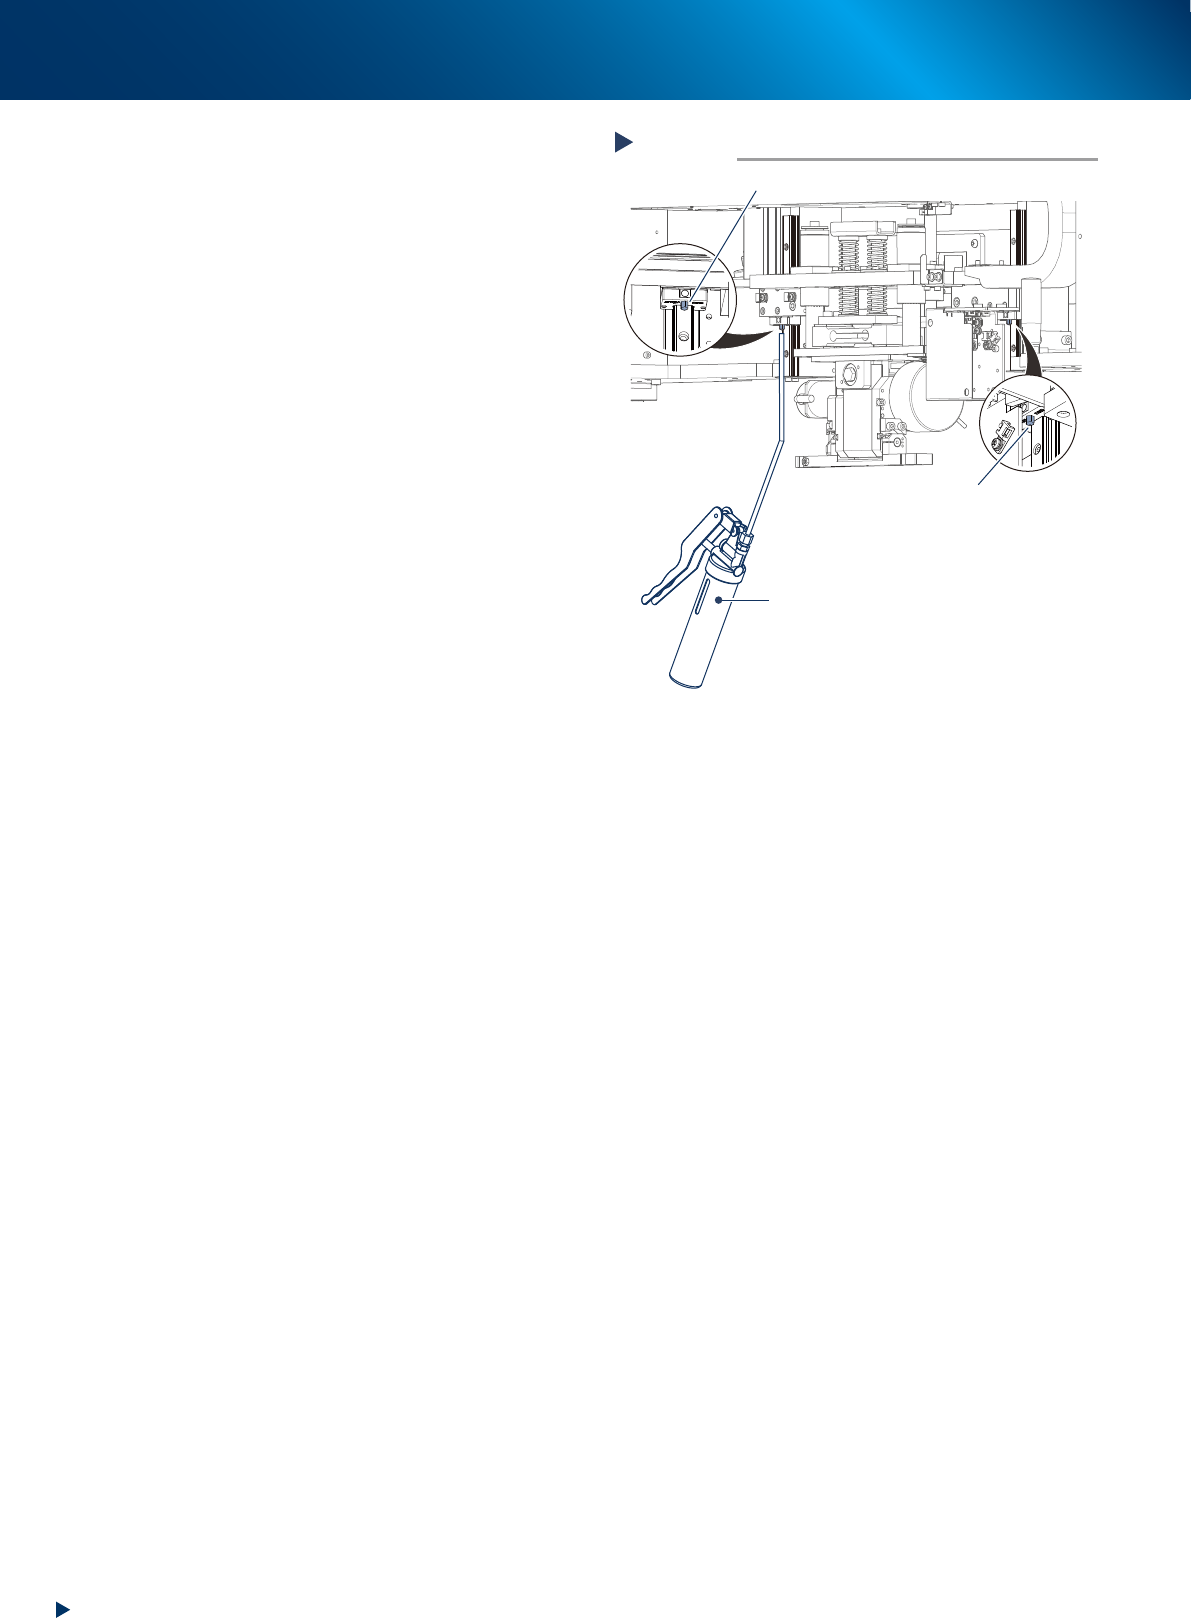
9
Inject the grease to the guide using a
grease gun.
1. Change the nozzle to the bent type nozzle
and inject the prescribed grease (NSL) to the
grease nipples of the guide (2 positions)
until the grease seep out from the gap.
2. Wipe away the excess grease.
0
Reattach the SZ-axis front cover to its
original position using Phillips
screwdriver.
Lubricating SZ-axis guide
Step 9
Grease gun (bent type nozzle)
Grease nipple of guide
Grease nipple of guide
53385-KMJ-00
3. 3-month maintenance
3-35
Chapter 3 Periodic maintenance items
3.5.2 Cleaning and Lubricating of SZ-axis with PSC
When PSC is installed with YSP10, the lubrication procedure of SZ-axis varies a little. And this section
describes the cleaning and lubrication procedure of the guide, then that of the shaft guide and ball screw, as
considering the work effectiveness.
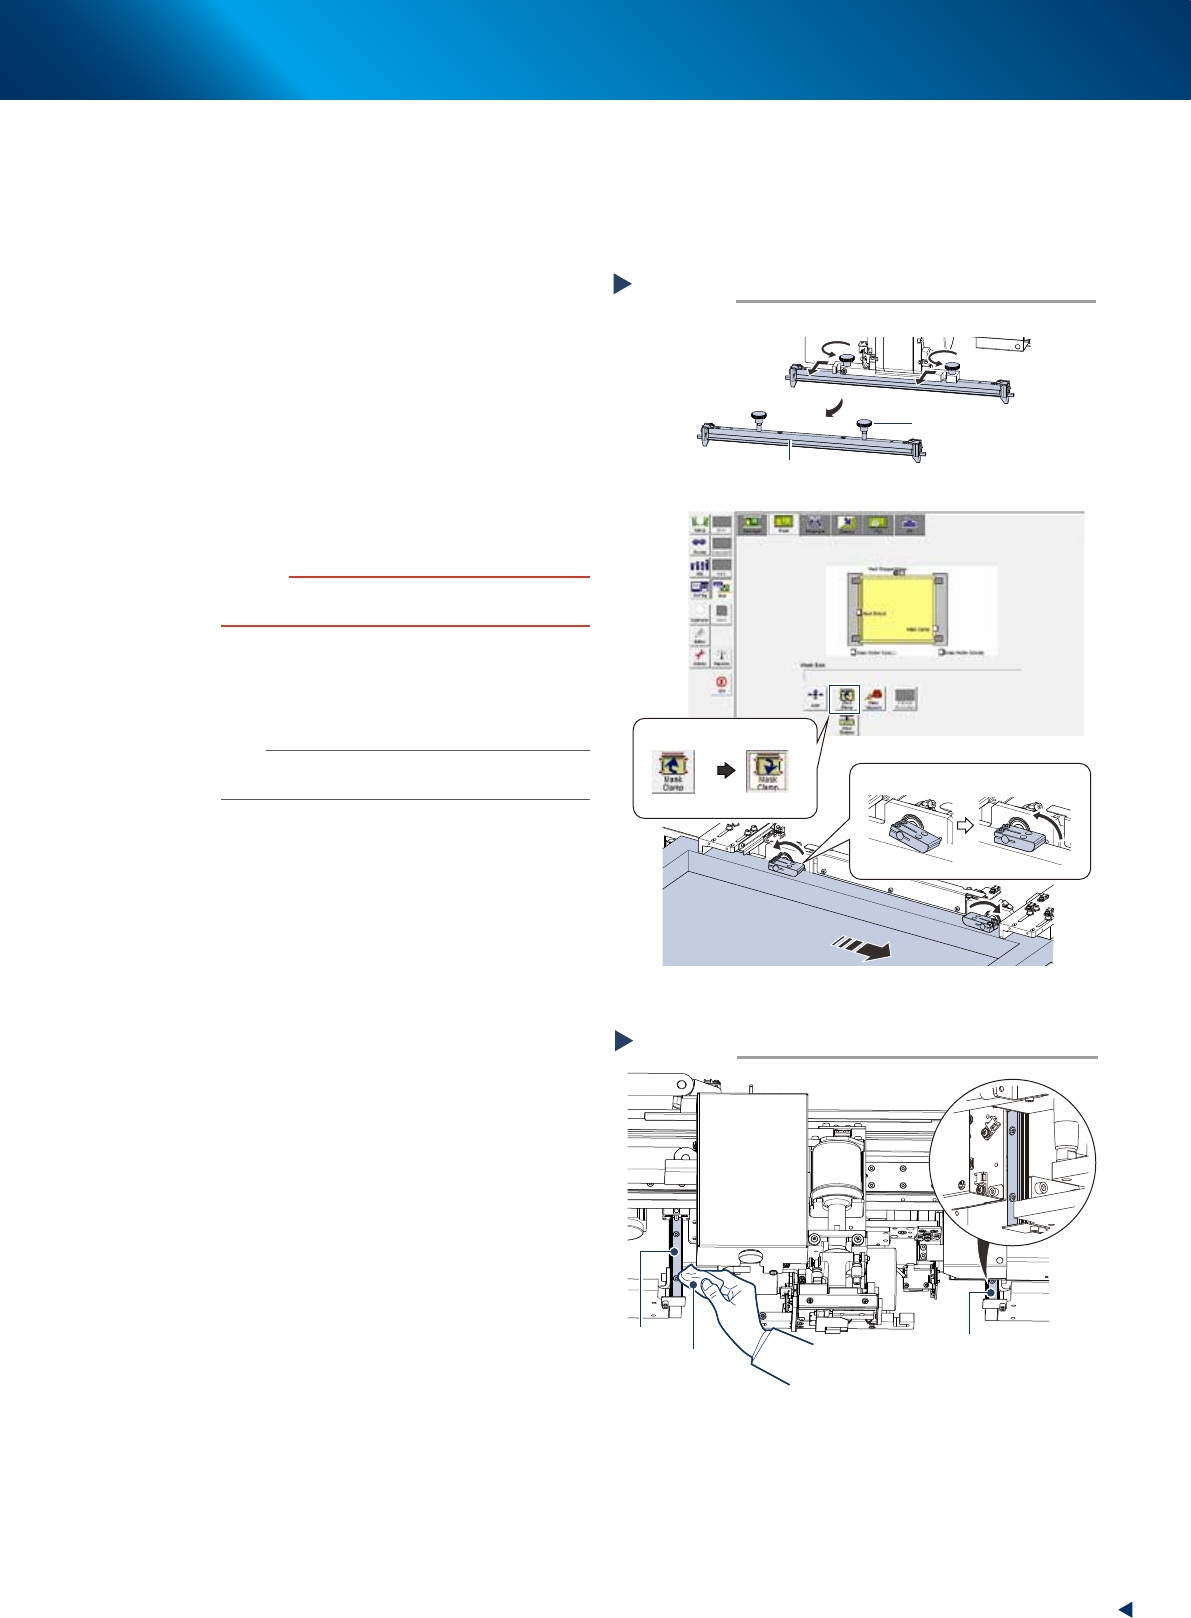
1
e
Remove the squeegee and mask.
1. Press the emergency stop button and open
machine safety cover.
2. Move the squeegee unit to machine front
side grabbing its handle.
3. Rotate the squeegee mounting knob
counterclockwise to remove the squeegee
from its holder.
4. Press the [Mask Clamp] button on [Unit]
- [Mask] screen. The mask clamp (4
positions) are released.
5. Pull out the mask frontward.
c
CAUTION
The squeegee and mask should always be removed. If not,
they may clash to the SZ-axis upon Step5.
2
Clean the SZ-axis tuide by wiping away
the grease or soiling on SZ-axis guides
(2 positions) using a lint-free cloth.
n
NOTE
Carefully wipe the guide grooves. Additionally, make sure
that any dirt is not produced.
Mask
Removing squeegee and mask
Step 1
■ Removing mask
■ Removing squeegee
Squeegee
Squeegee mounting knob
[Mask clamp] button
Clamp
Release
Clamp Release
54342-KMJ-00
Cleaning SZ-axis guide
Step 2
Lint-free cloth
Guide
Guide
53377-KMJ-00