YSP10_Mainte_E.pdf - 第43页
2. The daily inspection and cleaning 2-5 Chapter 2 Daily maintenance items 2.4 Cleaning unit Check the condition of cleaning unit before starting oper ation. Check the following items visually . ► Daily inspection items …
2. The daily inspection and cleaning
2-4
Chapter 2 Daily maintenance items
2.3 Squeegee
Check always the squeegee unit status when it is attached to machine.
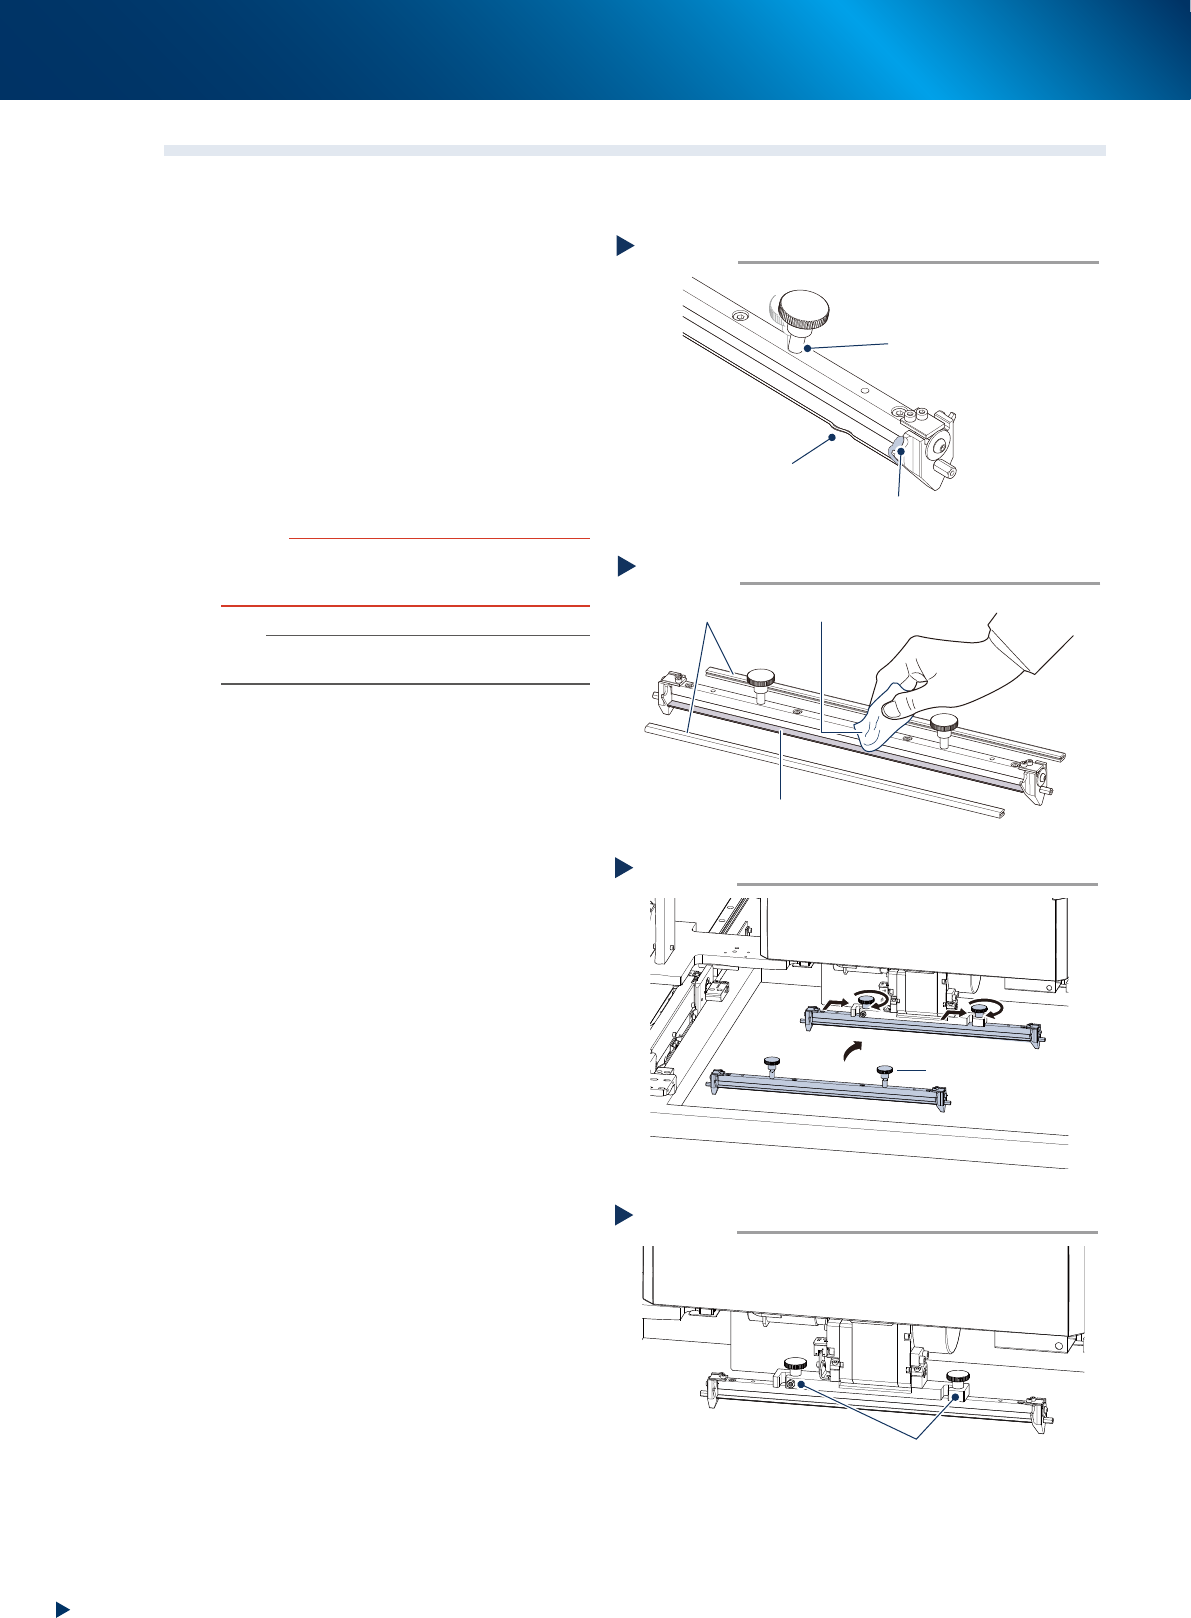
1
Check the squeegee unit.
Before attaching the squeegee, check
the following three items.
1. No wounds, cracks or wears on the scraper
unit of squeegee.
2. No solder or other foreign matter.
3. The squeegee mounting knob is in correct
position and not loosen.
2
Clean the squeegee by using a lint-free
cloth when there are some adherence
of the solder etc.
c
CAUTION
Do not soak the urethane squeegee for long time in
alchohol etc., as it may cause the expansion of the scraper
unit.
n
NOTE
Upon storing the squeegee after cleaning, be sure to
attach the protective covers.
3
Attach the squeegee by tting in the
squeegee holder and tightening the
squeegee mounting knob by hand.
4
Check that the squeegee is mounted
rmly to its holder.
►
Wounds, cracks or wears
When the scraper unit has wounds, cracks or
wears, it needs to be replaced. See Ch.4 "1.
Scraper unit" for details of how to replace the
scraper unit.
Checking the squeegee status
Step 1
in correct position and not loosen
No adherence of solder or foreign object
No wounds, crack or wears
53206-KMJ-10
Cleaning squeegee
Step 2
Lint-free cloth
Protective cover
Scraper unit
53207-KMJ-00
Attaching squeegee
Step 3
Squeegee mounting knob
53214-KMJ-00
Check the squeegee mounting status
Step 4
The squeegee is not loosen on its holder
53215-KMJ-00
2. The daily inspection and cleaning
2-5
Chapter 2 Daily maintenance items
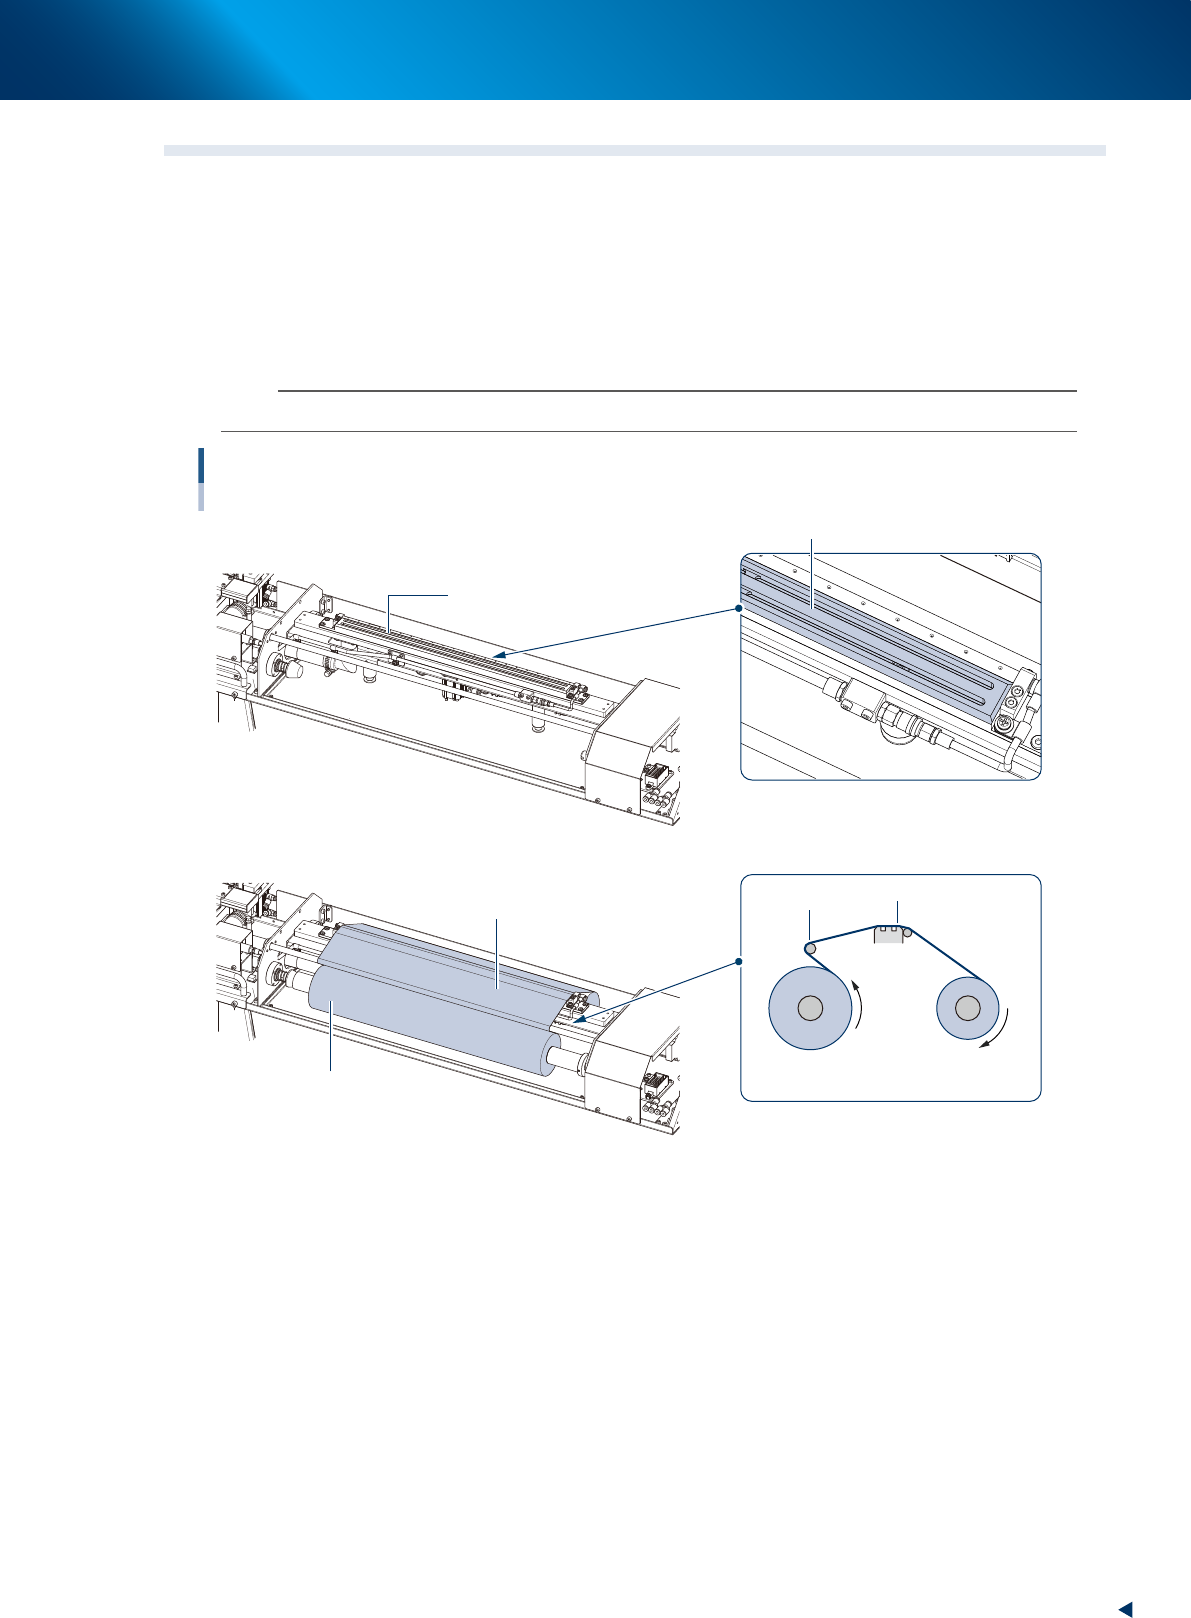
2.4 Cleaning unit
Check the condition of cleaning unit before starting operation. Check the following items visually.
►
Daily inspection items
• The cleaner head unit is not contaminated.
• The cleaning gauze is attached correctly. (See the image below)
• The cleaning gauze can be winded up without slack.
• The cleaning alcohol tank (at the left side of the machine front side) is filled enough.
n
NOTE
See attached "User's manual" for details of the cleaning gauze setting procedure.
Cleaning unit
Cleaner head and Cleaning gauze
The cleaning gauze is removed.
The cleaning gauze is attached.
Cleaner head
Cleaner head
Check the contamination and clean it.
Check if the cleaning gauze is attached correctly.
Side to be attached
Side to be attached
Side to be winded up
Guide
Without slack
53208-KMJ-00
►
Treatments
• When the cleaner head is not clean, wipe with lint-free cloth (with a few drops of alcohol when
needed).
• When the cleaner gauze is not attached correctly, remove it and reattach referring to the image
above.
• When the cleaner gauze cannot be winded correctly with slack, press the [Feed gauze] button on
[Unit] - [Cleaner] screen few times until the slack is eliminated.
2. The daily inspection and cleaning
2-6
Chapter 2 Daily maintenance items
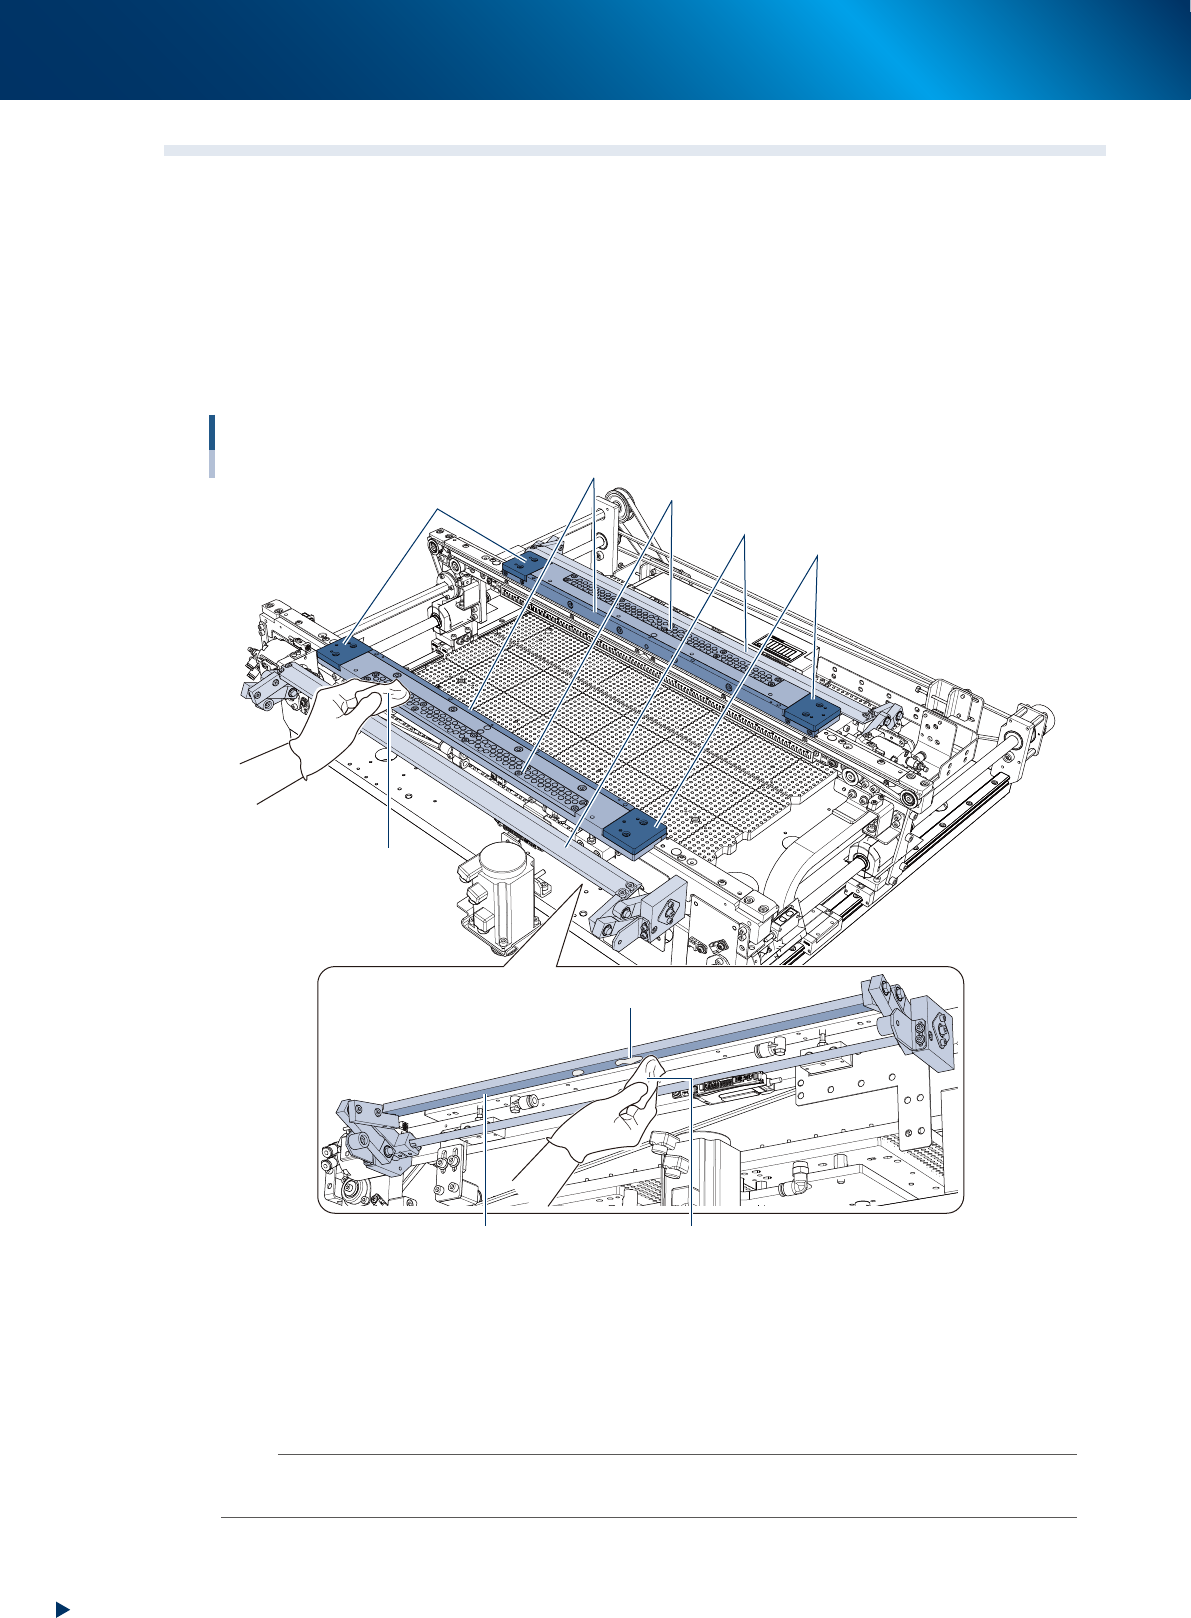
2.5 Mask vacuum unit, board flap and edge clamp plate
Check the condition of mask vacuum unit (mask plate), board flap (hereinafter referred to as flap) and edge
clamp plate (hereinafter referred to as edge plate) before starting operation. Check the following items.
►
Daily inspection items
• No adherence of solder etc. on the mask plate and extended conveyor plate.
• No adherence of solder etc. on the flap.
• No adherence of solder etc. or no wears on the edge plate*.
*When the edge plate worn out, a board imprint remains on it.
Mask vacuum unit, board flap and edge clamp plate
Mask plate
Edge plate
Flap
Extended conveyor plate
Extended conveyor plate
Lint-free cloth
(with a few drops of ethanol)
Underside of flap
Solder adherence
Lint-free cloth
(with a few drops of ethanol)
53209-KMJ-00
►
Treatments
• When the adherence of solder etc. is found on the mask plate, extended conveyor plate, flap or
edge plate, wipe with lint-free cloth with a few drops of absolute ethanol.
• The adherence of solder may be found on the underside of flap, so wipe it with care.
• When the edge plate is worn out, it requires to be replaced. Contact to your sales representative.
n
NOTE
When the back of the mask is not cleaned well, dirt may remain during the inspection. Clean the mask completely after
use, and review the mask cleaning setting as necessary.