00197454-01_AI_Portal_40mm_TwinVHF_SX12_de_en.pdf - 第104页
assembly Gantry Preparations 3.2.1 The Gantry Lift 104 Reconfiguration Kit Twin VHF with Gantry Reconfiguration Ki t T w i n V H F m i t P o r - Overview Assembly See also 3.2.2 Unpacking the Gantry [ ➙ 105] 1. Gantr…

assembly
3.2.1 The Gantry Lift Gantry Preparations
Reconfiguration Kit Twin VHF with Gantry Reconfiguration Kit Twin VHF mit Portal 103
WARNING
Stability, obstacles
► The platform must be always brought to the lowest position when using the lifting aid as
transportation unit (within the moving procedure). The load must always be centered (in the
center of gravity) on the platform (this may vary according to the individual case) in order to
achieve highest possible stability (tilt resistance) during moving. When moving the lifting
aid, pay particular attention to obstacles such as door limits, cables on the ground and also
check the driving through height with the height of the gantry lift slide. The small wheel di
-
ameter used (depends on configuration) could mean that even smaller obstacles can cause
an abrupt deceleration or inadvertent direction change if contact to the wheel is established.
► If the load is not completely lowered the lifting assistance may tilt or (in case of insufficiently
secured load) the load may fall down depending upon driving speed and kind of the obsta
-
cle. Thus, always lead the lifting assistance with appropriate speed, particularly in curves
and with changing or uneven soil conditions. Fasten the load always sufficiently before
transporting it in order to surely avoid inadvertent falling down and/or reduce the transpor
-
tation speed that also an unsecured load cannot glide from the load pickup in case of an
abrupt deceleration.
► Likewise the load must not come into oscillations during the transport . Thereby inadvertent
reactions can occur.
WARNING
Ergonomics
► Always make sure that the platform and the surface on which the load is putted down and/
or be taken up are on the same height (varies in case of individual preparations).
The load must be pulled of the platform and/or pushed onto it (not elevated/carried) in order
to work in an ideal ergonomic position!
assembly
Gantry Preparations 3.2.1 The Gantry Lift
104 Reconfiguration Kit Twin VHF with Gantry Reconfiguration Kit Twin VHF mit Por
-
Overview
Assembly
See also
3.2.2 Unpacking the Gantry [ ➙ 105]
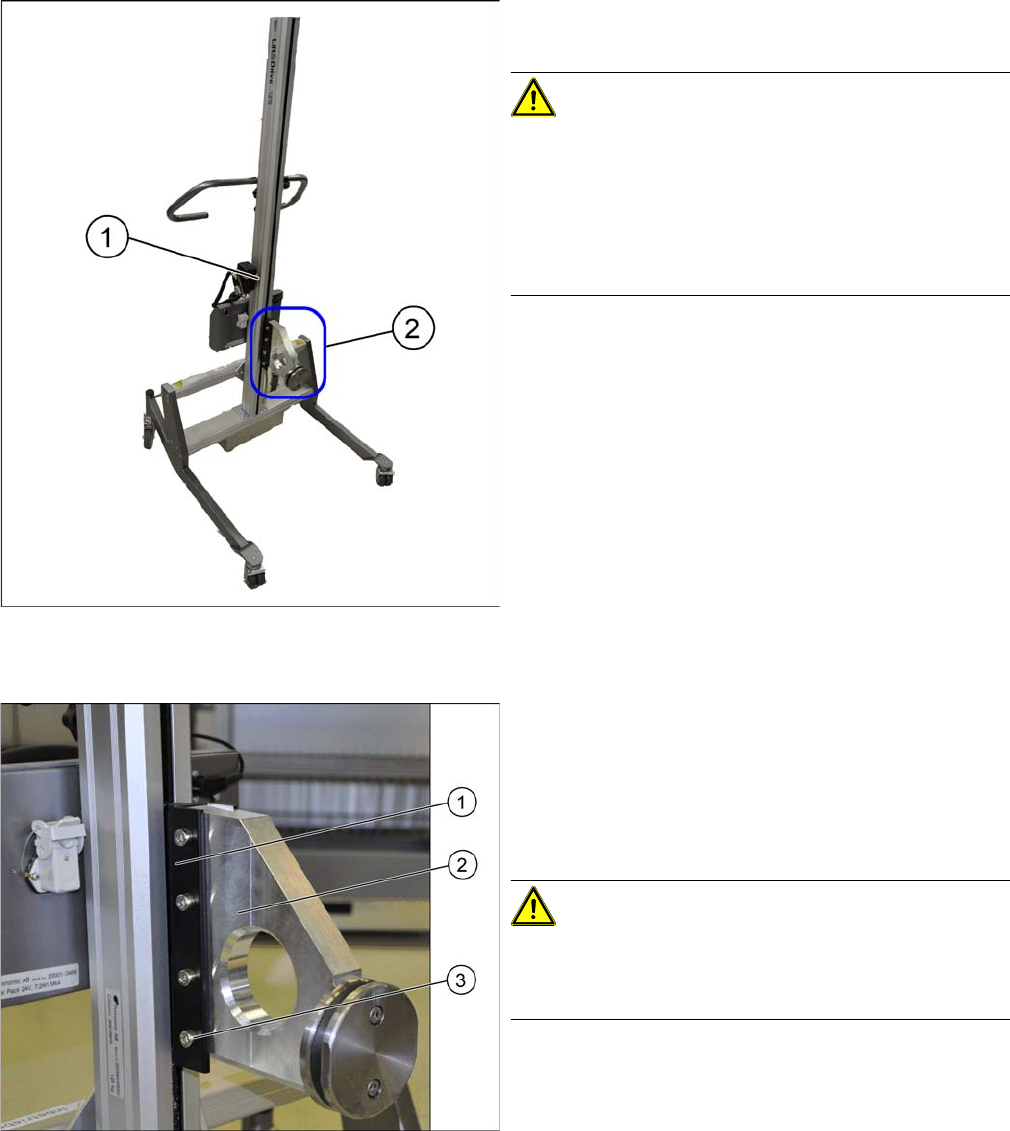
1. Gantry lift , SX1/SX2, [00519813-xx]
2. Gantry carrier plate – [03012160-xx]
CAUTION!
Safety Instructions
Pay attention to the weight of approximately 64 kg when
unpacking the transport wrapper!
Use appropriate tools or call further qualified persons.
The gantry lift has to be locked sufficiently when trans
-
porting it again in order to eliminate any danger.
Fitting the gantry carrier plate
To enable the gantry lift to accommodate the gantry, the
gantry carrier plate (2) must be fitted to the slide (1) of the
gantry lift.
► Use the 4 fastening screws (3) to fix the gantry carrier
plate (2) to the slide (1) of the gantry lift.
CAUTION!
Information on safety
Mount all 8 screws with the associated washers and tight
-
en them with 18 Nm.
assembly
3.2.2 Unpacking the Gantry Gantry Preparations
Reconfiguration Kit Twin VHF with Gantry Reconfiguration Kit Twin VHF mit Portal 105
3.2.2
3.2.2 Unpacking the Gantry
Unpacking the Gantry
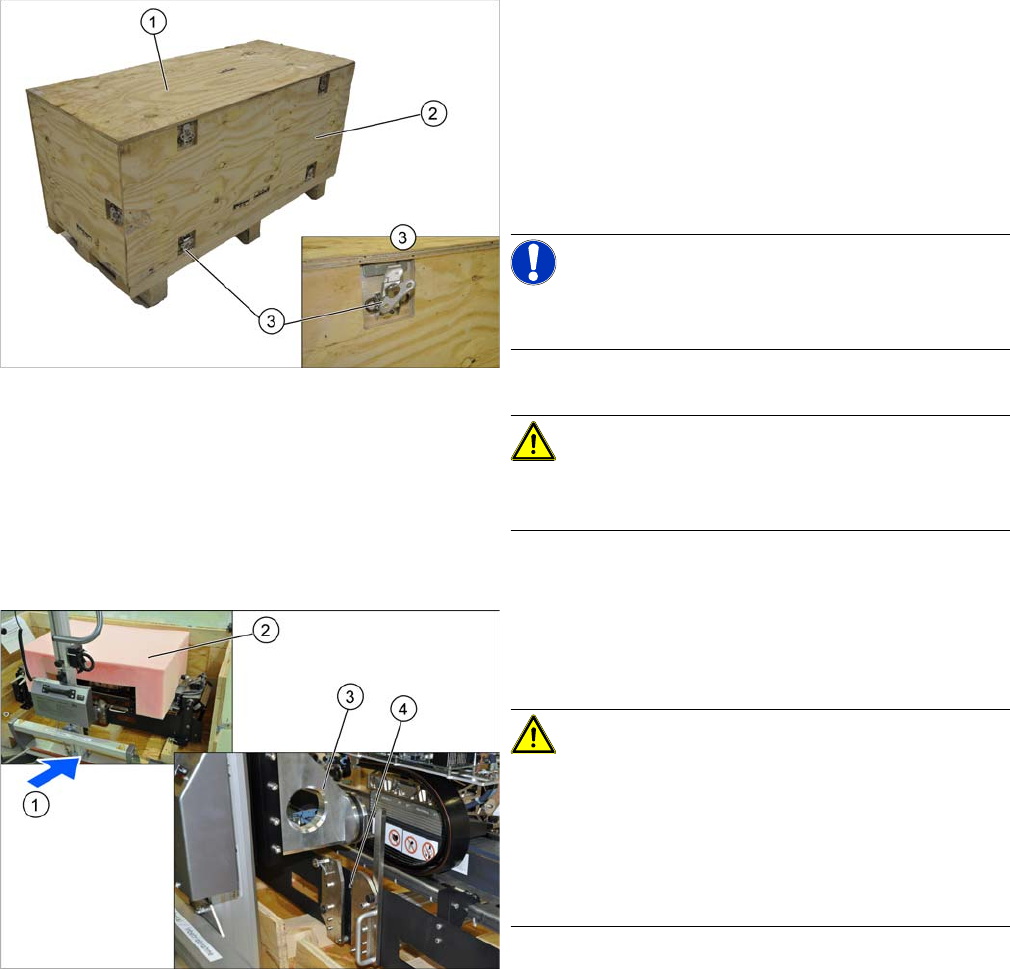
Transportation crate
The gantry is packed in a transportation crate. Move the
transportation crate near to the SIPLACE SX machine on
which the gantry is to be assembled. Do not move the
gantry over long distances with the gantry lift.
► Open the turn-lock fasteners (3) on the top (1) and
front (2) of the transportation crate.
► Remove the two wooden panels at (1) and (2).
NOTICE!
The gantry is fixed with 4 screws in the transportation
crate.
CAUTION!
Carrier
When putting back the carrier it must be screwed again.
Move the gantry lift into position
► Carefully move the transportation lift (1) up to the
gantry.
CAUTION!
Take care not to damage the gantry when moving it with
the gantry lift
Do not hit the gantry or locks with the gantry carrier plate
(3).
Make sure that the gantry carrier plate (3) protrudes
above the gantry carrier locks (4).
► Remove the foam cover (2).