YSH20_Ope_E.pdf - 第103页
2-46 2 asic operation 4 Remo ve the attachment and expand ring. The expand ring is not bolted, and so can be r emoved easily. c …
2-45
2
asic operation
4.2.5 Exchanging the expander unit and pallet clamp
When changing the magazine size (dicing frame size) for the wafer tray changer, the expander unit and pallet
clamp must also be exchanged. The methods for exchanging them are described below.
c
machine. The machine may malfunction if the power is not turned off.
n
Expander unit
1
Turn off the power to the machine.
2
Disconnect the harness (connector).
1. Open the safety cover on the rear of the machine.
2. Unplug the connector (PLT STG) shown below.
3. Using a 1.5mm wrench, remove the bolts (4 bolts) that secure the harness bracket.
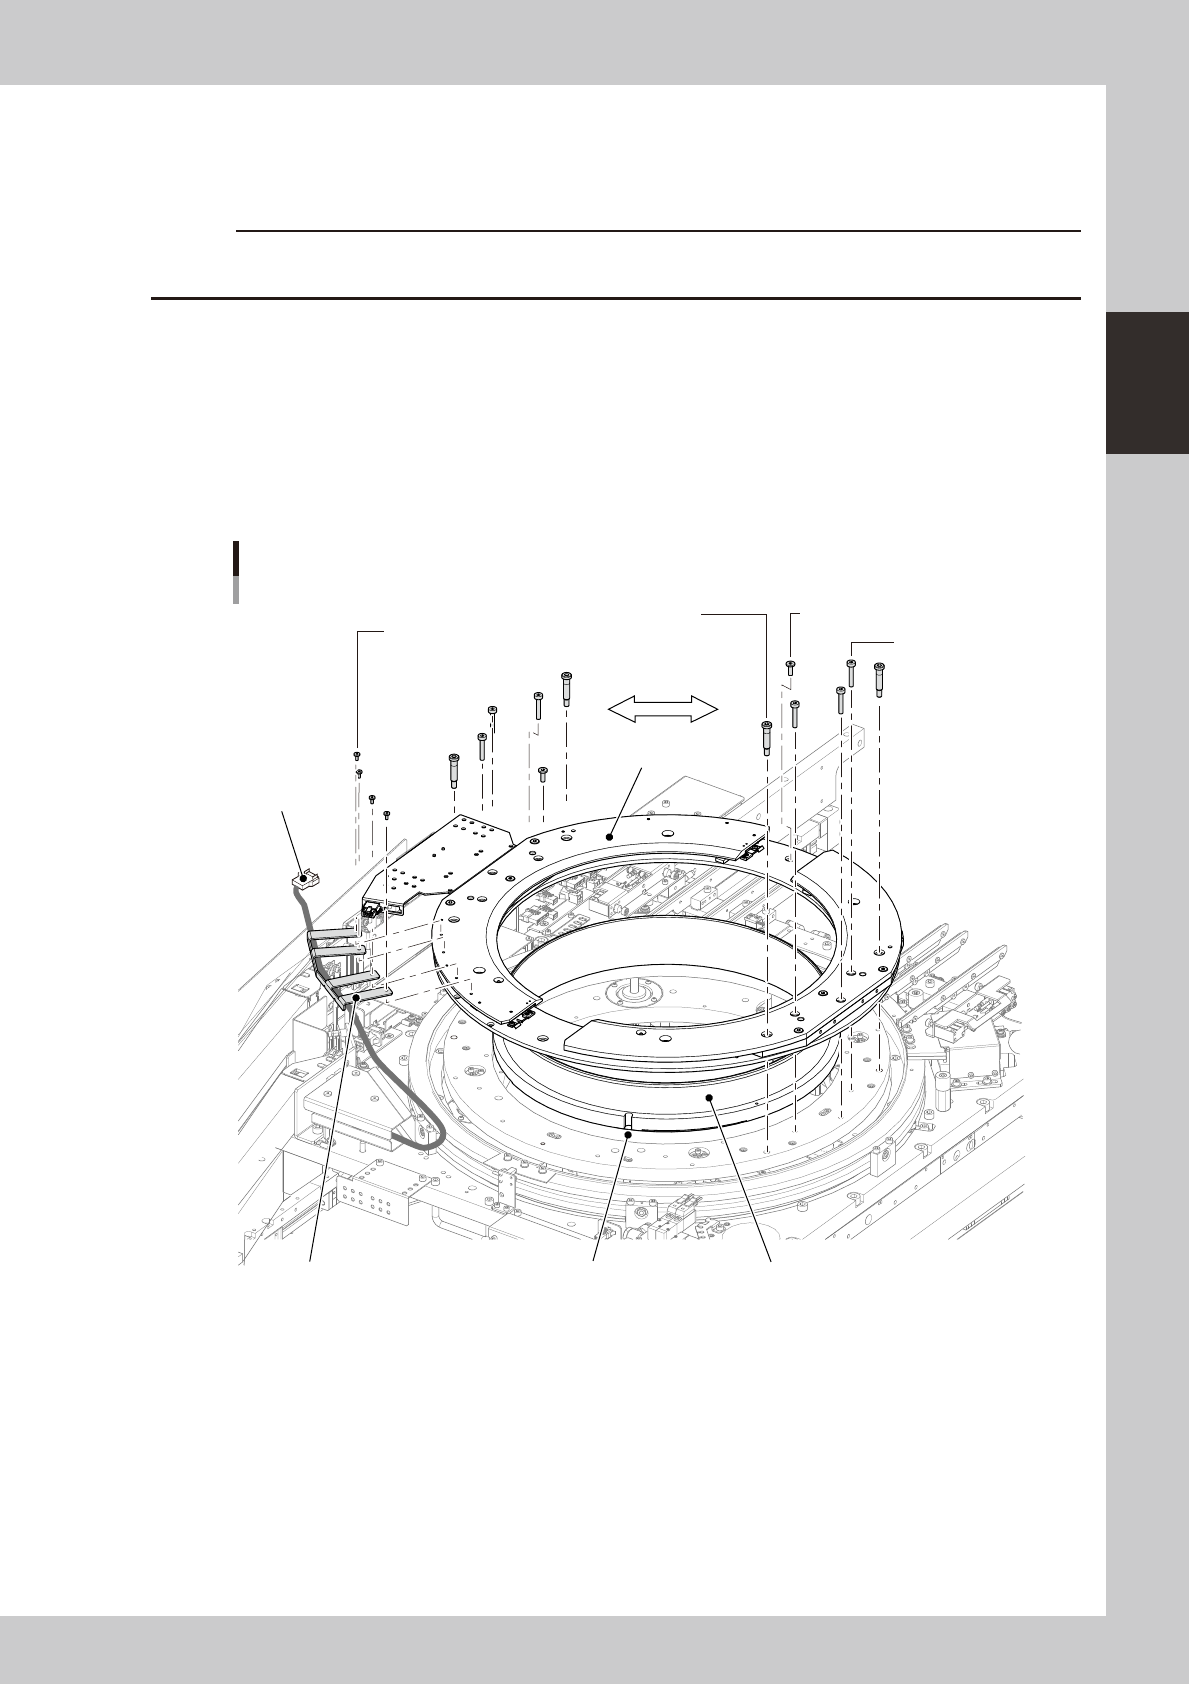
Exchanging the expander unit
Stud bolt
(4mm wrench.)
Mounting bolts are
symmetrically used.
Mounting bolt / 5-10 (3mm wrench)
Harness bracket mounting bolt
(1.5mm wrench.)
Connector
(PLT STG)
Mounting bolt / 5-25
(3mm wrench)
Attachment
Expand ringPositioning notchHarness bracket
23239-H0-00
3
Remove the bolts that secure the attachment.
1. Remove the stud bolts with the 4mm wrench (see the above figure).
2. Remove other mounting bolts with the 3mm wrench.

2-46
2
asic operation
4
Remove the attachment and expand ring.
The expand ring is not bolted, and so can be removed easily.
c
careful not to drop the expander unit on your foot during work since it is pretty heavy.
5
Arrange the expander unit to be used.
1. Align the expand ring with the positioning pin and fit it in place.
2. Place the attachment while aligning the mounting holes.
c
6
Secure the attachment.
1. Using the 4mmwrench, tighten the four stud bolts (two each on the right and left).
2. Using the 3mm wrench, tighten the remaining eight bolts (four each on the right and left).
7
Secure the harness bracket.
Using the 1.5mm wrench, fasten the harness bracket to the attachment.
8
Connect the connector.
Plug in the connector (PLT STG).
2-47
2
asic operation
n
Pallet clamp
1
Turn off the power to the machine.
2
Remove the wafer storage unit.
Follow the procedure for removing the wafer storage unit.
n
NOTE
The procedure for removing the wafer storage unit is described on the label located behind the door of the wafer
storage unit.
3
Remove the mounting bolts.
Using the 4mm wrench, remove the three bolts that secure the pallet clamp.
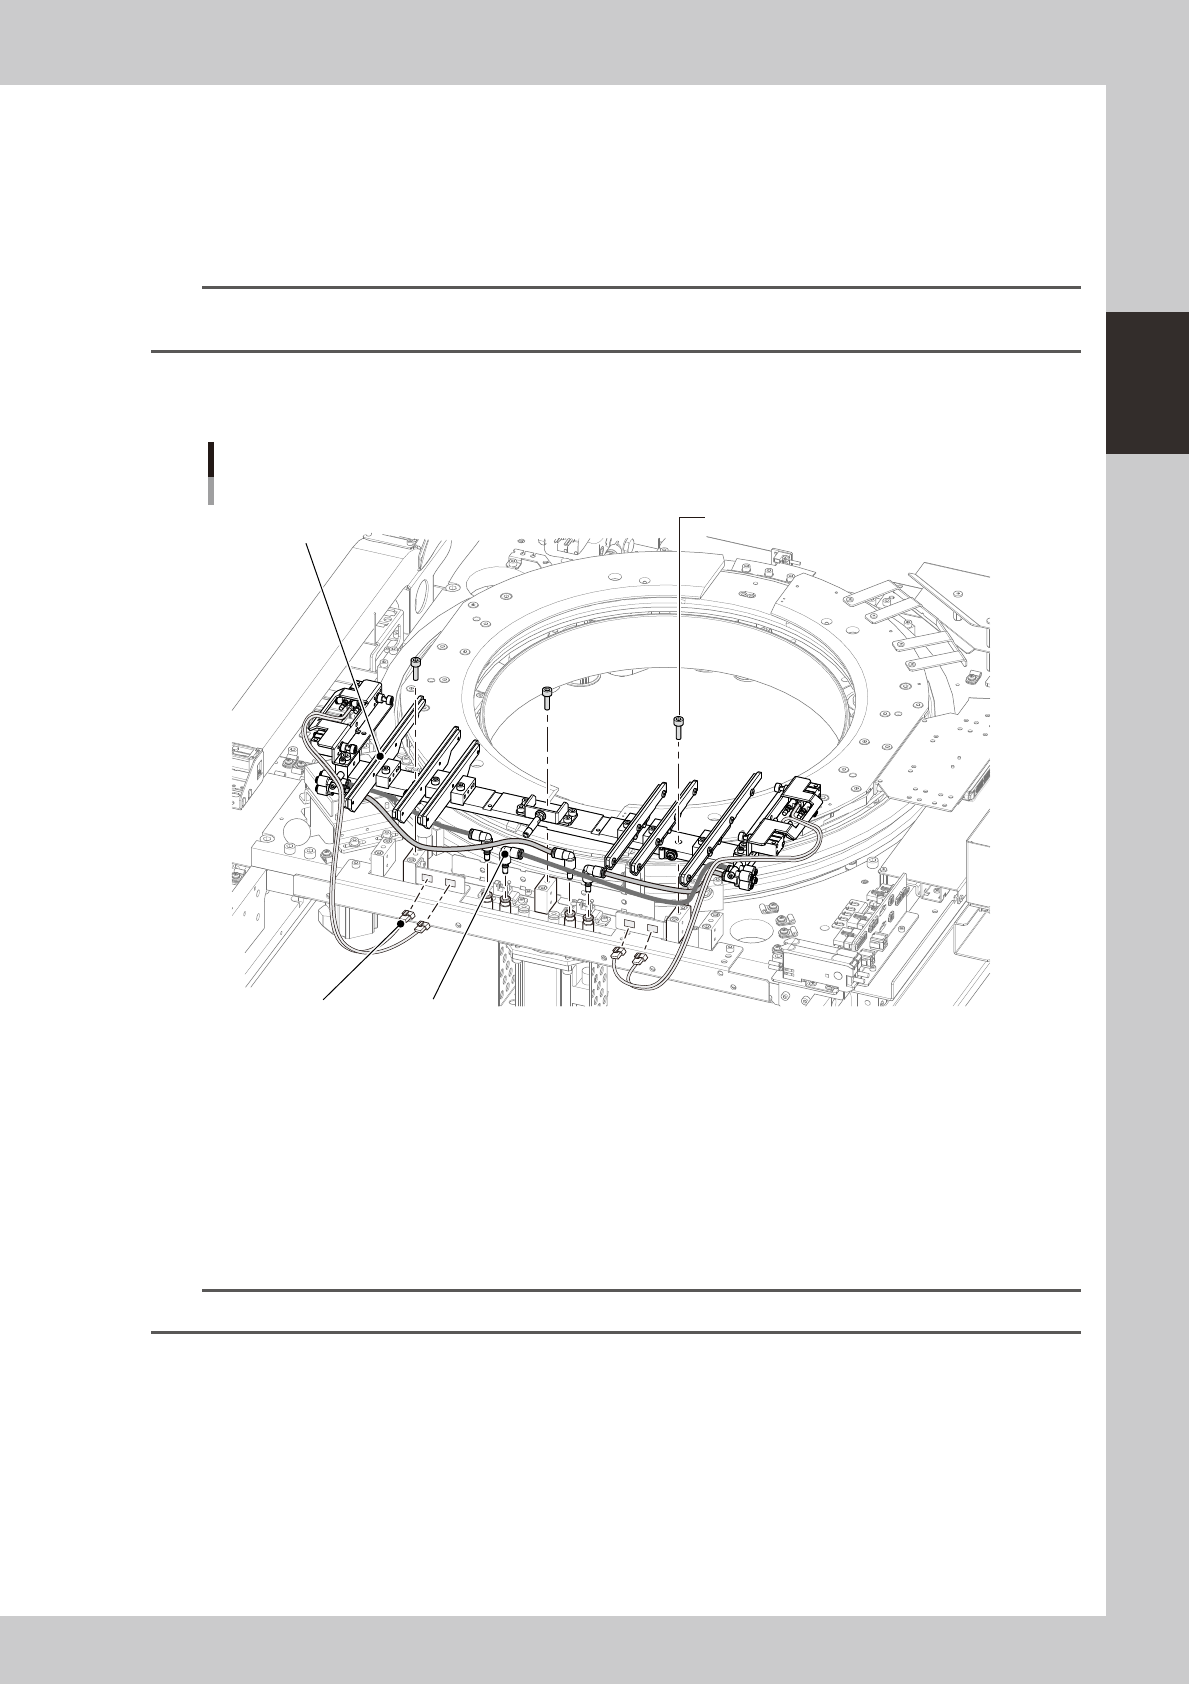
Exchanging the pallet clamp
Mounting bolt (3mm wrench)
PlugSensor connector
Pallet clamp
23240-H0-00
4
Unplug the connectors.
Unplug the sensor connectors for the right and left air cylinders.
5
Remove the air hoses.
Remove the orange and black air hoses along with the plug.
6
Exchange the pallet clamp.
Exchange the pallet clamp using the reverse procedure from steps 2 to 5.
n
NOTE
Plugging in the sensor connectors before tightening the mounting bolts makes it easier to install the pallet clamp.