YSH20_Ope_E.pdf - 第81页
2-24 2 asic operation 1 Adjust the con vey or width. After selecting the board data, open the [Unit]-[Conveyor] tab and press the [Width] button. Check the conveyor width shown in the "Conveyor Width" dialog …
2-23
2
asic operation
3.4 Conveyor unit setup flow
When the board type to be produced is changed, the conveyor unit setup must be adjusted, and other parts
prepared to match that board type. This section describes how to change the conveyor unit setup.
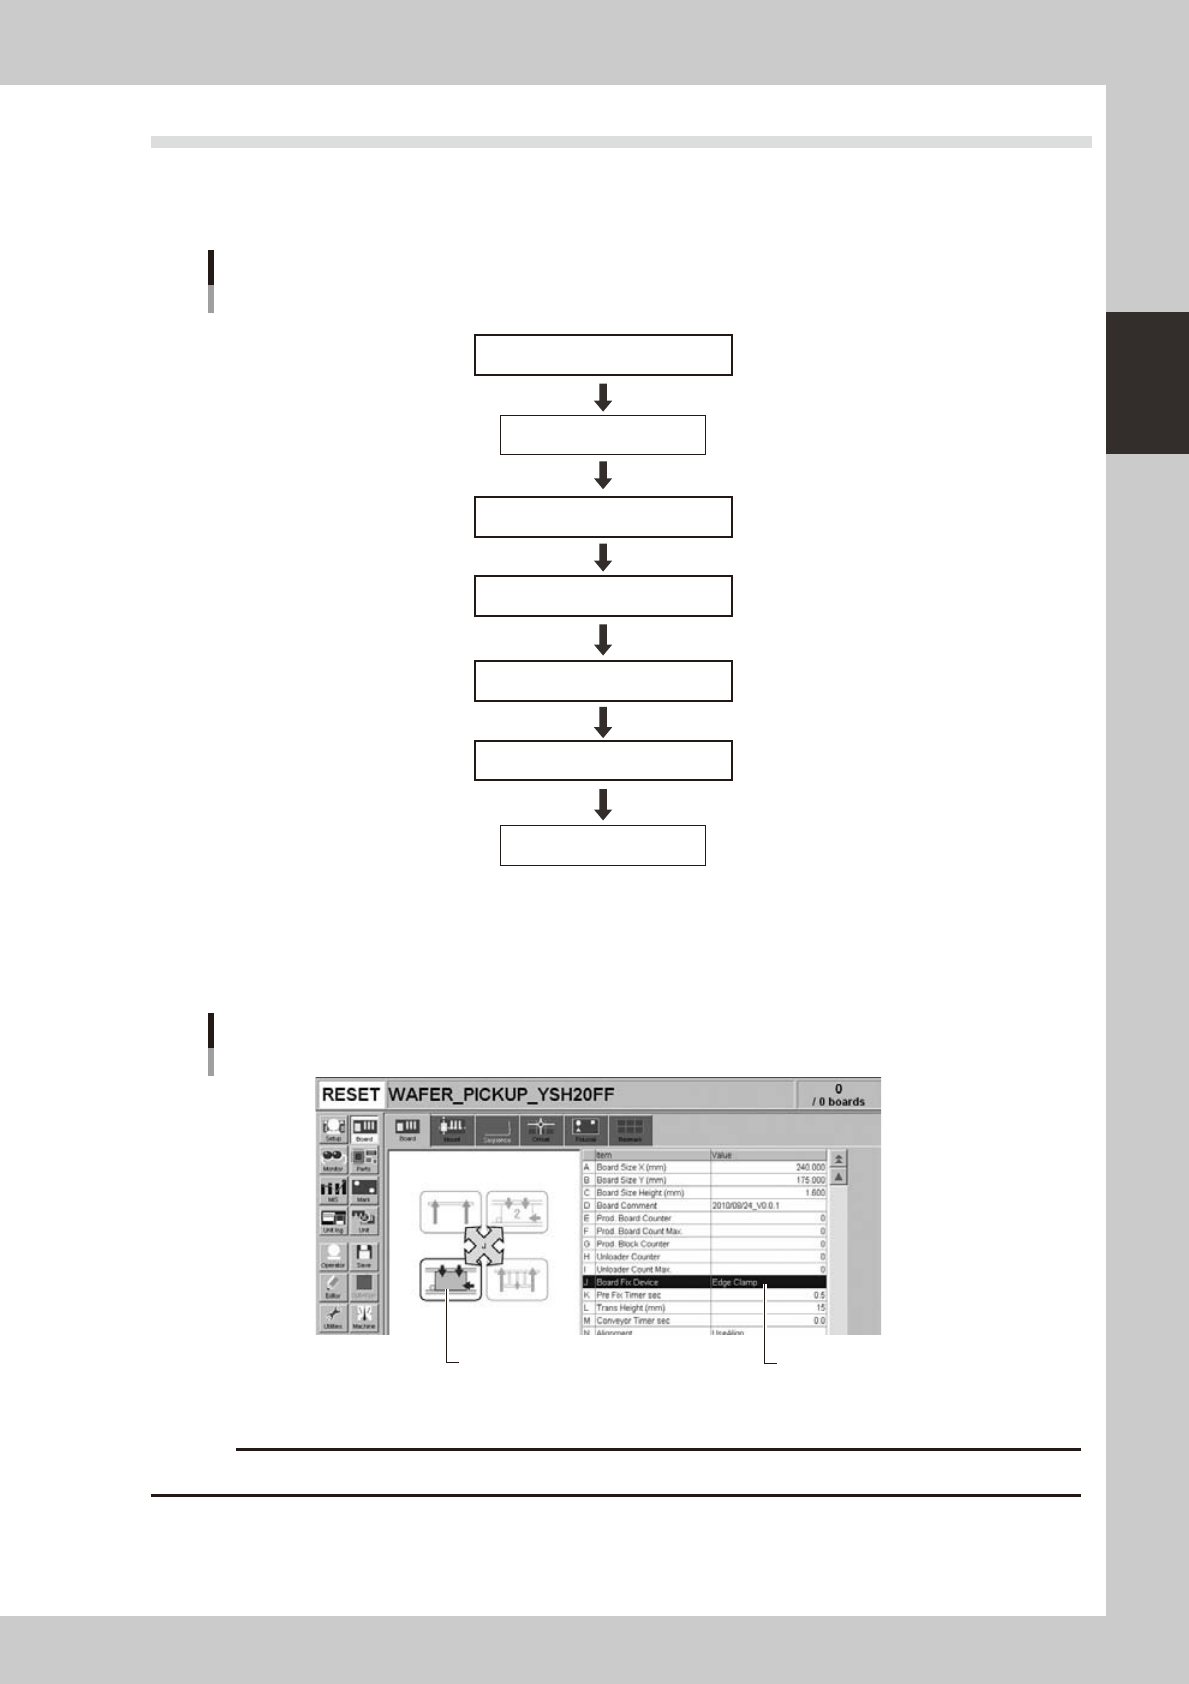
Set up the conveyor units as shown in the flowchart below.
Adjust conveyor width
Set board on conveyor
Adjust board hold plates
Press [Width] button.
Raise push-up plate.
Raise push-up plate.
Lower push-up plate.
Lower push-up plate.
Check that board is clamped securely
Remove board
Press emergency stop button
Cancel emergency stop
Setup flow
Conveyor
23203-H0-00
Board clamping method
Usually "Edge Clamp" method is used to clamp a board in the work position by pushing its edges up against the board
hold plates. Use push-up jigs (option) to support the board by pushing it (other than the edges) up from the bottom.
Board clamping method
[Board] tab screen showing board clamping method
Illustration shows how board is clamped
on the conveyor.
24218-H0-00
c
Conveyor's board sensors may fail to detect a production board if it has a slit or cutout.
2-24
2
asic operation
1
Adjust the conveyor width.
After selecting the board data, open the [Unit]-[Conveyor] tab and press the [Width] button. Check the
conveyor width shown in the "Conveyor Width" dialog box that appears, and press the [OK] button.
e
2
Press the emergency stop button and open the safety cover.
3
Set a board on the conveyor.
Press the [Push Up] button on the [Unit]-[Conveyor] tab to raise the push-up plate and check that the
board is securely clamped.
4
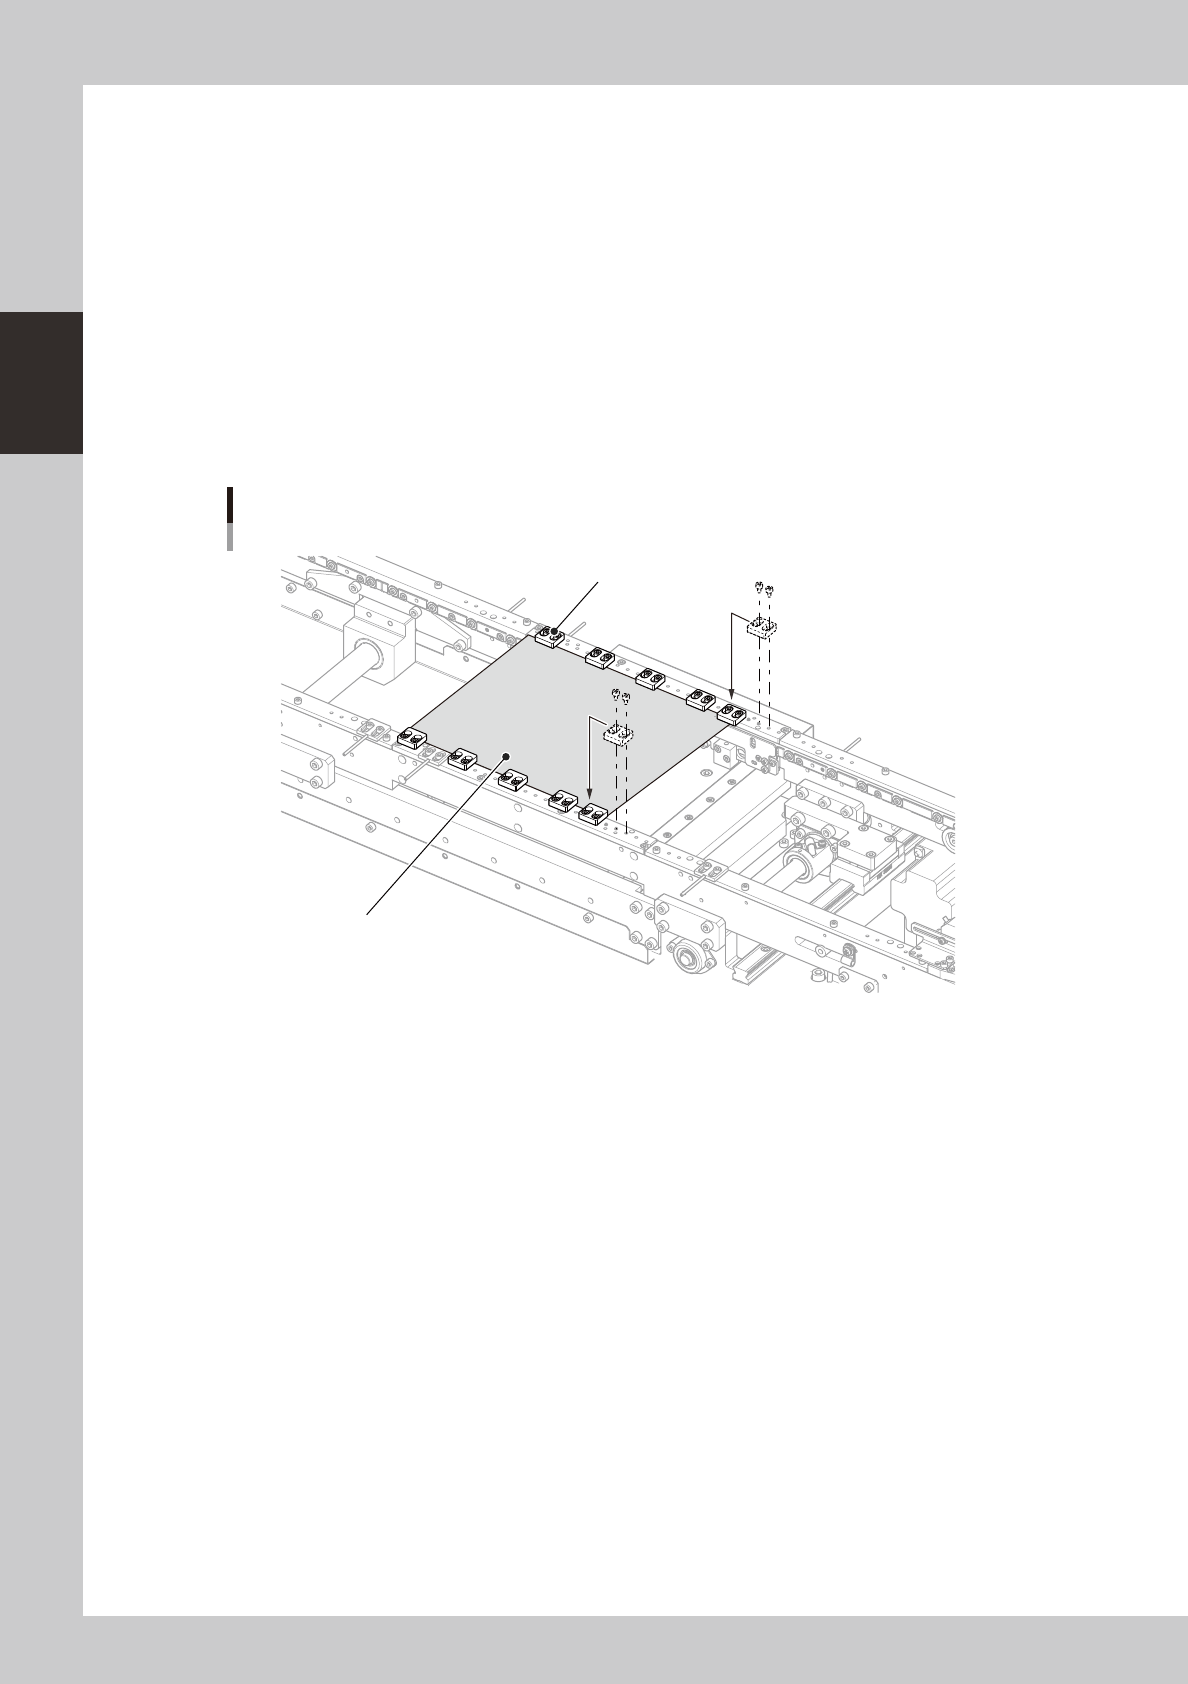
Adjust the positions of the board hold plates.
1. Lower the push-up plate.
2. Adjust the positions of the board hold plates so that the board is uniformly clamped when the board
clamp unit is raised. Use a hex wrench to remove the bolts that secure each board hold plate and
reattach it in the proper position.
Board hold plates
Board
Board hold plate
23204-H0-00
5
Check that the board is uniformly clamped on the conveyor.
1. Raise the push-up plate.
2. Check that the board is uniformly clamped on the conveyor. Lightly tap on the board and also
check for warping of the board. If the board is supported evenly with no warping, the adjustment is
okay.
6
Remove the board from the conveyor.
Lower the push-up plate and remove the board from the conveyor. Then cancel emergency stop.
2-25
2
asic operation
4. Preparing the component supply unit
4.1 Tape feeders
4.1.1 Setting the tape
c
Always use a tape set station or a power station to set the tape. The tape cannot be set directly on the machine.
1
Set the feeder.
Place the feeder in the temporary tape set station or power station for the off-line setup.
Setting the feeder
Handle
Feeder
Tape set station
23205-H0-00
2
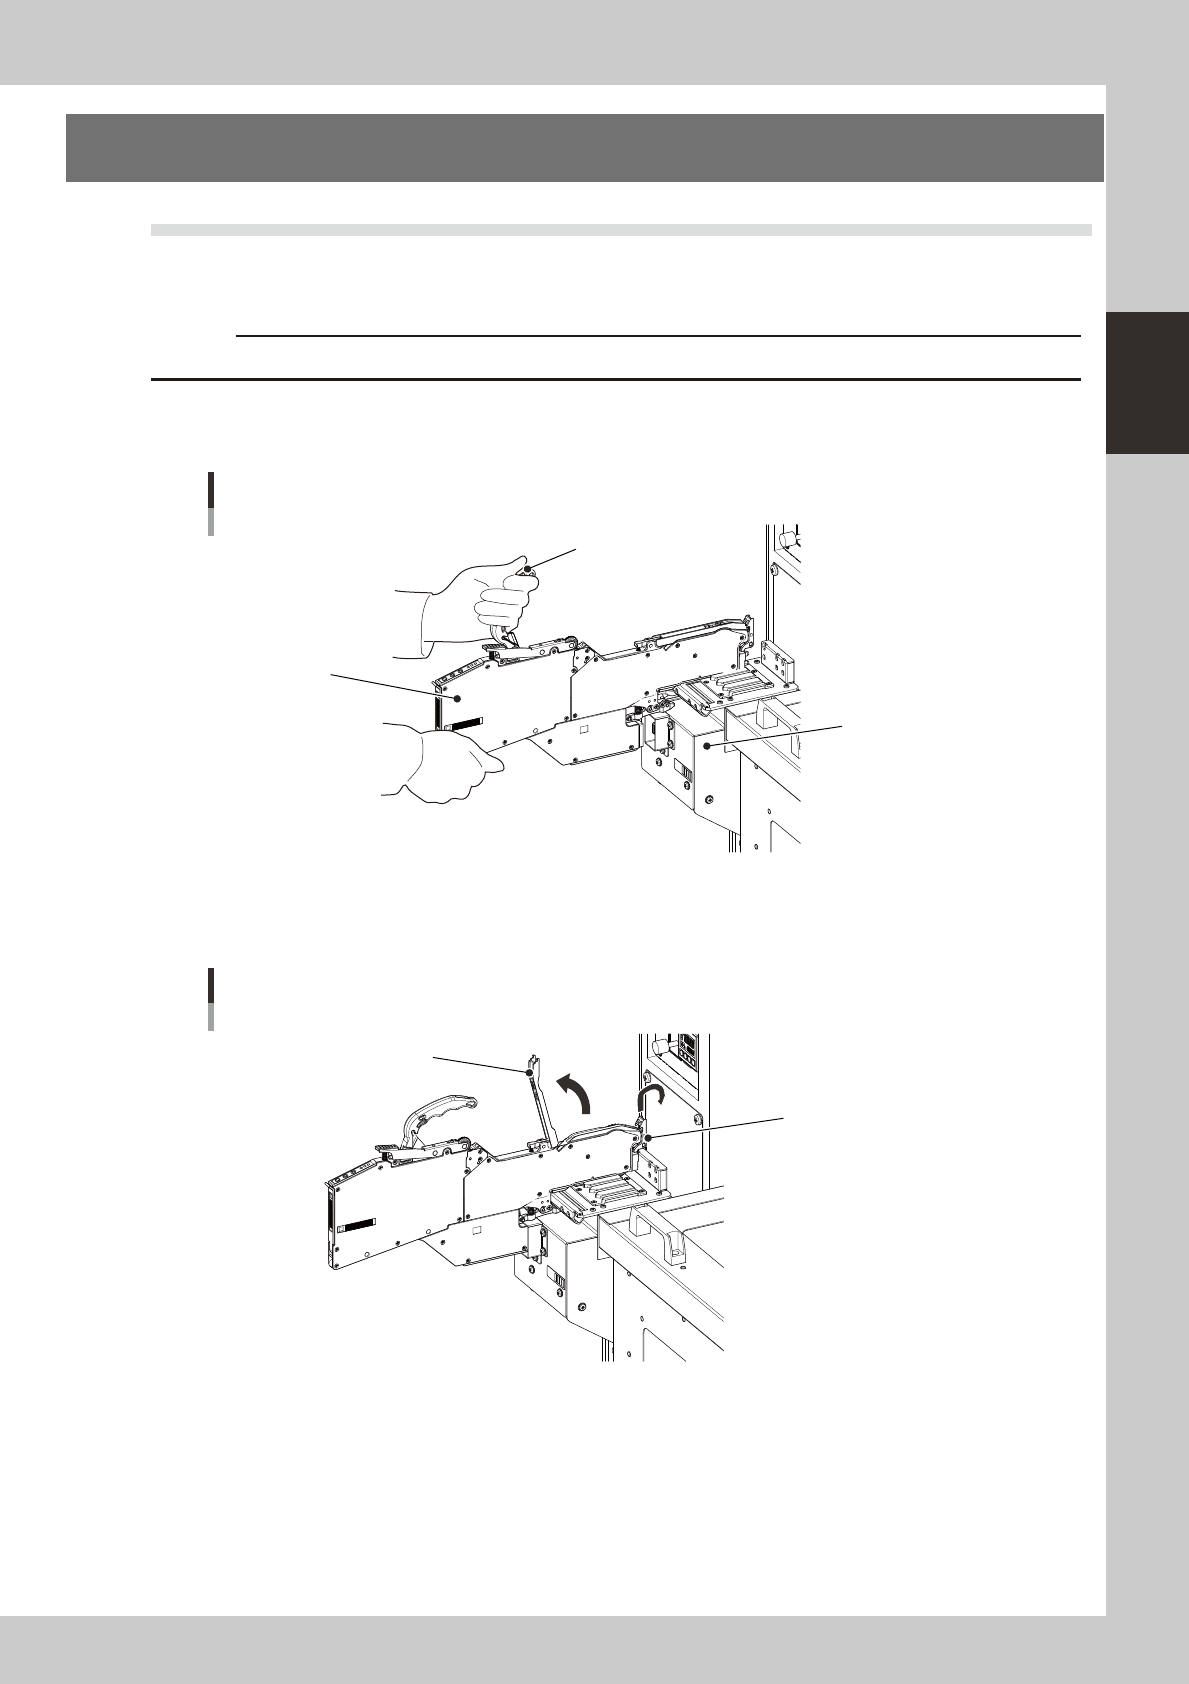
Raise the tape guide assembly.
Lower the front lever for the tape guide while lifting it, and raise the tape guide assembly.
Raising the tape guide assembly
Tape guide assembly
Tape guide front lever
23206-H0-00