YSH20_Ope_E.pdf - 第79页
2-22 2 asic operation 3.3 W ar ming up the machine After starting up the machine, we recommend w arming it up for about 10 minutes in most cases. If less than two hours has elapsed after the mac hine was last used, no …
2-21
2
asic operation
3
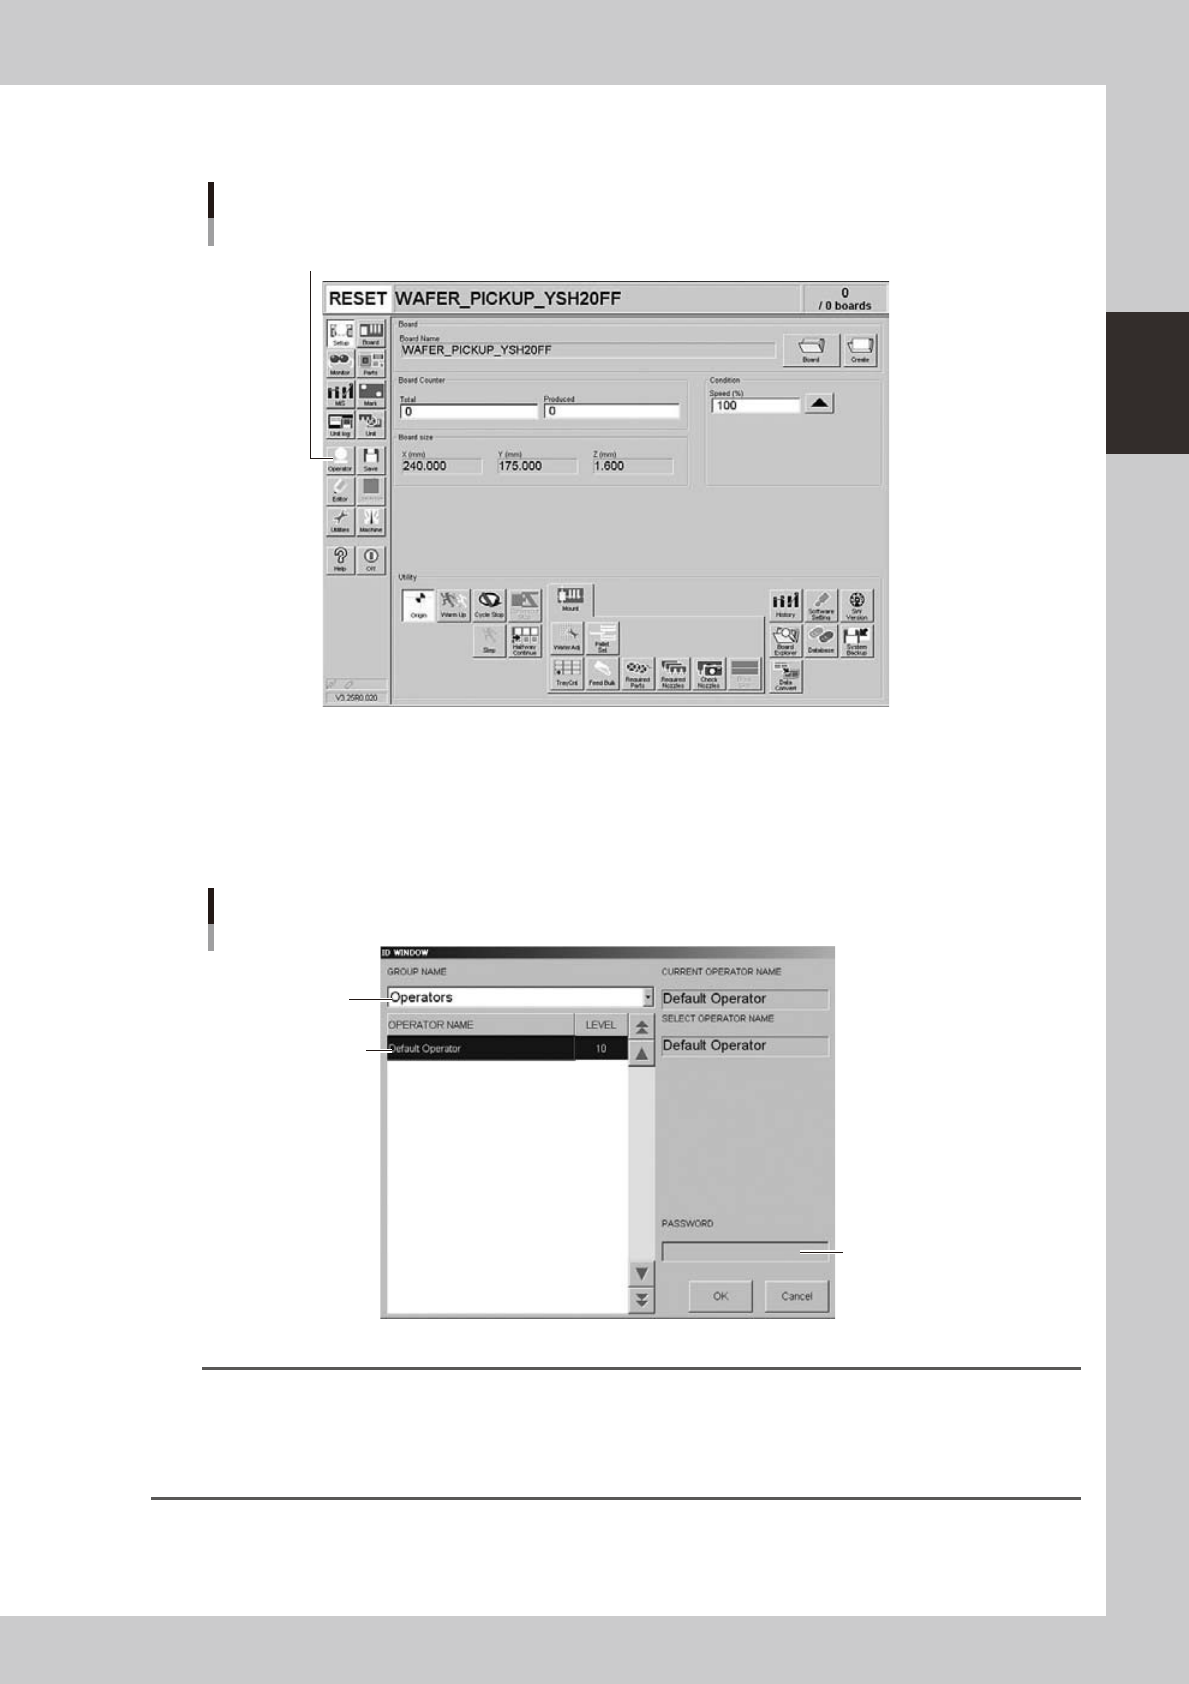
Press the [Operator] button.
The ID WINDOW dialog box appears for specifying the operator.
Press the [Operator] button to open the ID WINDOW.
[Operator] button
24214-H0-00
4
Specify the operator and enter the password.
As needed, the operator "Administrator" or "Operator" can be selected from the GROUP NAME list.
Select the group name and operator name, enter the password, and press the [OK] button. (Just press
the [OK] button if no password is set.) When the password is matched, the initial screen (Setup screen
before selecting a board) appears.
Select group name.
Enter password.
Select operator name.
Specifying the operator
24215-H0-00
TIP
Active menu buttons differ depending on the operation level setup. For example, when the machine is turned on with
the factory setup, the program starts up at an operation level called "Default Operator". This "Default Operator" level is
set to "Level 0" at the time of shipment to allow only basic operation items. This operation level can be changed as
needed. Operators and operation items can also be added and specified by setting the password and operation
level.
2-22
2
asic operation
3.3 Warming up the machine
After starting up the machine, we recommend warming it up for about 10 minutes in most cases. If less than
two hours has elapsed after the machine was last used, no warm-up is necessary.
1
Make pre-operation checks and then start up the machine.
For pre-operation checks and starting up the machine, see "3.1 Pre-operation check" in this chapter.
2
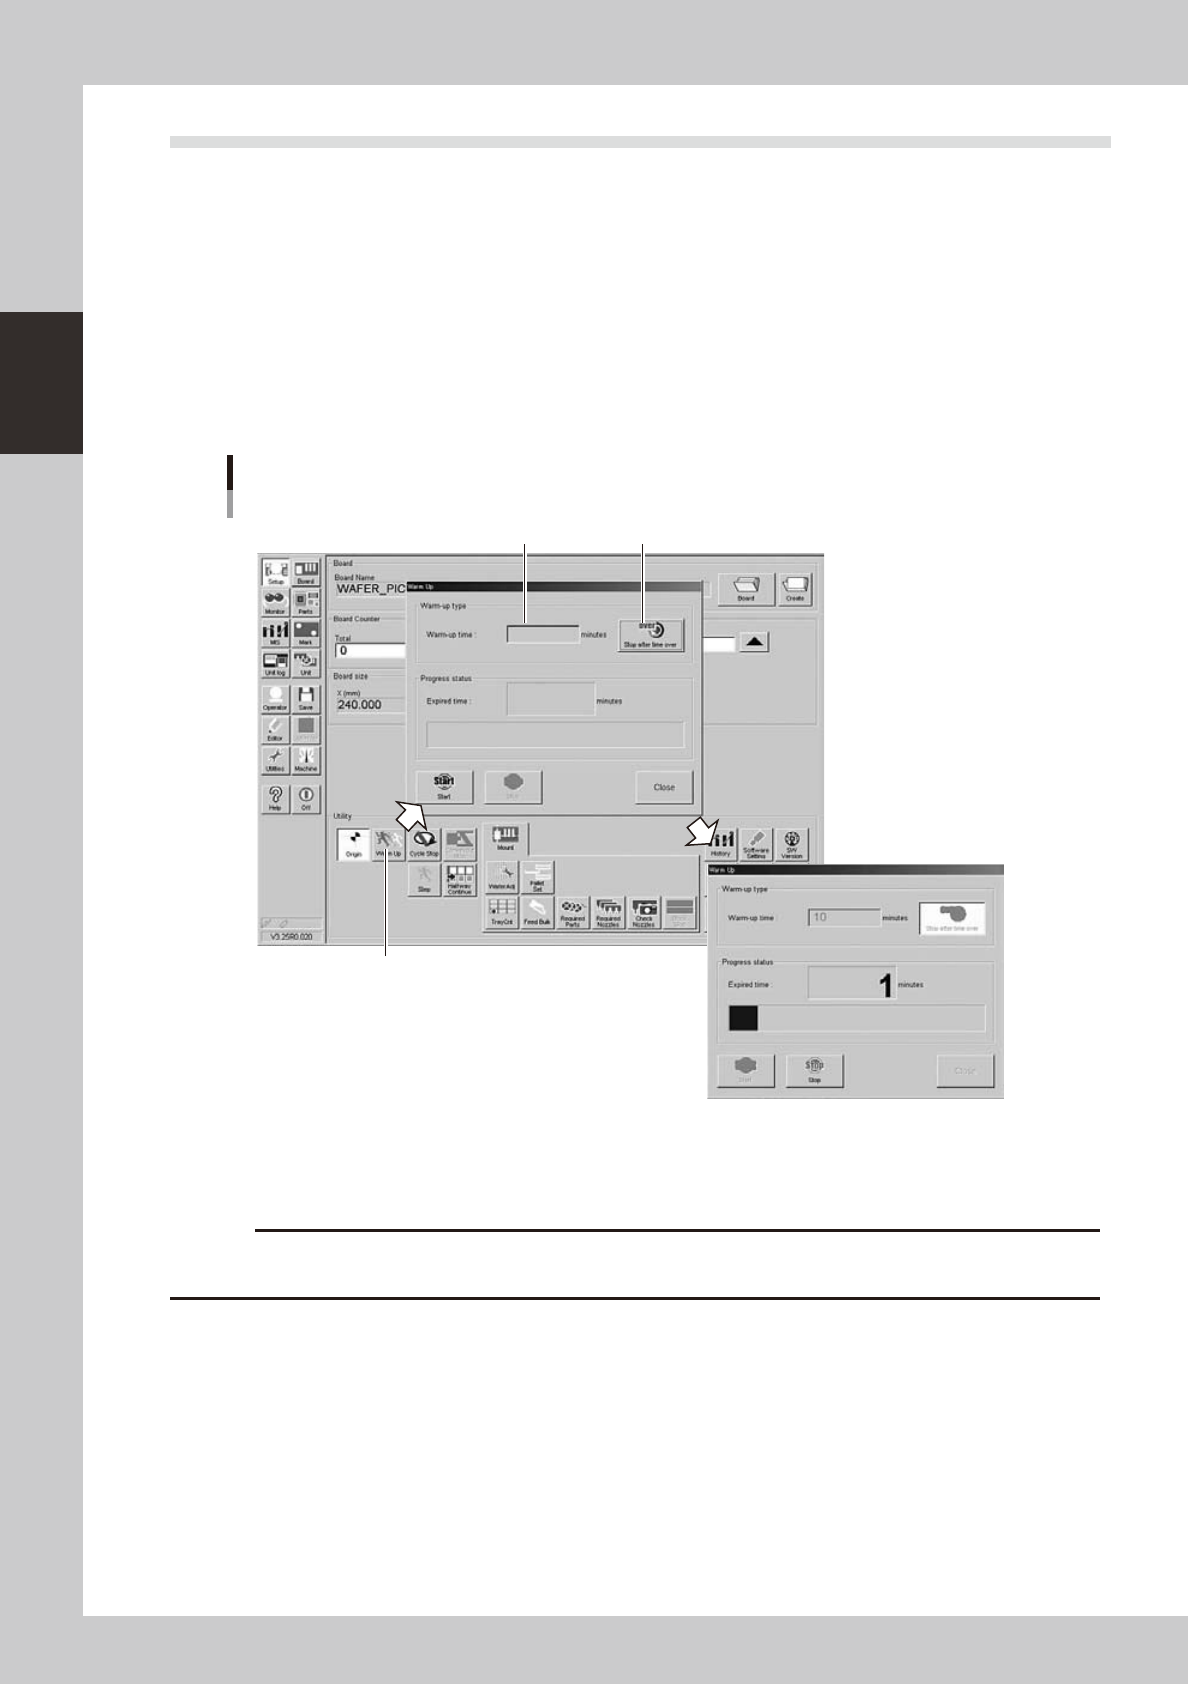
Press the [Warm Up] button on the Setup screen.
The Warm-up screen then appears.
3
Enter a warm-up time.
Press the [Stop after time over] button and enter the warm-up time. Warm-up will automatically stop
when the warm-up time you set has elapsed. Normally, about a 10-minute warm-up is sufficient.
Press this button to open the "Warm-up" screen.
Warm-up time setting
Press this button to enable warm-up time entry.
Screen showing warm-up
in progress
Enter warm-up time.
24216-H0-00
4
Press the [Start] button to start warm-up.
The warm-up progress time and status will appear under the "Progress status".
c
the problem and eliminate it.
5
Finish the warm-up.
Warm-up will automatically stop when the warm-up time you set is reached. Press the [Close] button,
and return to the previous screen.
2-23
2
asic operation
3.4 Conveyor unit setup flow
When the board type to be produced is changed, the conveyor unit setup must be adjusted, and other parts
prepared to match that board type. This section describes how to change the conveyor unit setup.
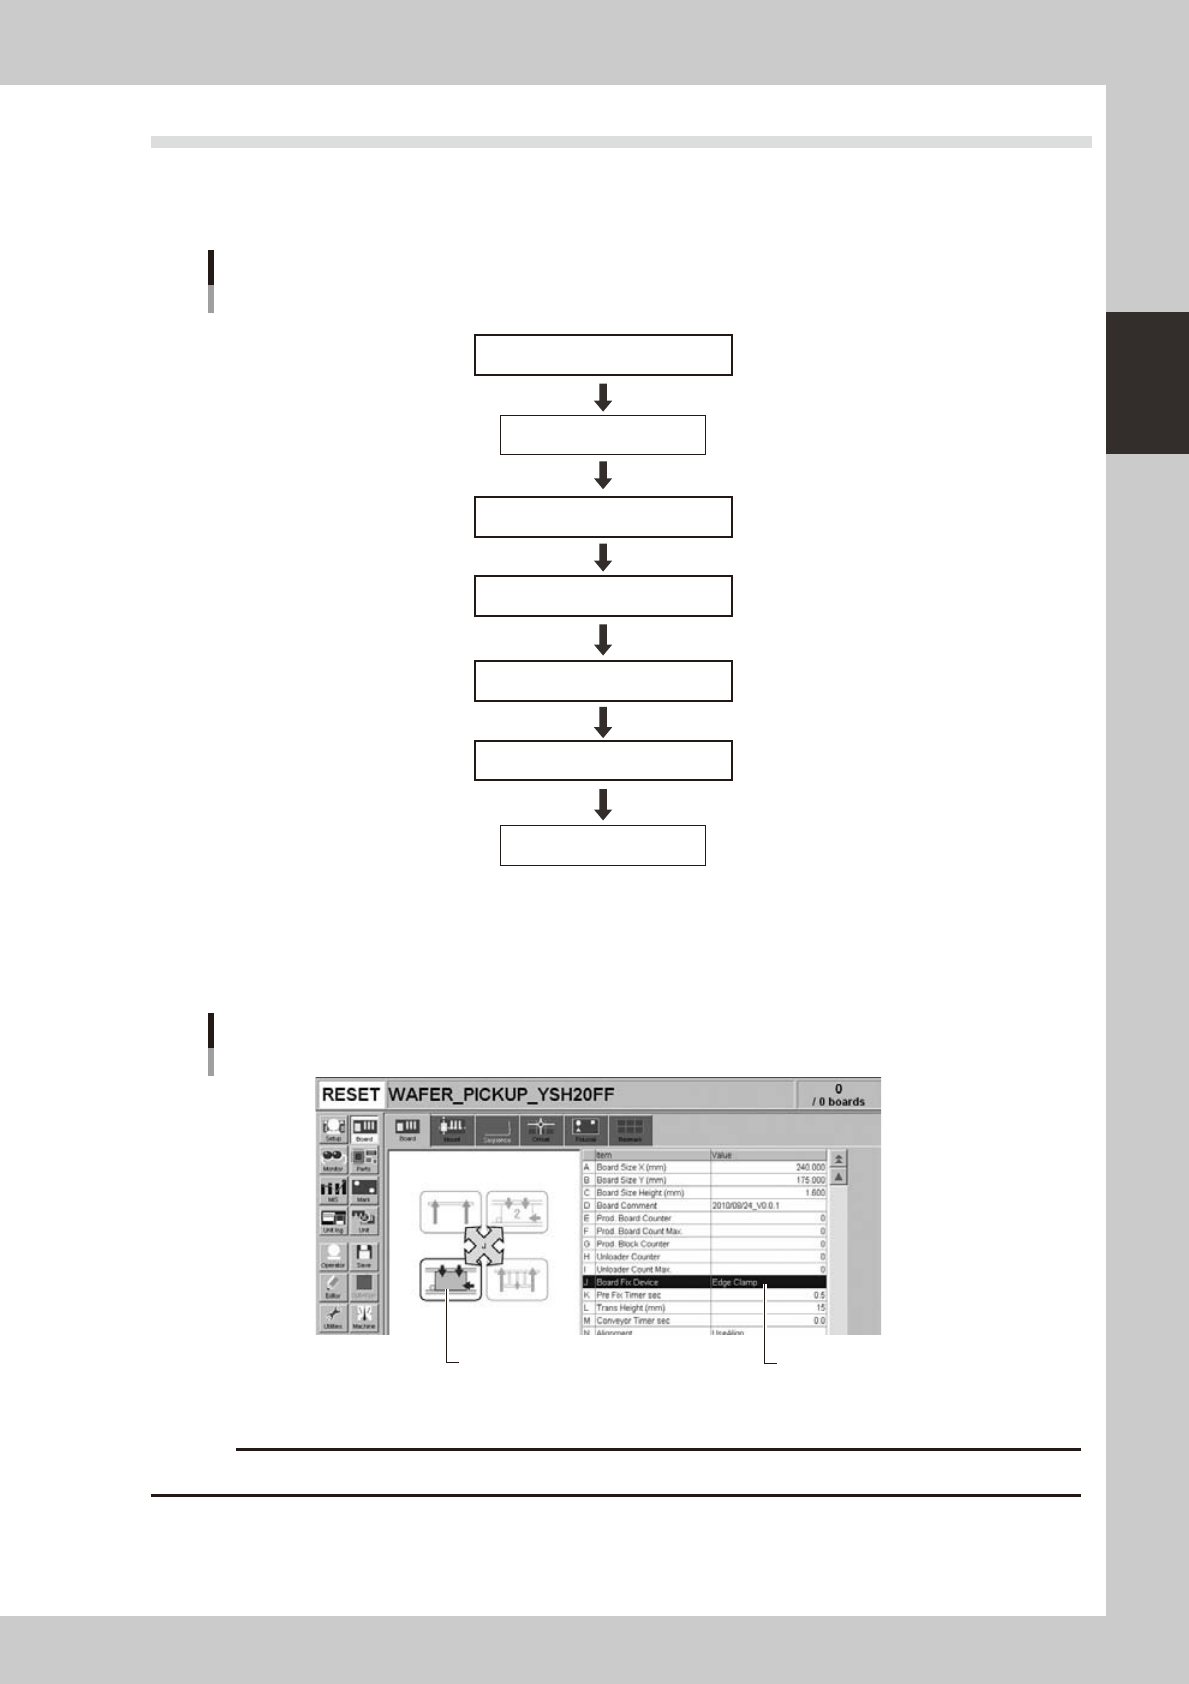
Set up the conveyor units as shown in the flowchart below.
Adjust conveyor width
Set board on conveyor
Adjust board hold plates
Press [Width] button.
Raise push-up plate.
Raise push-up plate.
Lower push-up plate.
Lower push-up plate.
Check that board is clamped securely
Remove board
Press emergency stop button
Cancel emergency stop
Setup flow
Conveyor
23203-H0-00
Board clamping method
Usually "Edge Clamp" method is used to clamp a board in the work position by pushing its edges up against the board
hold plates. Use push-up jigs (option) to support the board by pushing it (other than the edges) up from the bottom.
Board clamping method
[Board] tab screen showing board clamping method
Illustration shows how board is clamped
on the conveyor.
24218-H0-00
c
Conveyor's board sensors may fail to detect a production board if it has a slit or cutout.