4OM-1075-002.pdf - 第32页
(9) Head Section Fig. 4A23 Fig. 4A24 A Nozzle Up/Down Linear Guide 1M4 Every Month Cleaning and Lubrication (DAPHNE EPONEX GREASE No. 1) Follow the steps below for the lubrication. (6 places × 2 heads) 1. Wipe off old gr…
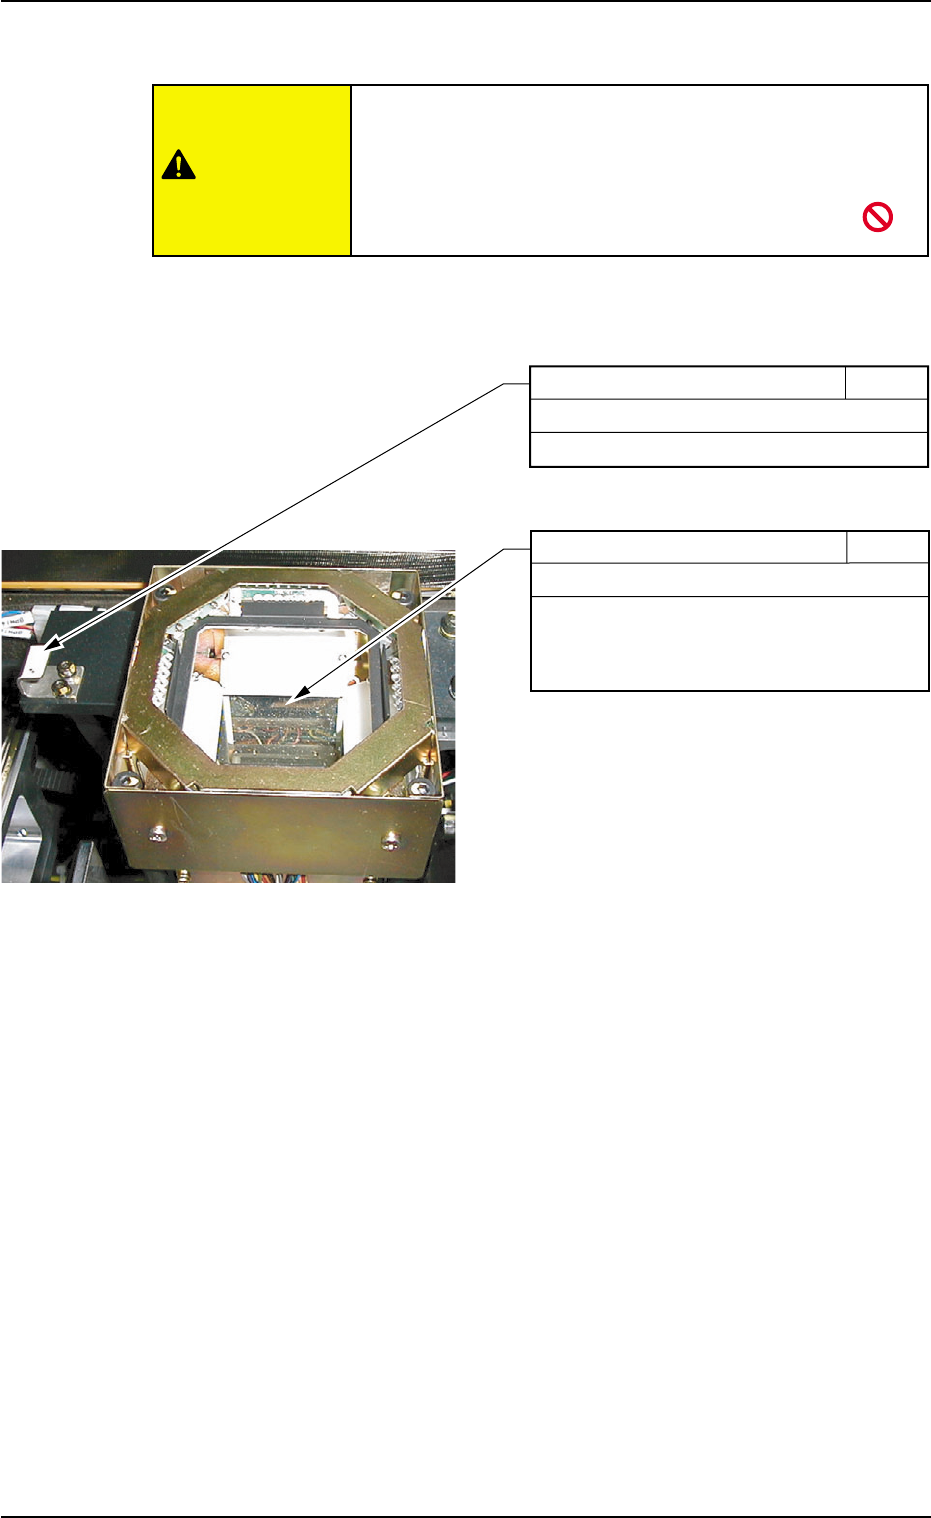
(8) Fixed Camera Section
Do not blow air to this section with an air gun. Instead,
use a suction force such as a vacuum cleaner.
If the plate is kept dirty and dusty, recognition many not
be performed correctly.
Fig. 4A22
Upper Surface of Fiducial Mark 1W8
Every Week Cleaning
Wipe off dirt and dust with a rag.
Upper Surface of Fixed Camera 1W7
Every Week Cleaning
Pick up the components that have fallen
with a pair of vacuum tweezers and wipe
off dust with a lens cleaning cloth.
0308-004 1-18 AHB01ETRP
1.3 Maintenance Spots
CAUTION
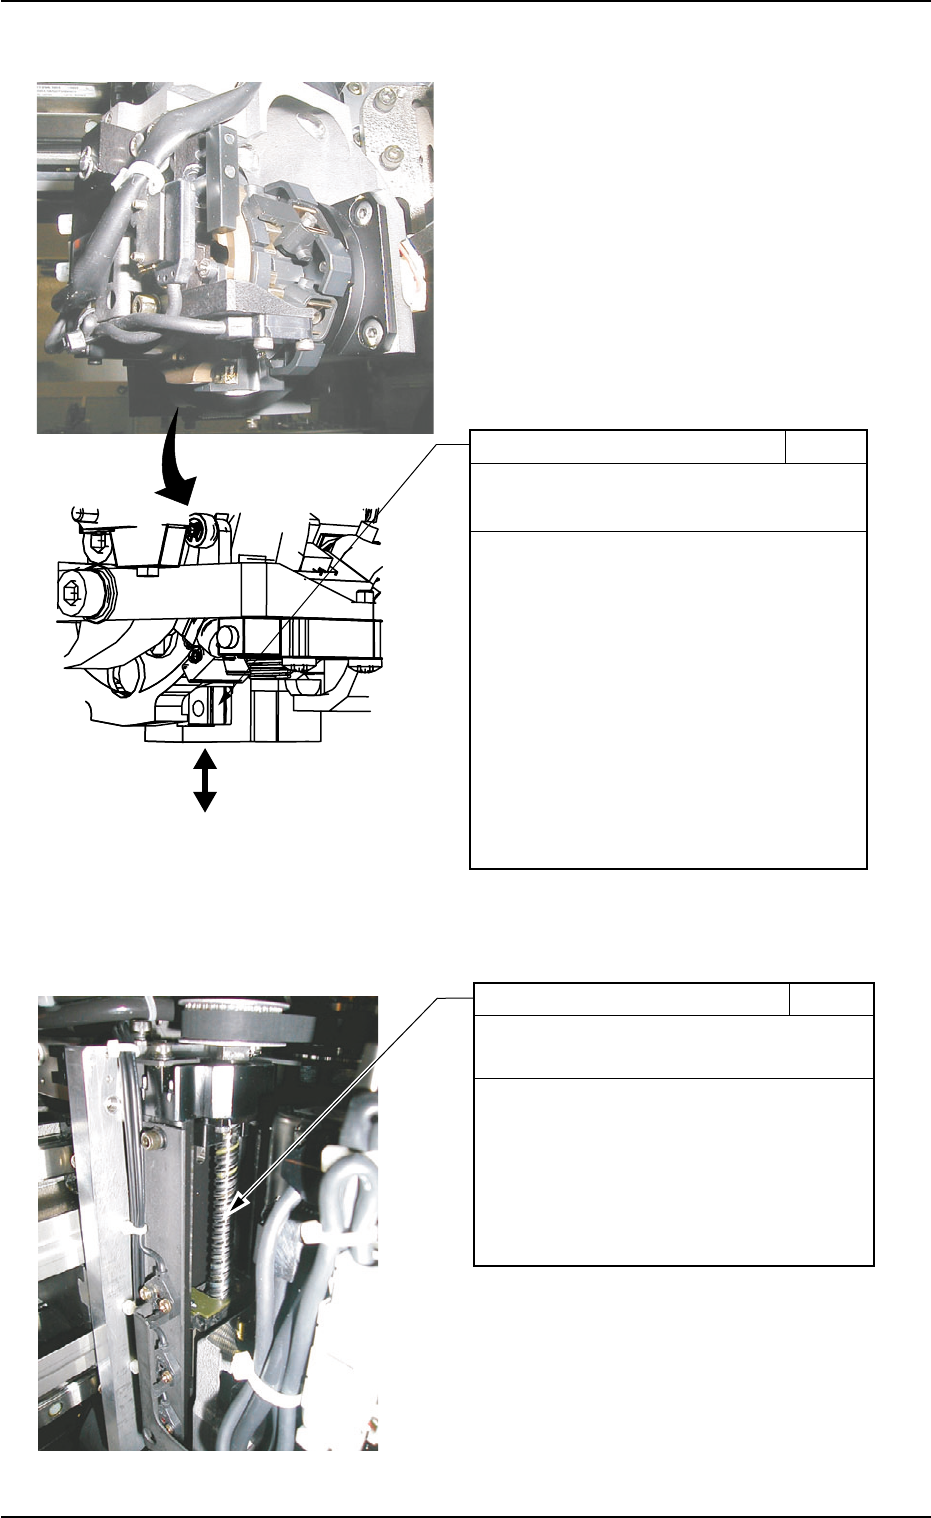
(9) Head Section
Fig. 4A23
Fig. 4A24
A
Nozzle Up/Down Linear Guide 1M4
Every Month Cleaning and Lubrication
(DAPHNE EPONEX GREASE No. 1)
Follow the steps below for the lubrication.
(6 places × 2 heads)
1. Wipe off old grease with a cotton swab
and supply a little amount of new one to
the guide with a grease applicator.
2. Move the arrow-marked part "A" up and
down to smooth out the grease.
3. Wipe off excess grease.
* Take ample care not to leave the waste
threads after cleaning.
1.3 Maintenance Spots
0308-004 1-19 AHB01ETRP
Linear Guide of Head 3M5
Every 3 Months Cleaning and Lubrication
(DAPHNE EPONEX GREASE No. 1)
Follow the steps below for the lubrication.
Wipe off old grease with a rag and supply
new one with an injector.
* Take ample care not to leave the waste
threads after cleaning.
0308-004 1-20 AHB01ETRP
1.3 Maintenance Spots
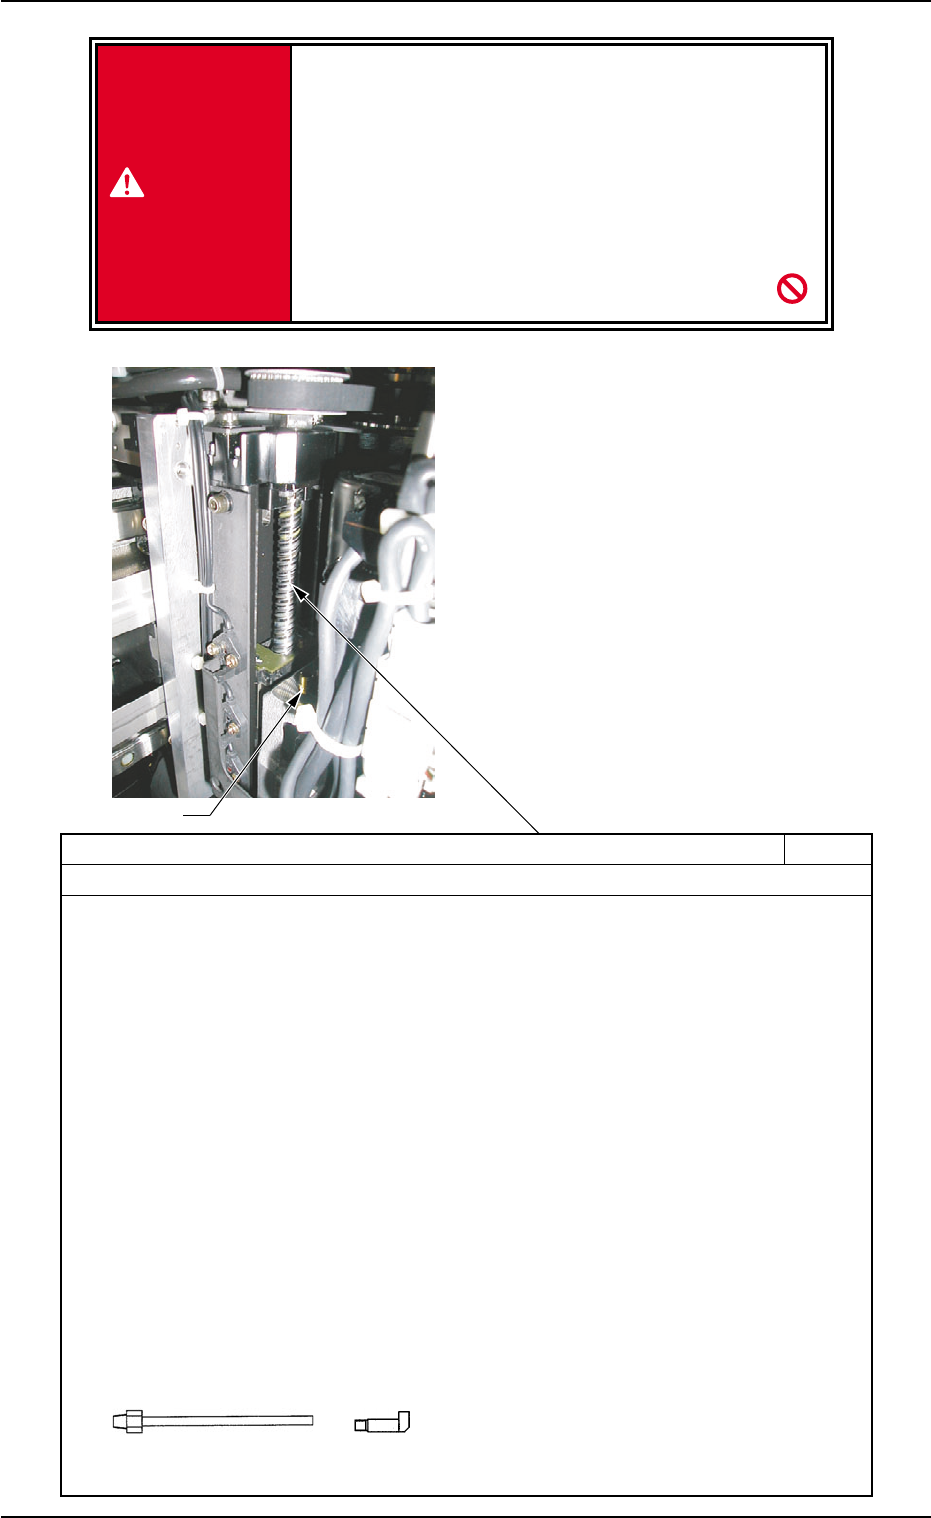
Ball Screw 3M6
Every 3 Months Cleaning and Lubrication (DAPHNE EPONEX GREASE No. 1)
Follow the steps below for the lubrication.
1. Turn on the power supply and the air source of the machine.
2. Store all nozzles in the nozzle stockers.
3. Open the "Zeroing Opn." tab sheet and perform the zeroing operation for all devices.
(Operation Sequence: [MAINT.] Button → [MNL OPN.] Button → "Zeroing Opn." Tab)
4. Open the "Manual Axis Opn." tab sheet and move the heads to the following positions.
(Operation Sequence: [MAINT.] Button → [MNL OPN.] Button → "Manual Axis Opn." Tab)
Beam X1 Axis: -500 mm (-500000 P)
Beam X2 Axis: -880 mm (-880000 P)
Beam Y Axis: -880 mm (-800000 P)
Head #1 Up/Down Axis: +25 mm (+10000 P)
Head #2 Up/Down Axis: +25 mm (+10000 P)
5. Turn off the power supply and the air source of the machine.
6. Inject a proper amount of "DAPHNE EPONEX GREASE No. 1" from the grease nipples of
Heads #1 and #2.
Use the U+N-type attachment.
7. Turn on the power supply and the air source of the machine.
8. Move the heads up and down to smooth out the grease.
9. Turn off the power supply and the air source of the machine.
10. Wipe off the grease collected at the lower area of the ball screw.
* Take ample care not to leave the waste threads after cleaning.
* Use the U- and S-type attachments.
Grease should be applied every 3 months after the initial month.
U Type S Type
Nipple
Fig. 4A25
• Don't do any cleaning and lubrication work with the
power turned "ON".
Be sure to turn off the power before starting any
cleaning and lubrication work.
When the machine malfunctions, you may be
trapped in the moving mechanism and it may re-
sult in a major injury.
Note that only one person should be in
charge of lubrication work.
DANGER