00196614-03_AI_Vakuumpumpe_SXDX12_de_en.pdf - 第124页
Maintenance Maintenance Tasks for Vacuum Pump 4.1.5 Final work 124 Vacuum Pump Vakuumpumpe 4.1.5 4 . 1 . 5 F in a l w o r k Final work ► Installation is performed by fo llowing the above instructions i n the r everse ord…

Maintenance
4.1.4 Performing Maintenance Tasks Maintenance Tasks for Vacuum Pump
Vacuum Pump Vakuumpumpe 123
4.1.4.1
4.1.4.1 Checking/Replacing the Filter Insert
Checking/Replacing the Filter Insert
► Open the edgewise retaining clamp of the filter casing
and remove the cap.
► Remove the vacuum filter (1).
► Check the vacuum filter and replace it, if necessary
(filter insert [03077677-xx]).
Maintenance
Maintenance Tasks for Vacuum Pump 4.1.5 Final work
124 Vacuum Pump Vakuumpumpe
4.1.5
4.1.5 Final work
Final work
► Installation is performed by following the above instructions in the reverse order. Also observe the
following instructions:
Compone nt Supply - Manual Tables - Fitting Pr otections - SW Version
SXDX12V1V2 – Tape Cutter – Waste Tape Chute – Pay Attention to the Plastic Strips – SW Version
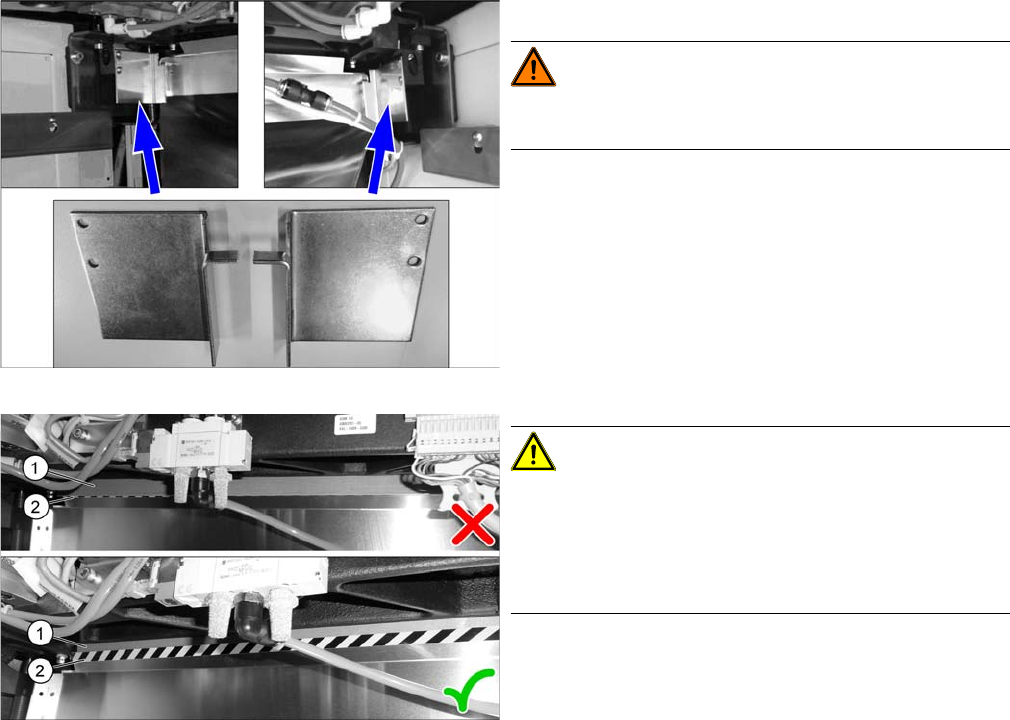
Manual tables only:
WARNING! There is a risk of injury on manual
tables without the two protections.
► Fit the two protections.
CAUTION!
Make sure that the plastic strips (1) (if present) are locat-
ed behind the plate (2) when you hook up the used tape
chute.
The black-yellow hatched label must be completely visi-
ble.
Appendix
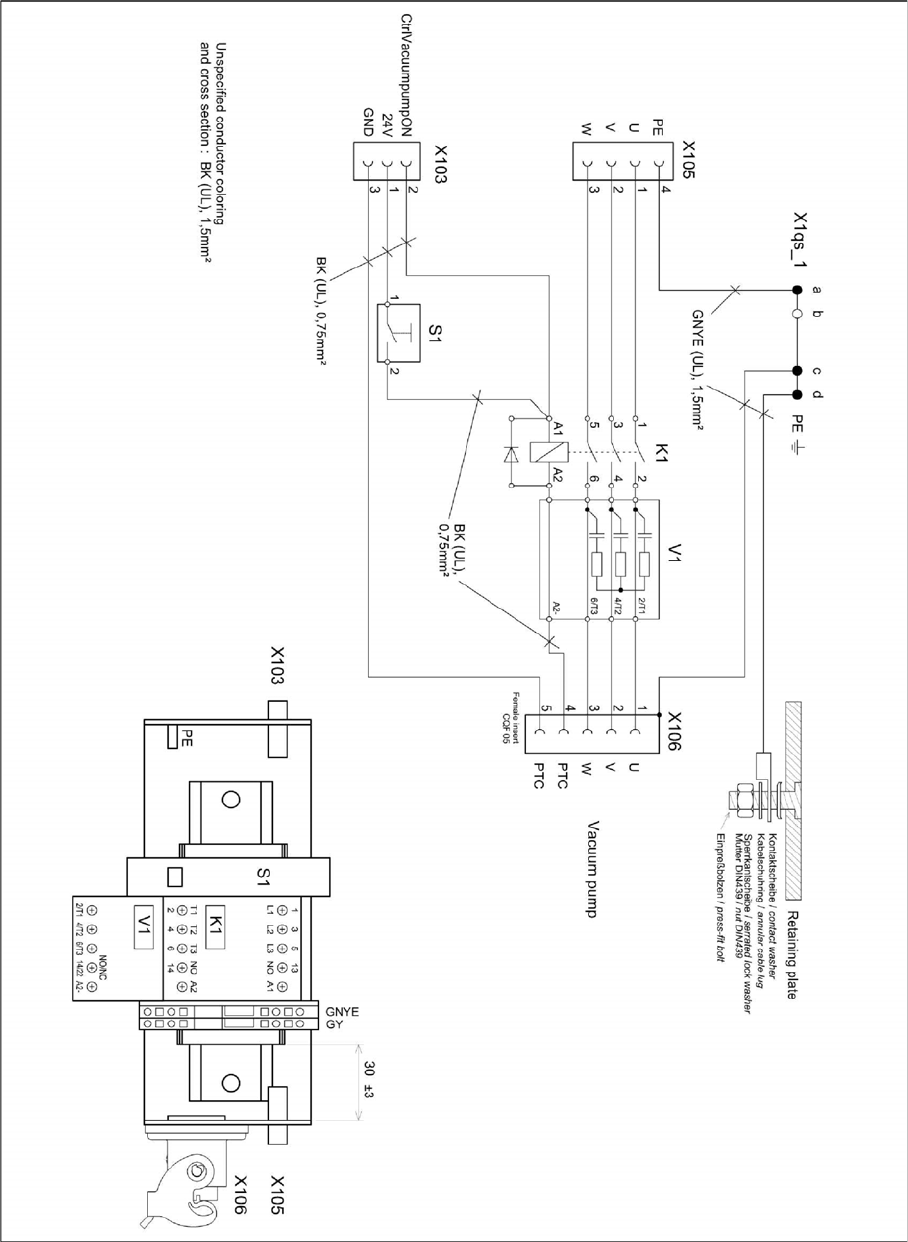
Circuit Diagram for Vacuum Pump Connection Unit SX1/SX2 (Machines up to No.
Vacuum Pump Vakuumpumpe 125
5
5 Appendix
Appendix
5.1
5.1 Circuit Diagram for Vacuum Pump Connection Unit SX1/SX2 (Machines up to No. Mxxx)
Circuit Diagram for Vacuum Pump Connection Unit SX1/SX2
(Machines up to No. Mxxx)