00198281-02_JG SmartFeeder 24-104 mm X_EN.pdf - 第11页
Operating the Feeder Module - Feeder Log Off and Removal 11 www.asm-smt.com 1.7 Feeder Log Off and Removal 1. Press the back of the removal handle. This handle will protrude and trigger the log off procedure. Once the st…

Operating the Feeder Module - Feeder Setup and Log On
10
www.asm-smt.com
1.6 Feeder Setup and Log On
1. Place the feeder module on the
changeover table.
Attention:
When placing the feeder module, make
sure that the slider guide of the feeder
module fits properly in the Omega profile
of the track on the changeover table.
If the feeder module is not placed prop-
erly, the pickup window can be damaged
during insertion.
2. Carefully push the feeder module into the
changeover table, as far as the stop.
3. If the removal handle is still out, push it
into the feeder module.
4. The feeder is now logged on.
Operating the Feeder Module - Feeder Log Off and Removal
11
www.asm-smt.com
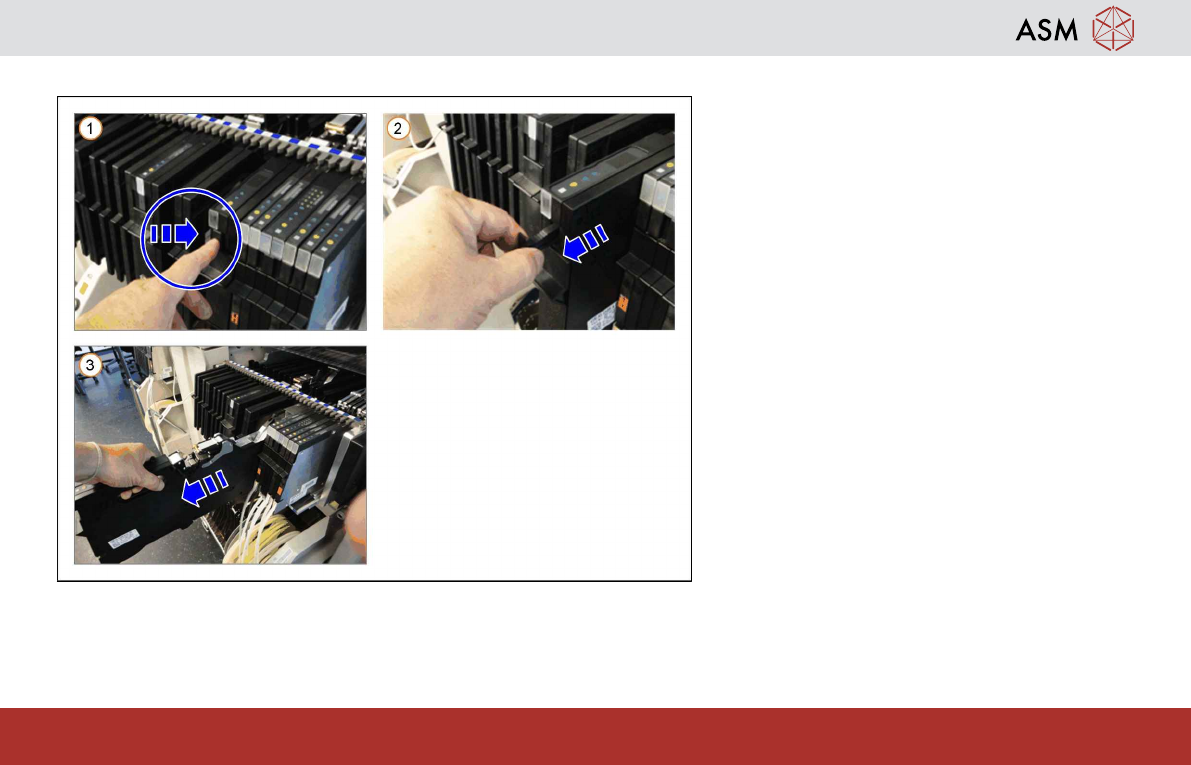
1.7 Feeder Log Off and Removal
1. Press the back of the removal handle.
This handle will protrude and trigger the
log off procedure.
Once the status displays have gone off,
remove the feeder module from the
changeover table.
2. Use the removal handle to pull the feeder
module a little bit out of the component
table.
3. Use the handle to pull the feeder module
completely out of the component table.
Operating the Feeder Module - Preparing the Tape Material
12
www.asm-smt.com
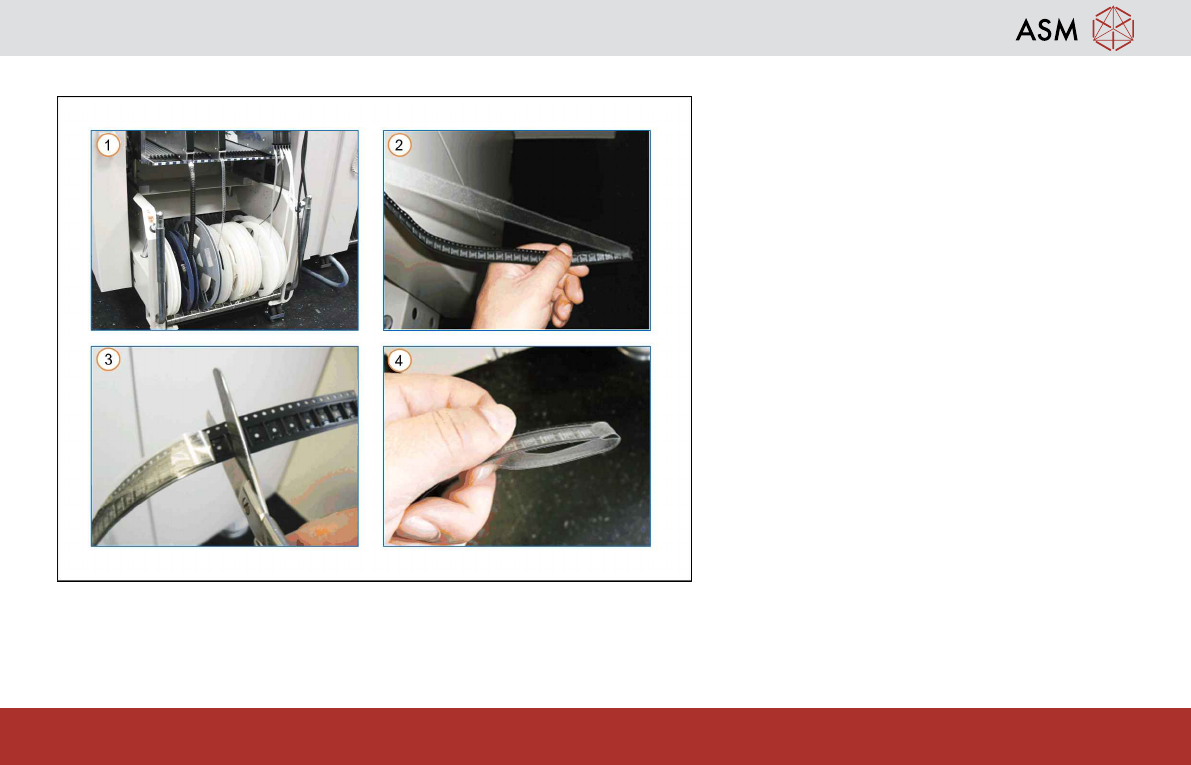
1.8 Preparing the Tape Material
Prepare the tape with enough (approx. 35 cm)
protruding cover foil.
1. Insert the tape reel into the tape con-
tainer. Use a spindle, if required.
2. Remove as much of the protruding foil as
needed to leave only a few empty tape
pockets.
3. Cut the end of the empty tape.
4. Fold the protruding cover foil over down-
wards.