00198281-02_JG SmartFeeder 24-104 mm X_EN.pdf - 第15页
Operating the Feeder Module - Setting the Pickup Position 15 www.asm-smt.com 1.11 Setting the Pickup Position The SmartFeeders 24-104mmX have 1 pickup position each, indicated by a marking on the pickup window (A) . …
Operating the Feeder Module - Inserting the Tape
14
www.asm-smt.com
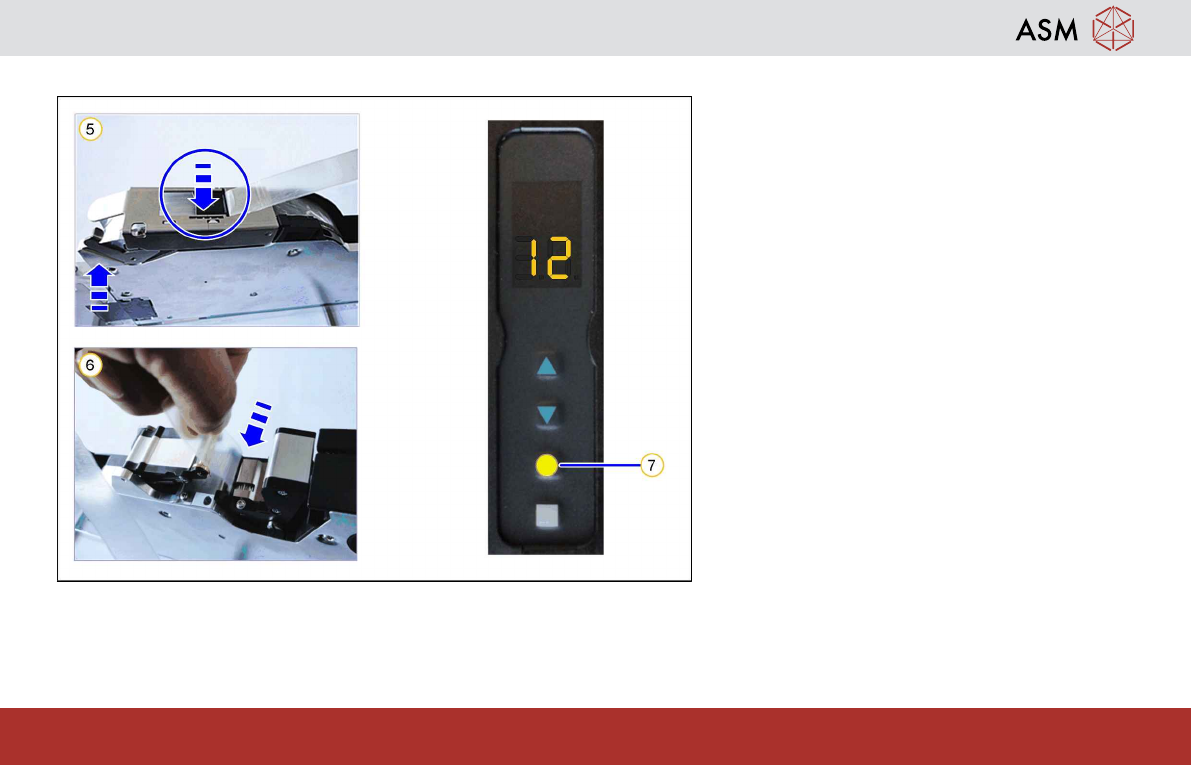
1.10 Inserting the Tape
5. Bring the pickup window down again.
Make sure that one hole of the tape each is
correctly fixed by a pin of the pin wheel.
6. Thread the cover foil into the foil removal.
7. Press the yellow FOIL button. The foil
removal starts and the cover foil gets
pulled in.
Note:
Take care that the cover foil is exactly on the
foil rocker. The foil motor will be deactivated
when the cover foil is tight on the foil rocker.
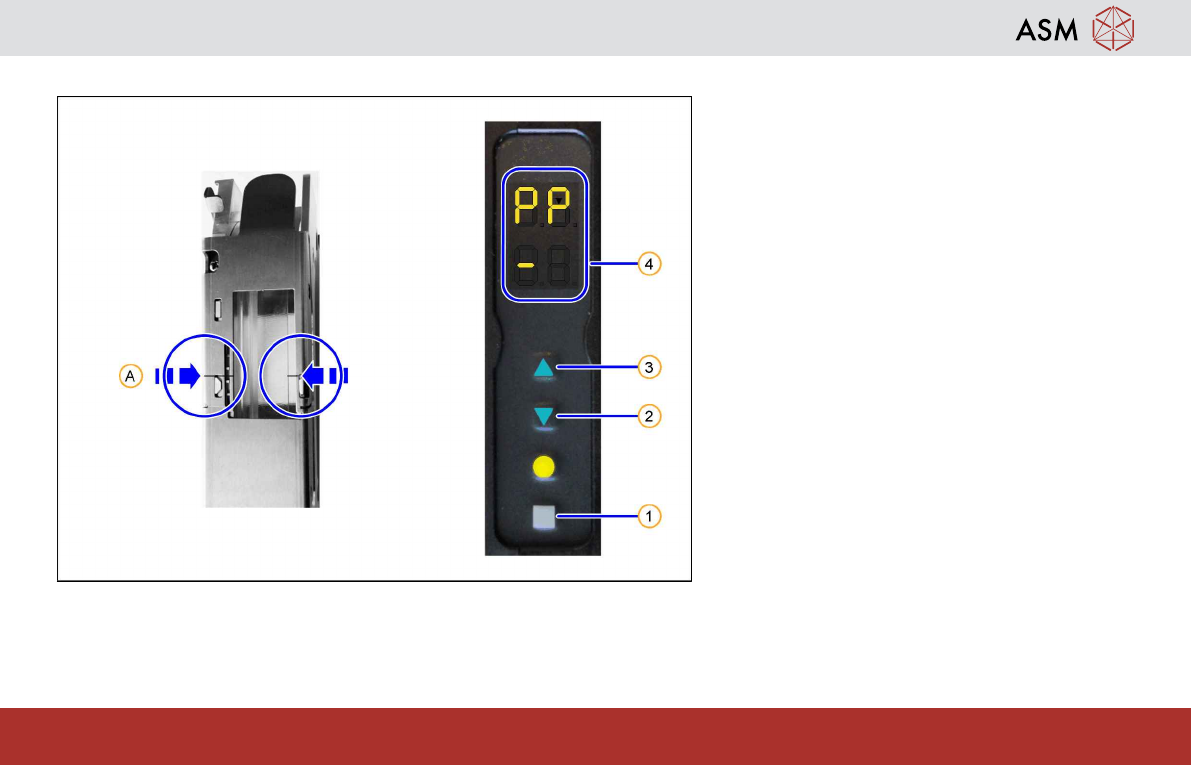
Operating the Feeder Module - Setting the Pickup Position
15
www.asm-smt.com
1.11 Setting the Pickup Position
The SmartFeeders 24-104mmX have 1
pickup position each, indicated by a marking
on the pickup window (A).
1. Press the gray SET button (1) repeatedly
until the characters "PP" (Pick Position)
are displayed in the upper half of the dis-
play.
2. Set the pickup position by pressing the
FORWARDS button(3) or the BACK-
WARDS button(2) briefly.
To confirm the changed position, the dis-
played "-"(4) changes with each pressure
from the left to the right or back again.
Notice:
Adjust the pickup position until the center of the
component is at the pickup position.
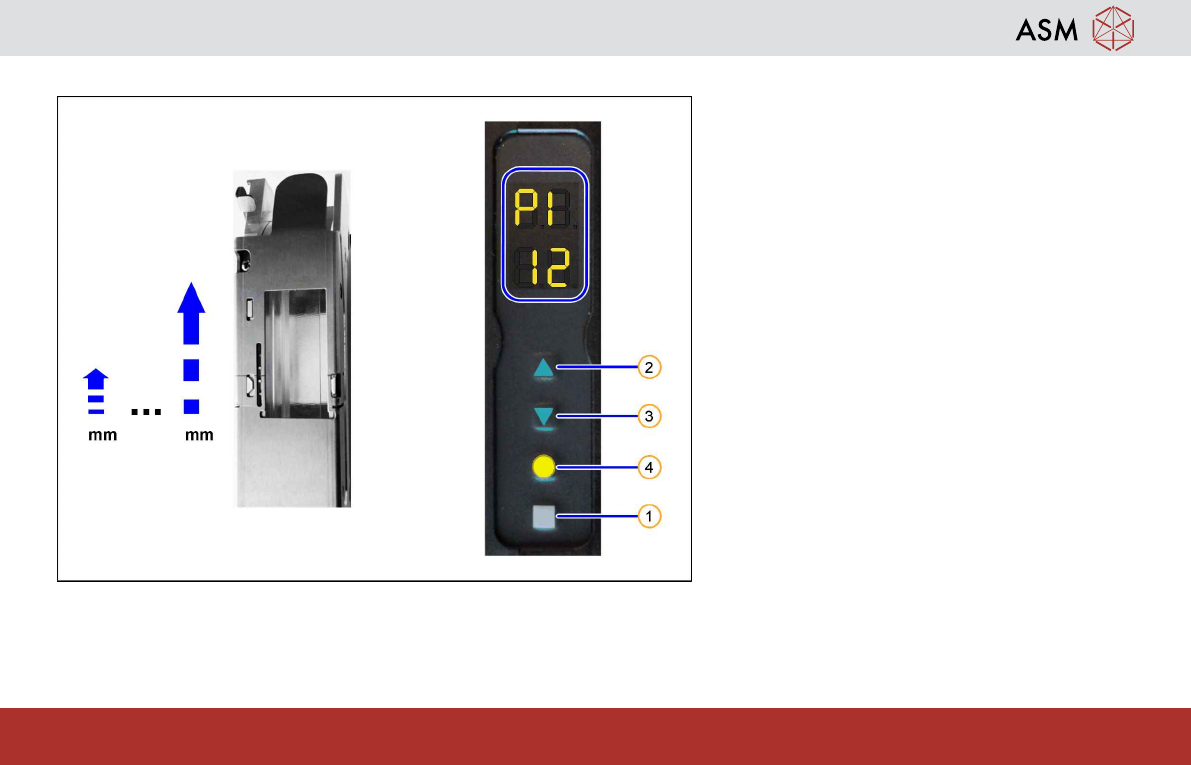
Operating the Feeder Module - Setting the Pitch
16
www.asm-smt.com
1.12 Setting the Pitch
1. Press the gray SET button (1) repeatedly
until the characters "PI" (PITCH) are dis-
played.
The adjusted pitch is displayed in the
lower part of the display.
2. Press the FORWARDS button (2) to in-
crease the pitch.
3. Press the BACKWARDS button (3) to re-
duce the pitch.
4. Press the gray SET button (1) briefly to
save the setting and switch over to the
next menu.
5. Press the yellow FOIL button(4) to save
the setting and switch back to the previ-
ous menu.
Possible pitches (in 4 mm steps):
24 mm X: 4mm … 32mm
32 mm X: 4mm … 40mm
44 mm X: 4mm … 52mm
56 mm X: 4mm … 64mm
72 mm X: 4mm … 80mm
88 mm X: 4mm … 96mm
104 mm X: 4mm … 96mm