00198281-02_JG SmartFeeder 24-104 mm X_EN.pdf - 第30页
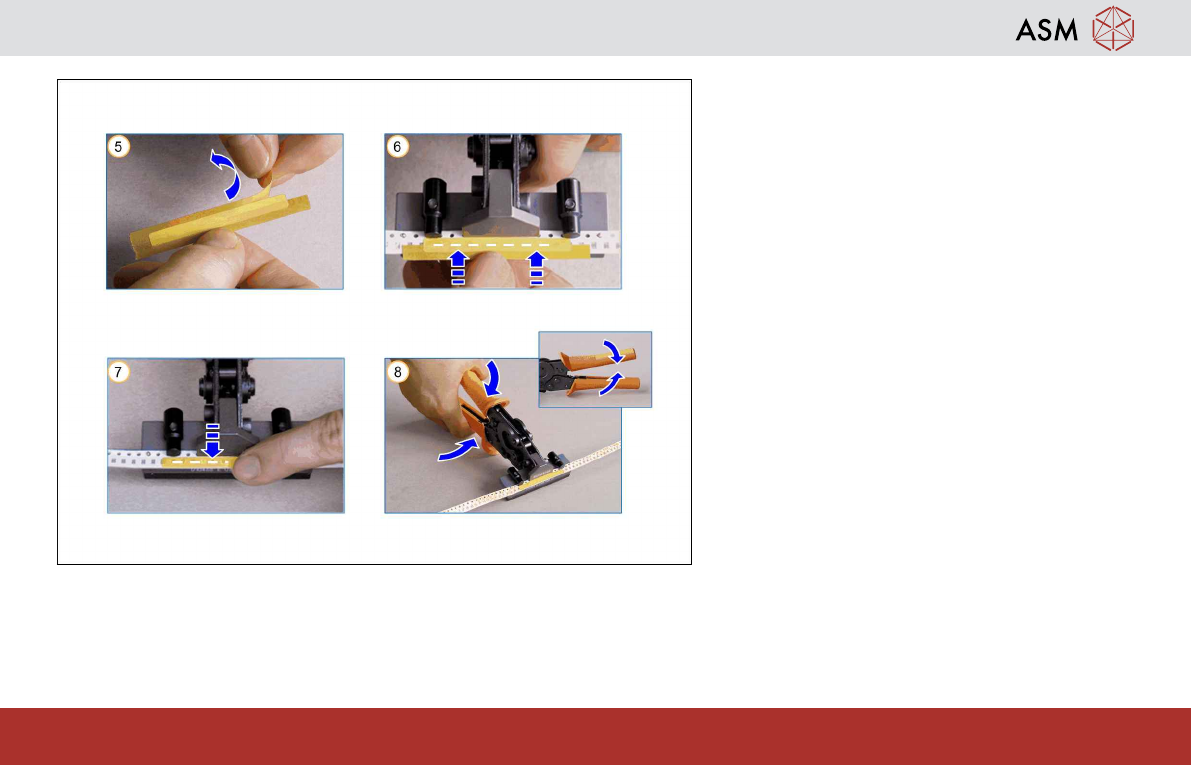
Splicing - Splicing Narrow Tapes 30 www.asm-smt.com 1. Remove one half of the protector strip. Attention : Do not touch the sticky surface! 2. Lay the adhesive strip on top of the com- ponent tape and press firmly 3. Rem…
Splicing - Splicing Narrow Tapes
29
www.asm-smt.com
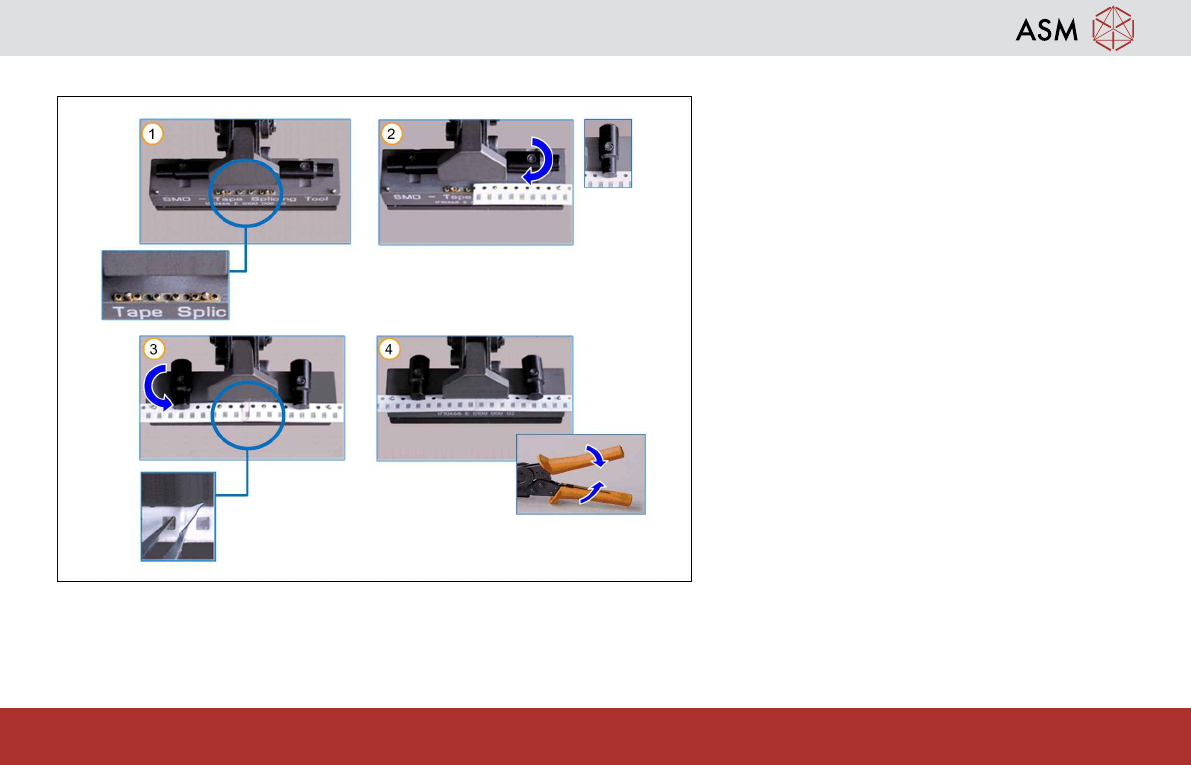
2.4 Splicing Narrow Tapes
1. Place the rivet on the pins, on the prongs.
2. Place the end of the old tape over half of
the rivet and then close the right-hand
locking of the splicing tool, as shown in
the diagram.
3. Place the start of the new tape over the
other half of the rivet and then close the
other locking of the splicing tool. The foil
must protrude over the end of the old
tape, at the top.
4. Crimp the splicing tool, until it audibly
clicks.
Splicing - Splicing Narrow Tapes
30
www.asm-smt.com
1. Remove one half of the protector strip.
Attention:
Do not touch the sticky surface!
2. Lay the adhesive strip on top of the com-
ponent tape and press firmly
3. Remove carefully the second half of the
protector strip and press firmly on the ad-
hesive strip.
4. To finish splicing the tape, press the spli-
cing tool until this releases itself.
Open the locking of the splicing tool afterwards
and remove the tape.
Splicing - Splicing a Wide Tape
31
www.asm-smt.com
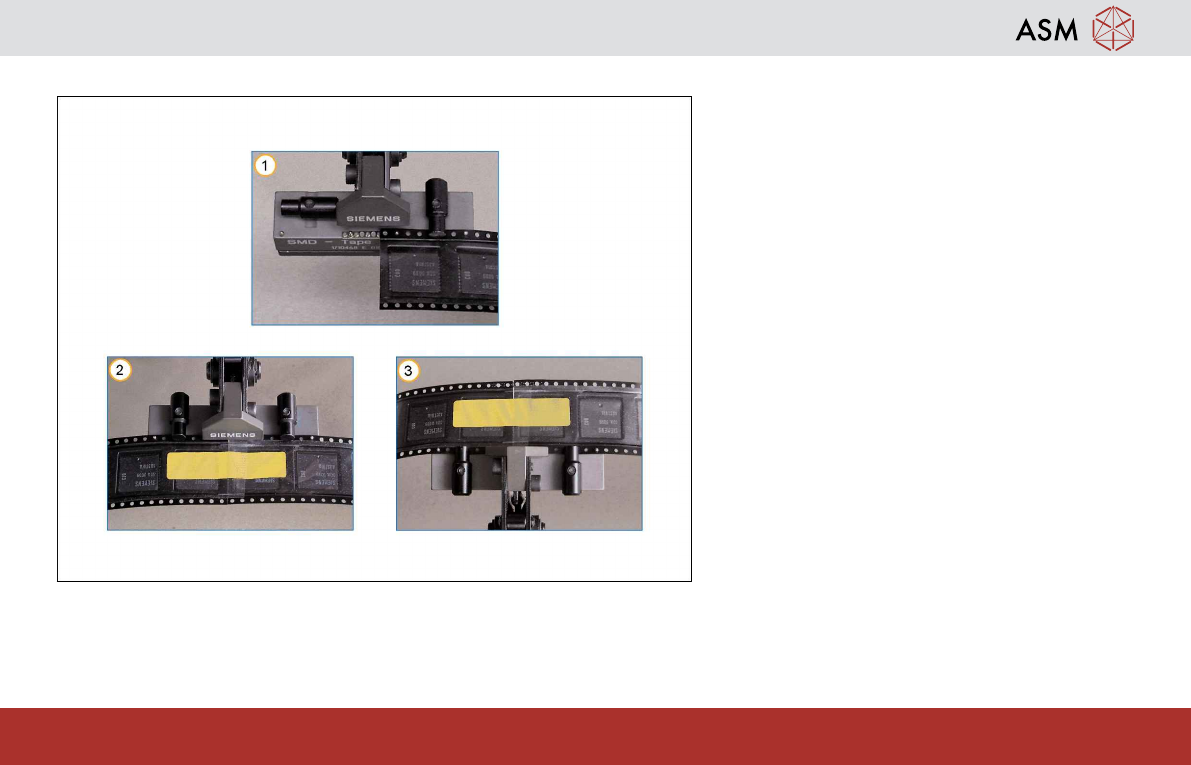
2.5 Splicing a Wide Tape
1. Place the end of the tape over half of the
rivet and then close the right-hand locking
of the splicing tool, as shown in the dia-
gram.
2. First splice one side of the tape, as de-
scribed for the narrow tape. Use a wide
adhesive strip!
3. Place a new rivet into the splicing tool,
turn the tape over and splice the perfora-
tion onto the other side.