00198281-02_JG SmartFeeder 24-104 mm X_EN.pdf - 第34页
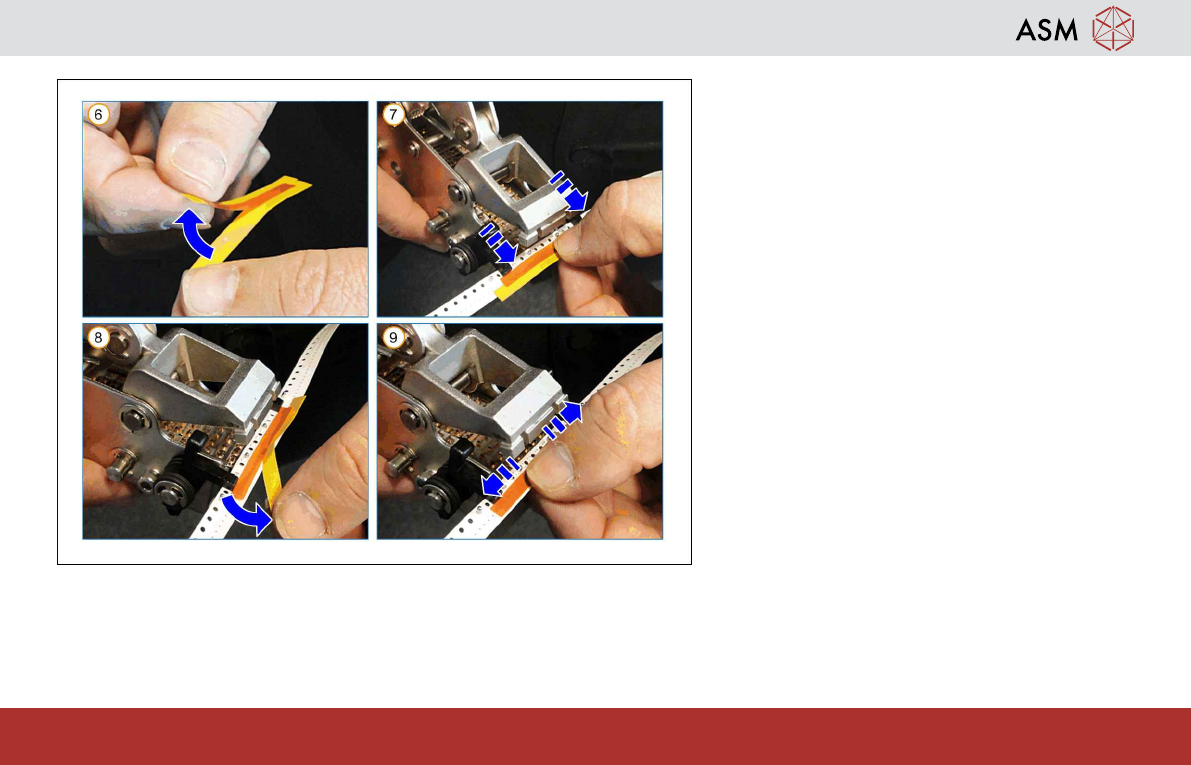
Splicing - Splicing with the Multi-frame Tape Splice Gripper 34 www.asm-smt.com 1. Remove half of the protector strip. Attention : Do not touch the sticky surface! 2. Lay the adhesive strip on top of the com- ponent tape…
Splicing - Splicing with the Multi-frame Tape Splice Gripper
33
www.asm-smt.com
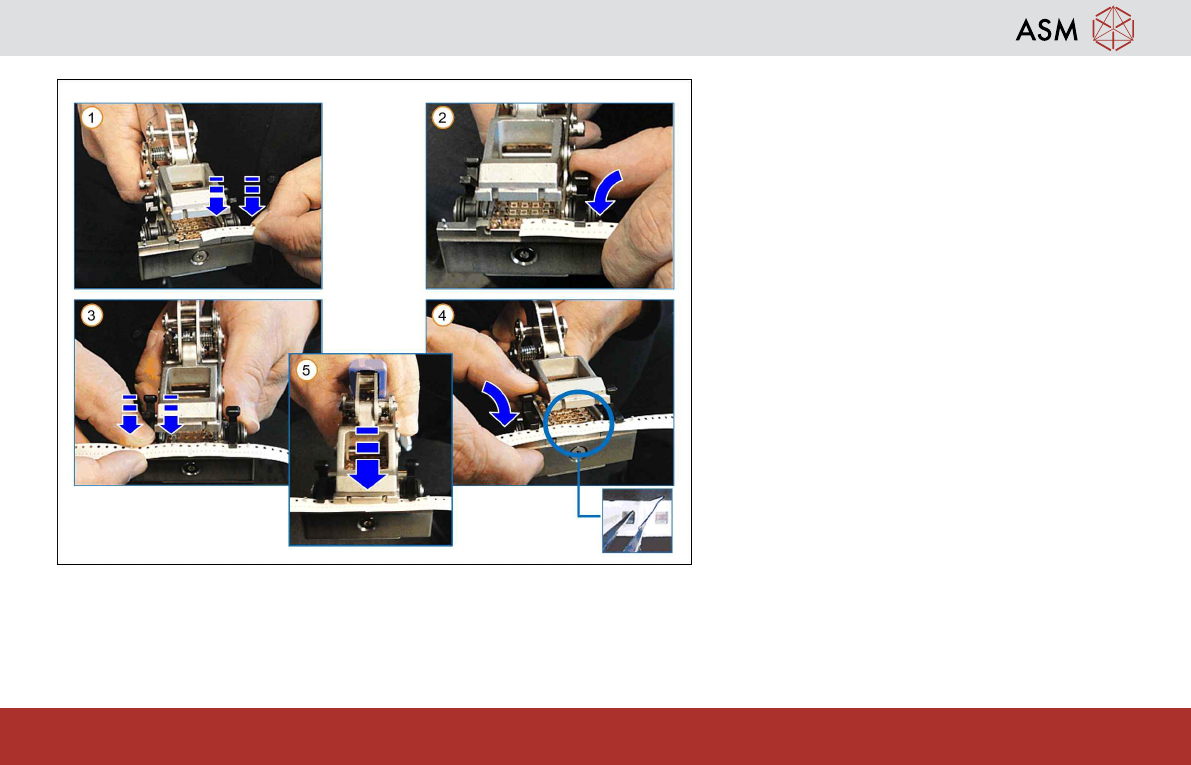
To prepare the ends of the tape, proceed as
described further above.
1. Place the end of the old tape over half of
the rivet.
2. Close the right-hand locking of the multi-
frame tape splice gripper, as shown in the
diagram.
3. Place the start of the new tape over the
other half of the rivet.
4. Close the other locking of the splicing
tool. The foil must protrude over the end
of the old tape, at the top.
5. Press the multi-frame tape splice gripper
firmly together, to close the splicing rivet.
Splicing - Splicing with the Multi-frame Tape Splice Gripper
34
www.asm-smt.com
1. Remove half of the protector strip.
Attention:
Do not touch the sticky surface!
2. Lay the adhesive strip on top of the com-
ponent tape and press firmly
3. Carefully remove the second half of the
protector strip.
4. Press down firmly on the adhesive strip.
Now open both interlocks of the multi-frame
tape splice gripper and remove the tape.

Splicing - Checking the Splicing Point
35
www.asm-smt.com
2.7 Checking the Splicing Point
Identifying correct splicing.
1. If the tape is spliced correctly, the prongs
of the rivet will be visible.
2. Top of a tape (8 mm)
3. Bottom of a tape (8 mm)
4. Top of a tape (24 mm)