00198281-02_JG SmartFeeder 24-104 mm X_EN.pdf - 第28页
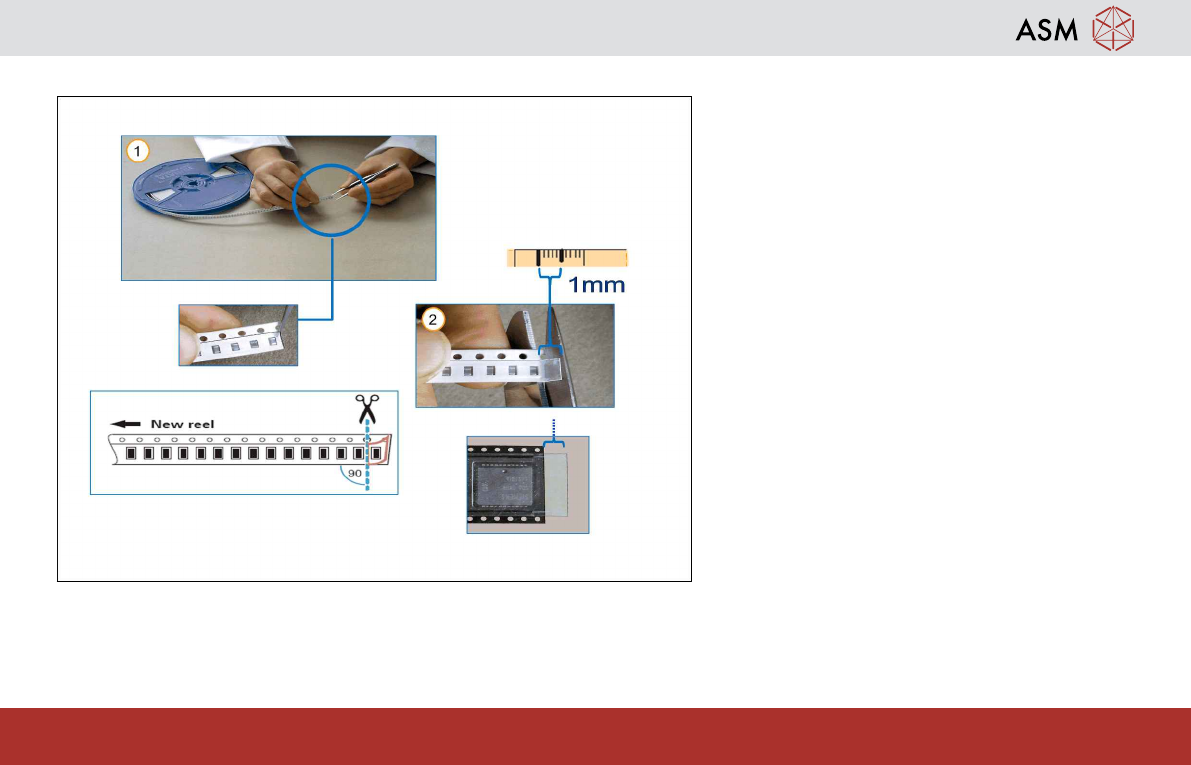
Splicing - Preparing the New Tape 28 www.asm-smt.com 2.3 Preparing the New Tape 1. Peel off the foil (about the width of a com- ponent pocket) towards the back. 2. Cut the tape exactly between two pockets in the middle o…
Splicing - Preparing the Old End Tape
27
www.asm-smt.com
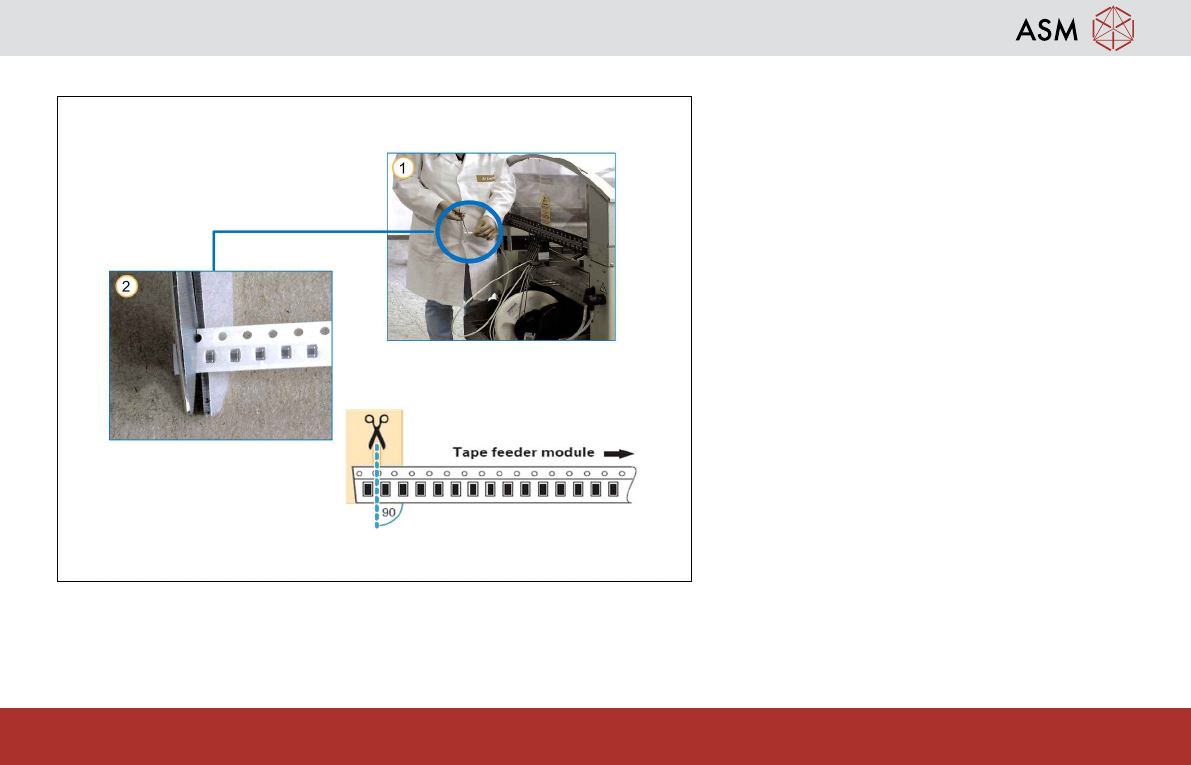
2.2 Preparing the Old End Tape
Old end tape:
1. The tape end protrudes from the feeder
module.
2. Cut carrier tape exactly between two
pockets in the middle of the hole, as
shown in picture. All pockets must be full
to the end of the tape.
Note:
The tape splice must have enough of the old
tape, so that the machine does not need to be
stopped.
Splicing - Preparing the New Tape
28
www.asm-smt.com
2.3 Preparing the New Tape
1. Peel off the foil (about the width of a com-
ponent pocket) towards the back.
2. Cut the tape exactly between two pockets
in the middle of the perforation, as shown
in picture. All pockets must be full to the
end of the tape.
Note:
Make sure that you do not cut the foil, so that
the new and old foils overlap.
Splicing - Splicing Narrow Tapes
29
www.asm-smt.com
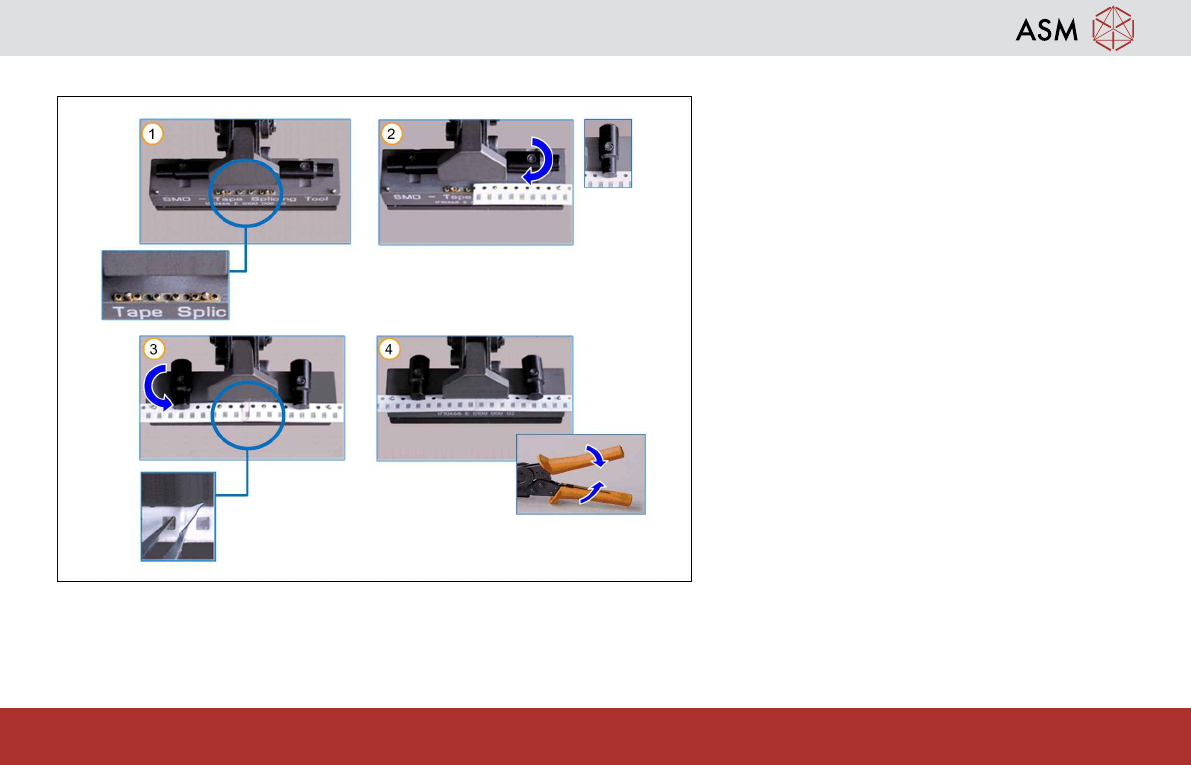
2.4 Splicing Narrow Tapes
1. Place the rivet on the pins, on the prongs.
2. Place the end of the old tape over half of
the rivet and then close the right-hand
locking of the splicing tool, as shown in
the diagram.
3. Place the start of the new tape over the
other half of the rivet and then close the
other locking of the splicing tool. The foil
must protrude over the end of the old
tape, at the top.
4. Crimp the splicing tool, until it audibly
clicks.