OPERATING MANAUAL(FOR ENGINEERS).pdf - 第72页
Page 3-8 3-4 Adjusting Pin Positioning Unit (Option) Setting the reference Check that the reference of mounting board is the pin hole or edges, and set it following the figure below . Adjusting the procedure Adjust pin f…
Page 3-7
CHANGING
PRODUCTION BOARD
3
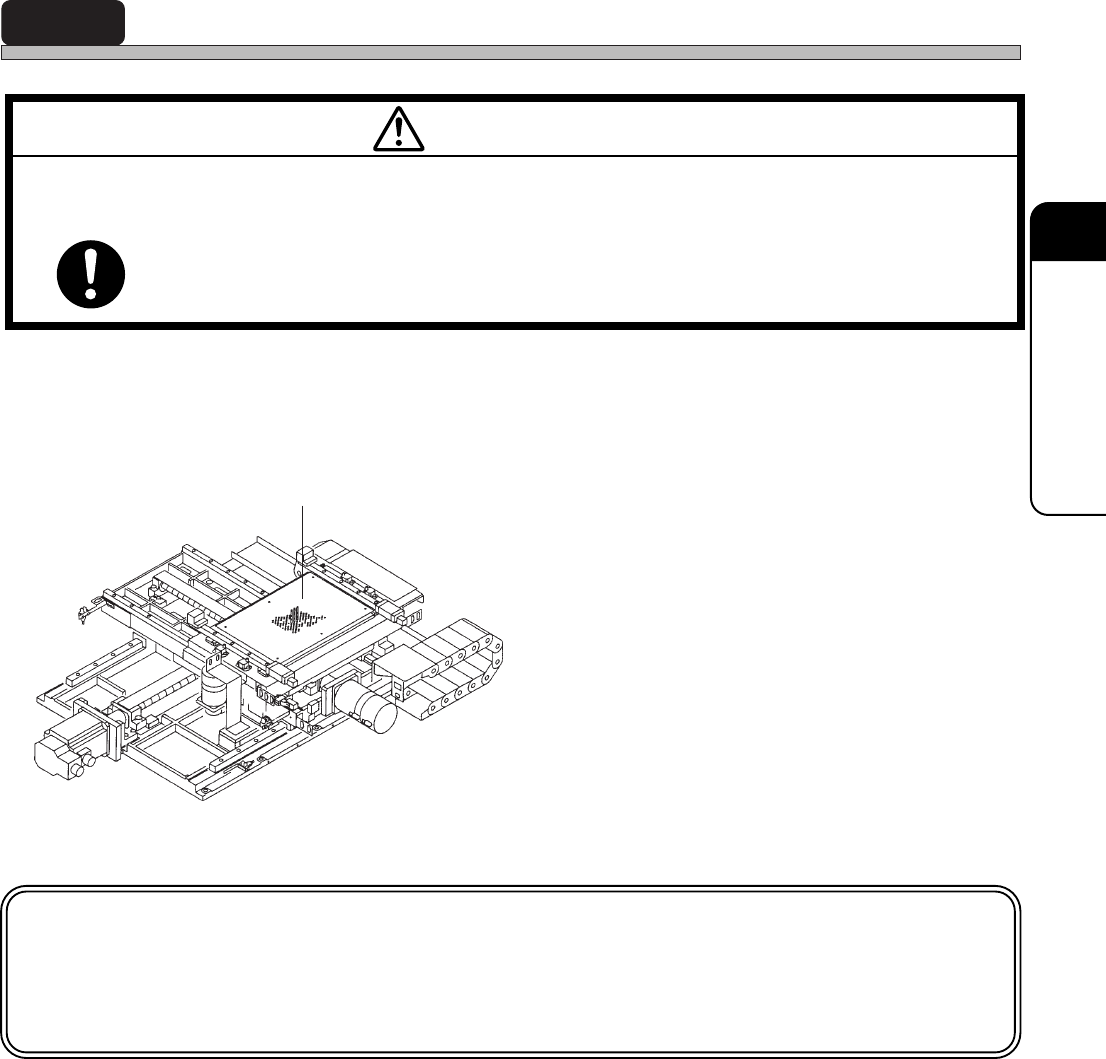
3-3 Setting the Holder Pins
When the board size and thickness are changed, or when parts are set to the rear side of board,
the holder pins are adjusted.
1. Move supporters according to board
size.
• Set as many supporters as possible to support
whole board equally.
∗ Be careful not to touch pins to parts on rear
side of board.
NOTICE
Before setting the supporters, carry out automatic width adjustment for the front
and rear conveyors and board holder.
Supporter
M97E
TURN OFF THE POWER AND THE SERVO SWITCH BEFORE WORKING INSIDE
ACTIVE PART OF THE MACHINE FOR MACHINE SET-UP.
You will have serious injury if the machine is actuated.
WARNING
3Y3C-E-EMD03-A01-00
07JHC2AA
Page 3-8
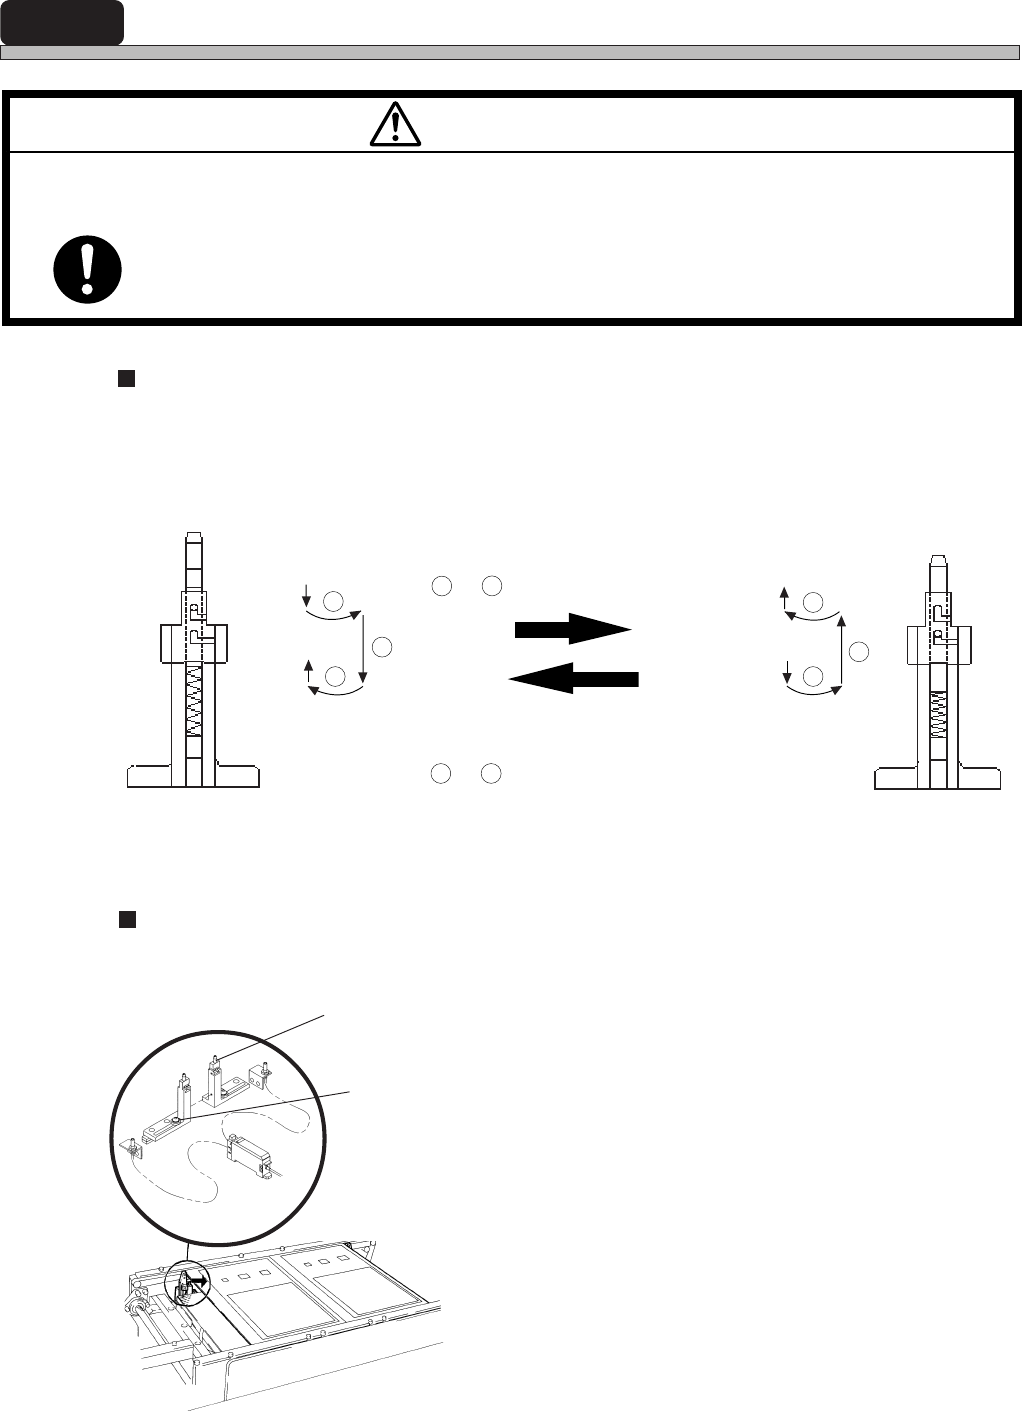
3-4 Adjusting Pin Positioning Unit (Option)
Setting the reference
Check that the reference of mounting board is the pin hole or edges, and set it following the figure
below.
Adjusting the procedure
Adjust pin following the procedure below.
1. Loosen the lock bolt of movable pin.
2. Slide the movable pin by hand to
adjust.
3. Tighten the lock bolt.
M97E
TURN OFF THE POWER AND THE SERVO SWITCH BEFORE WORKING INSIDE
ACTIVE PART OF THE MACHINE FOR MACHINE SET-UP.
You will have serious injury if the machine is actuated.
WARNING
Positioning pin
Lock bolt
3Y3C-E-EMD03-A01-00
Edge reference
Pin hole reference
• Pin hole reference
Put out the pin as the procedures
1
to
3
in the right figure.
90° rotation
• Edge reference
Push the pins as the procedures
1
to
3
in the left figure.
Operating procedure
3Y3C-049E
3Y3C-050E
90° rotation
1
2
3
1
2
3
90° rotation
90° rotation
3P3C-PS027
Page 3-9
CHANGING
PRODUCTION BOARD
3
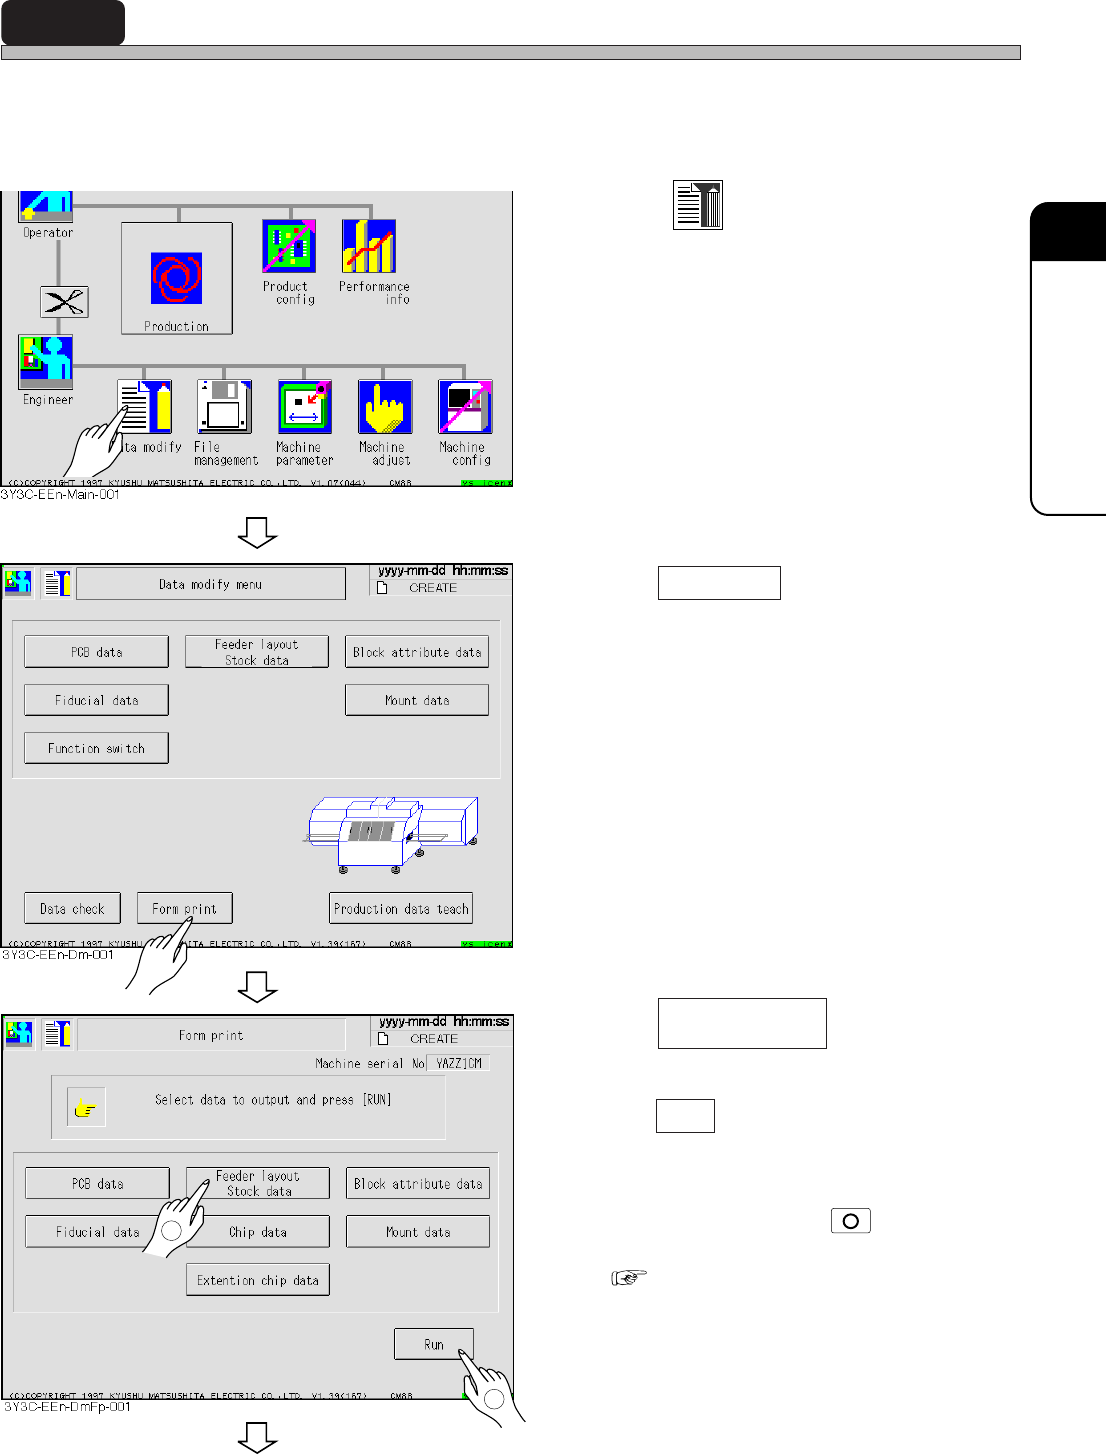
3-5 Setting and Checking Materials
Not to produce bad board, check that the materials in data and those set on the feeder table are
proper, in the following procedures.
∗ For setting the feeder, see “Chapter 6 Setting Materials” in OPERATING MANUAL for Operators.
1. Press
Data modify
.
• Data modification menu screen appears.
2. Press Form print .
• Form print screen appears.
3. Press .
4. Press Run .
• The data is printed with the printer.
∗ To stop outputting, press
STOP
on the opera-
tion panel.
( 4-10 Form Print)
To the next page
3Y3C-E-EMD03-A02-00
1
2
Feeder layout
Stock data