00193325-01.pdf - 第40页
3 Graphical user int erface SIPLACE Software Guide SR.503.xx 3.3 User interf ace - views and menus Issue 12/01 E N 40 3.3.2.3 „ Options“ menu The "Opti ons" menu is o nly ava ilable i n the m ain view. This men…
SIPLACE Software Guide SR.503.xx 3 Graphical user interface
Issue 12/01 EN 3.3 User interface - views and menus
39
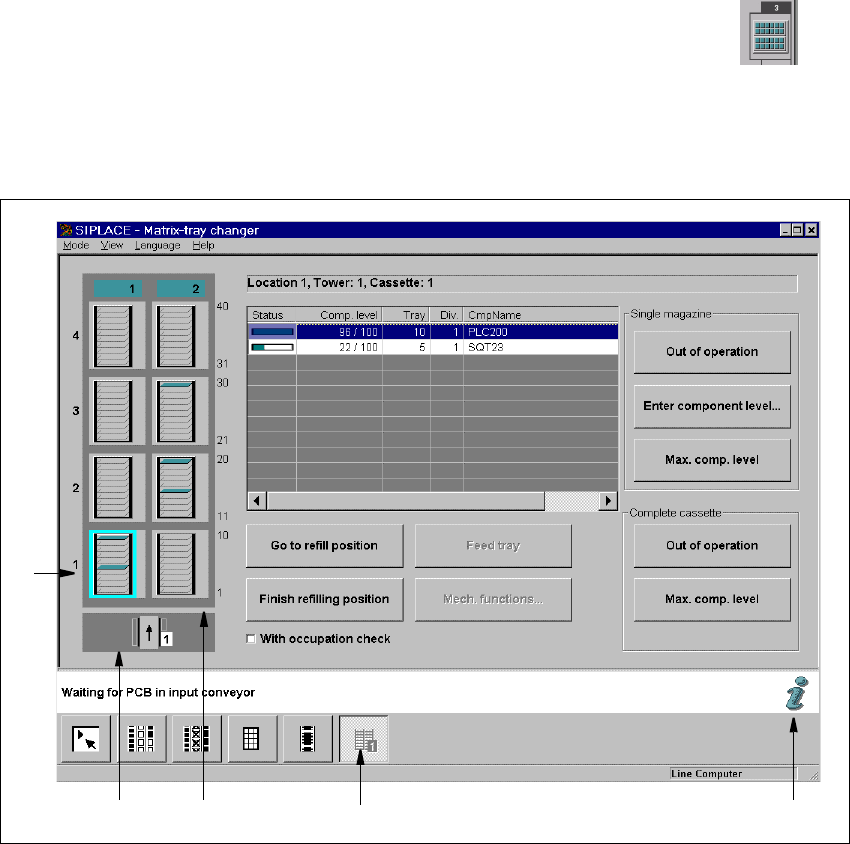
Matrix-tray changer (only for S-25 HM) 3
In order to move to the view for the Siplace Matrix-tray changer you must click the 3
button (Location 1 or Location 3).
Or, from the "View" menu, select the "Feeder" function, and activate the button for MTC in the
dialog displayed. The following window opens.
3
Fig. 3.3 - 3 "Matrix Tray Changer" view (S-25 HM)
3
Key to Fig. 3.3 - 3
(1) Cassette number
(2) Tower number
(3) Level number
(4) Selects the "MTC" view.
(5) Help system for the topic „MTC“
You will find a detailed description of the MTC in the Station Operating Manual. Please refer to the
Online Help for parameter descriptions..
1
32
5
4
3 Graphical user interface SIPLACE Software Guide SR.503.xx
3.3 User interface - views and menus Issue 12/01 EN
40
3.3.2.3 „Options“ menu
The "Options" menu is only available in the main view. This menu contains all the supplementary
functions. 3
Click the required menu item and then make the appropriate settings or selections in the cor-
responding windows or dialog boxes.
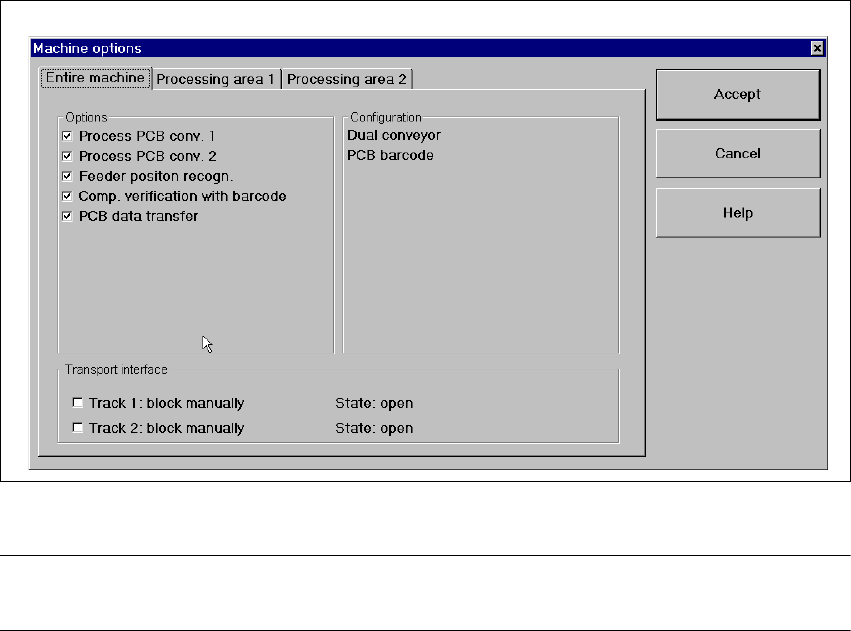
Machine options... (HS-50) 3
Depending on access level, you can obtain information about the station configuration ("Opera-
tor") or activate or deactivate the displayed machine options ("Line engineer", "Service"). 3
Click the Machine options... menu item (or the appropriate button in the working area of the
main view). The following window is displayed.
3
Fig. 3.3 - 4 „Machine options - entire machine“ dialog box (Example: HS-50)
NOTE
Only those machine options are displayed which are configured at the current station. 3
SIPLACE Software Guide SR.503.xx 3 Graphical user interface
Issue 12/01 EN 3.3 User interface - views and menus
41
Click the checkboxes corresponding to the machine options which you want to activate or de-
activate.
When the machine is switched off, all options are reset except those listed below:
– Comp. verification with barcode
– Feeder position recognition
– PCB data transfer from PA1(„Whispering Down the line“)
NOTE
At "Operator" access level, it is only possible to activate and deactivate the conveyor interface op-
tions. 3
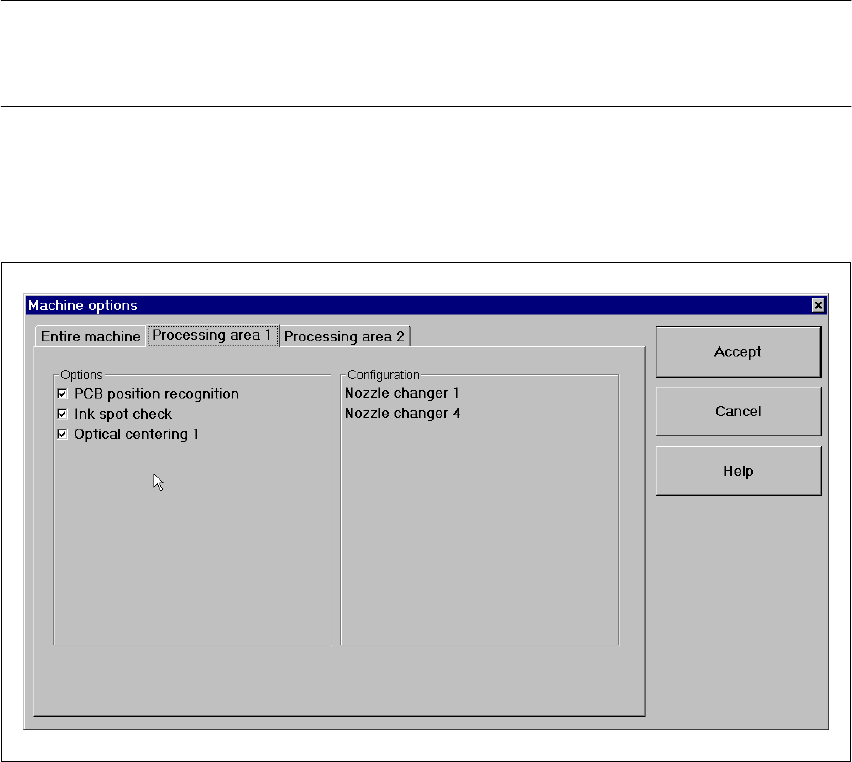
If you want to activate or deactivate the options for a processing area or view its configuration,
click the Processing area 1 or Processing area 2 tab to select the required area.
The display switches to the selected processing area (see example below for PA1).
3
Fig. 3.3 - 5 „Machine options - Processing area 1" dialog box (Example: HS50)
Activate/deactivate the checkboxes corresponding to the required machine options.
Click Accept to save the settings.
Machine options... (S25-HM) 3
Depending on access level, you can obtain information about the station configuration ("Opera-
tor") or activate or deactivate the displayed machine options ("Line engineer", "Service"). 3