00197467-01_SM_DLM3-4_Kunde_en.pdf - 第27页
Service Work Replacing the DP Rocker Service Manual SIPLACE Placement Heads DLM3/DLM4 27 3.6 3 . 6 R e p la c in g t h e D P R o c k e r Replacing the DP Rocker Parts, equipment and tools ▪ Upper section o f rocker assem…
Service Work
Replacing the Turning Station
26 Service Manual SIPLACE Placement Heads DLM3/DLM4
Preparation
► Remove the head from the machine. For details about removing and fitting the placement head, refer
to the service manual for your machine.
Removal
Installation
► Further installation is performed by following the above instructions in the reverse order. Also ob
-
serve the following instructions:
NOTICE
Removal
Depending on your machine type and installation location, you may not need to remove the
head.
► In this case, observe section "1.2 Preparatory Work..." [ ➙ 10].
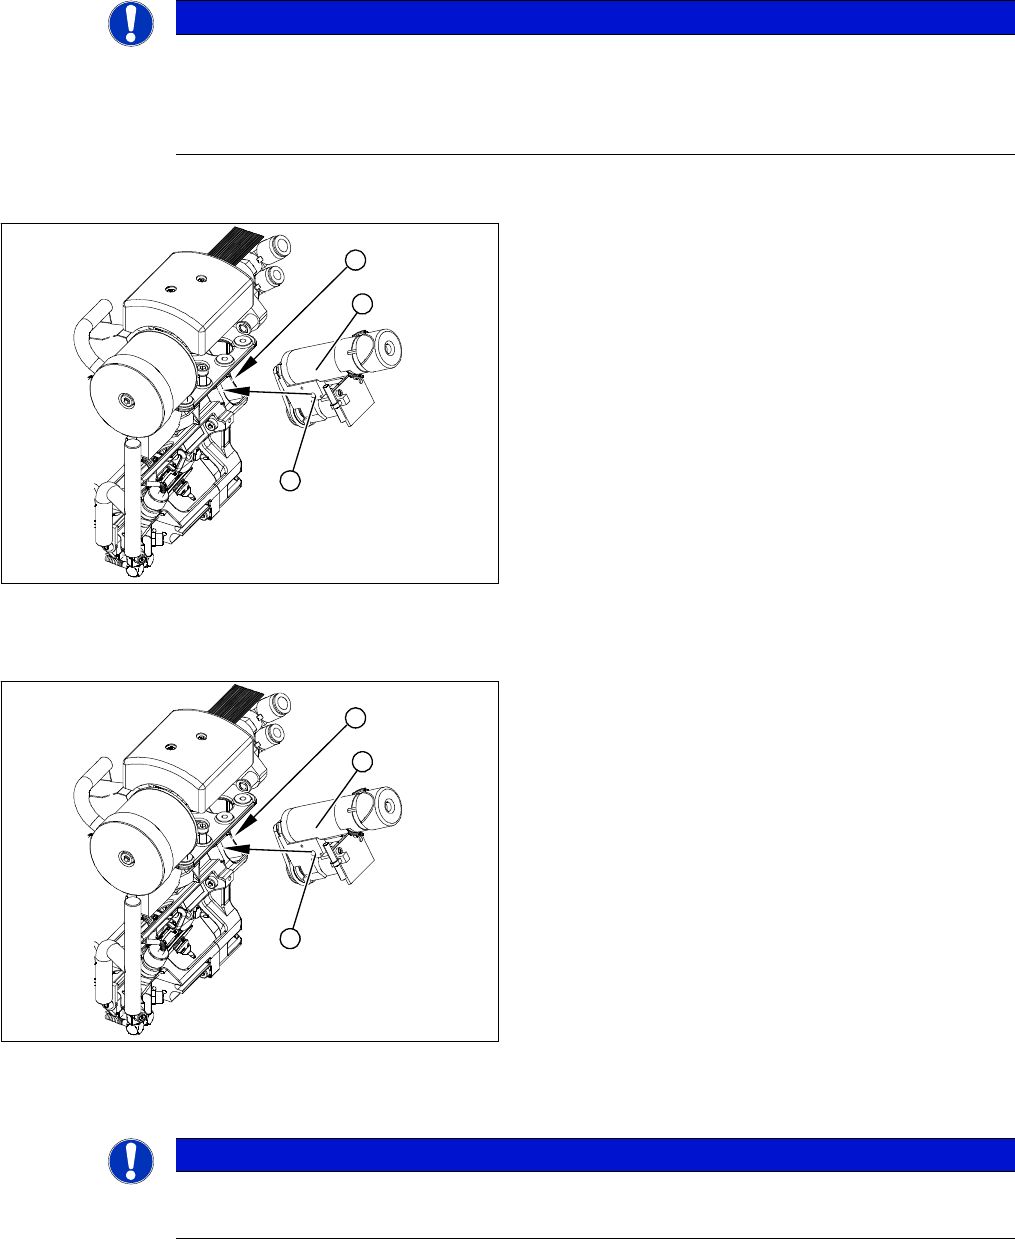
► Loosen the screw fastening the turning station (2).
► Carefully lever the turning station (1) backwards, off
the locating pins and gently pull it out of the head.
3
1
2
► Make sure that the contact surfaces on the turning
station and back part (3) are clean.
► Insert the turning station holes (1) onto the parallel
pins.
► Carefully push the turning station towards the front
part until it reaches the stop.
► Fasten the turning station with the screw provided (2).
3
1
2
NOTICE
Installation instructions
► Perform a function test.
Service Work
Replacing the DP Rocker
Service Manual SIPLACE Placement Heads DLM3/DLM4 27
3.6
3.6 Replacing the DP Rocker
Replacing the DP Rocker
Parts, equipment and tools
▪ Upper section of rocker assembly / R2 [03065216Sxx]
▪ Belt tensioning device DP-DLM [03063649-xx]
▪ Tool kit for RF rocker, turning station DLM [03064145-xx] (contains the "upper section of rocker as
-
sembly / R2" [03065216Sxx])
Overview
NOTICE
Improvement
The swivel-in rocker of the DP station has been fitted with 2 cones from version 7 onwards. The
DP station [00320041-05] can be upgraded to accommodate this improvement by simply re
-
placing the old part.
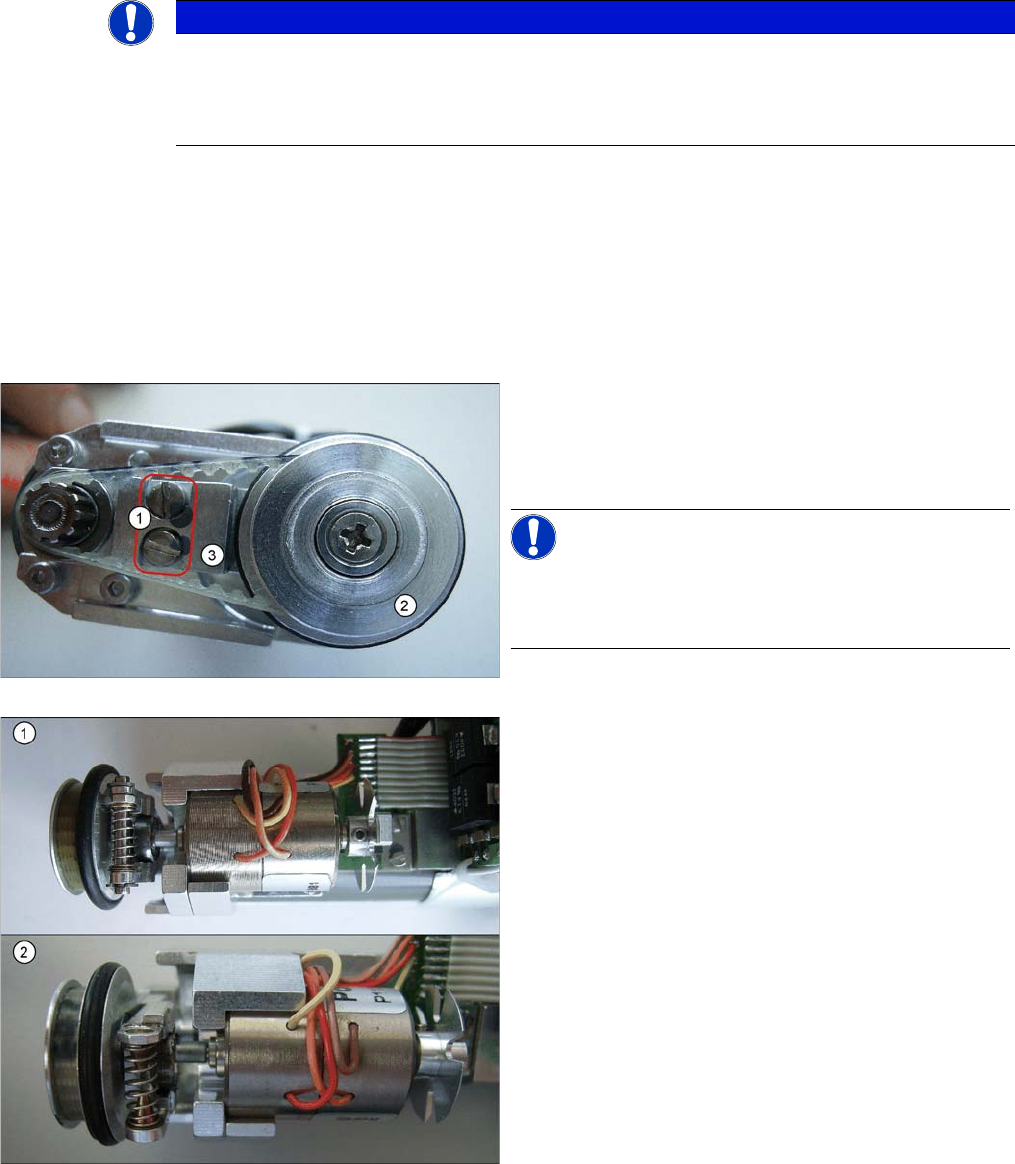
1. Fastening screws for rocker arm
(screwdriver, size 0).
2. Drive wheel
3. Drive arm
NOTICE!
The rocker arm is located under the drive arm (3). The
drive arm is fixed to the rocker arm with the two screws
(1).
The adjacent diagram shows a comparison of the spring
mechanism on the DP rocker with version 5 (1) and ver
-
sion 7 (2) with two cones.

Service Work
Replacing the DP Rocker
28 Service Manual SIPLACE Placement Heads DLM3/DLM4
Preparation
► Remove the head from the machine. For details about removing and fitting the placement head, refer
to the service manual for your machine.
Removal
► Loosen the two fastening screws (size 0 screwdriver).
► You can now move the rocker and pull off the belt.
► Swing the rocker arm on the motor to one side and remove the rocker arm with drive wheel from the
swivel-in ball bearing.
Installation
► Fit the drive armwith drive wheel back on the swivel-in ball bearing.
► Swivel the rocker arm on the motor back and refit the M2x3.5 screws.
► See also "3.7 Replacing the Toothed Belt for the DLM Turning Station (from version 07) [00320041-
xx]" [ ➙ 29] for the following tasks.
► Place the belt back on the drive wheel and pull it over the motor toothed wheel.
► Fit the belt tensioning device for the DP station.
► Tighten the two screws.
► Further installation is performed by following the above instructions in the reverse order.
NOTICE
Replacing the DP rocker
When replacing the DP rocker, you also need to replace the drive toothed belt.