XPM2_XPM3 Technical Ref Manual Conveyor1.pdf - 第22页
VI TRO NICS-SOLTEC REFLO W SOLDERING SYSTEMS Oc tober 10, 2008 22 XPM 2 / XPM 3 Technical Reference M anual C onv ey or Sy stem s 3. Meas ure lane width midway betw ee n the feeds cre w locati ons . Compare m eas urement…
VITRONICS-SOLTEC REFLOW SOLDERING SYSTEMS
October 10, 2008
21
XPM2 / XPM3 Technical Reference Manual Conveyor Systems
SET LANE PARALLEL
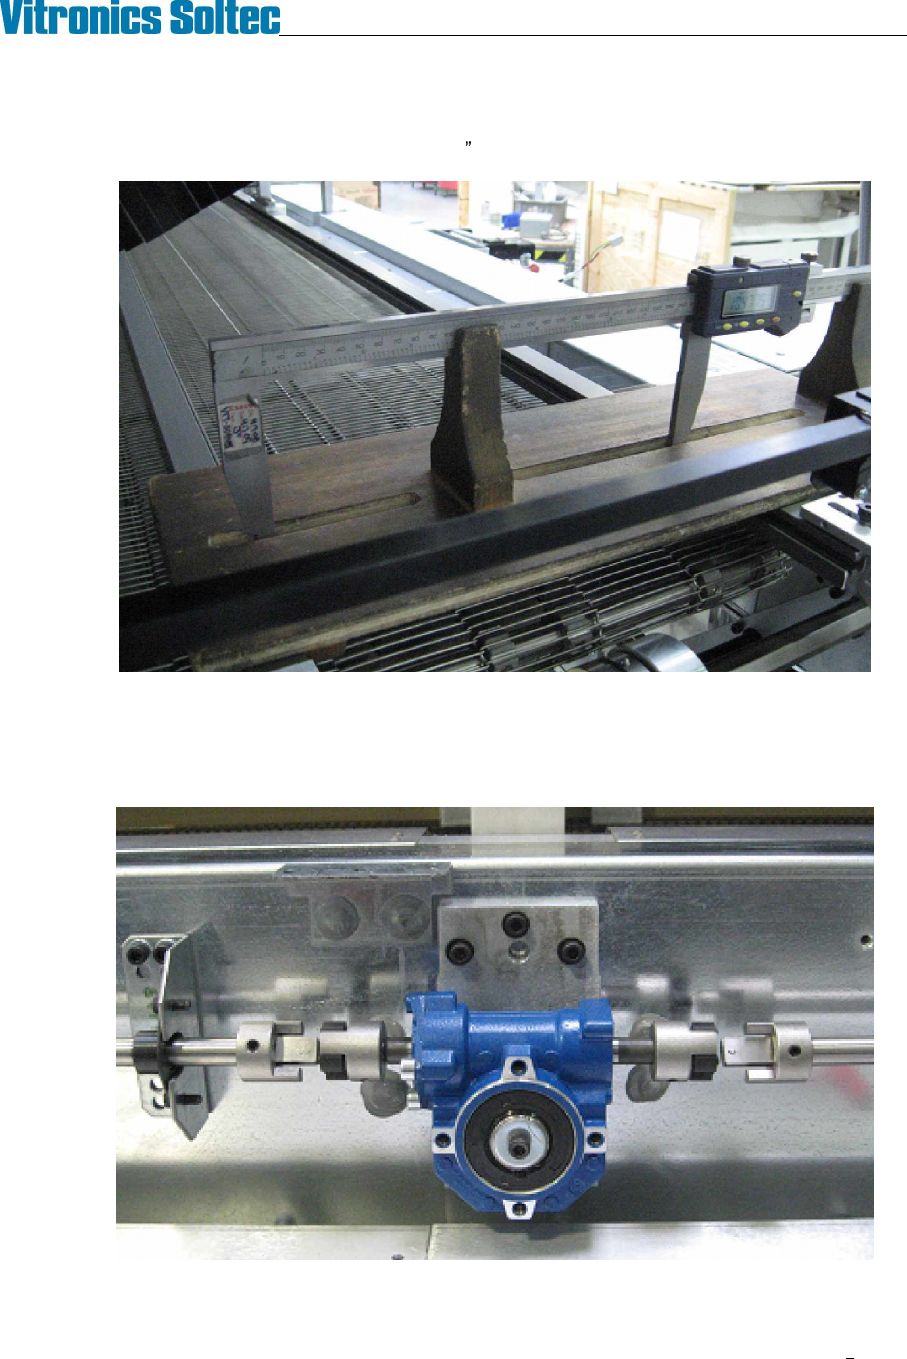
1. Measure lane width near the feedscrew locations: (onload, offload, and intermediates). The measured
width at all feed screws must fall within a .020 (0.5mm) range.
Digital calipers (in wooden support) measuring lane width at face above chain groove.
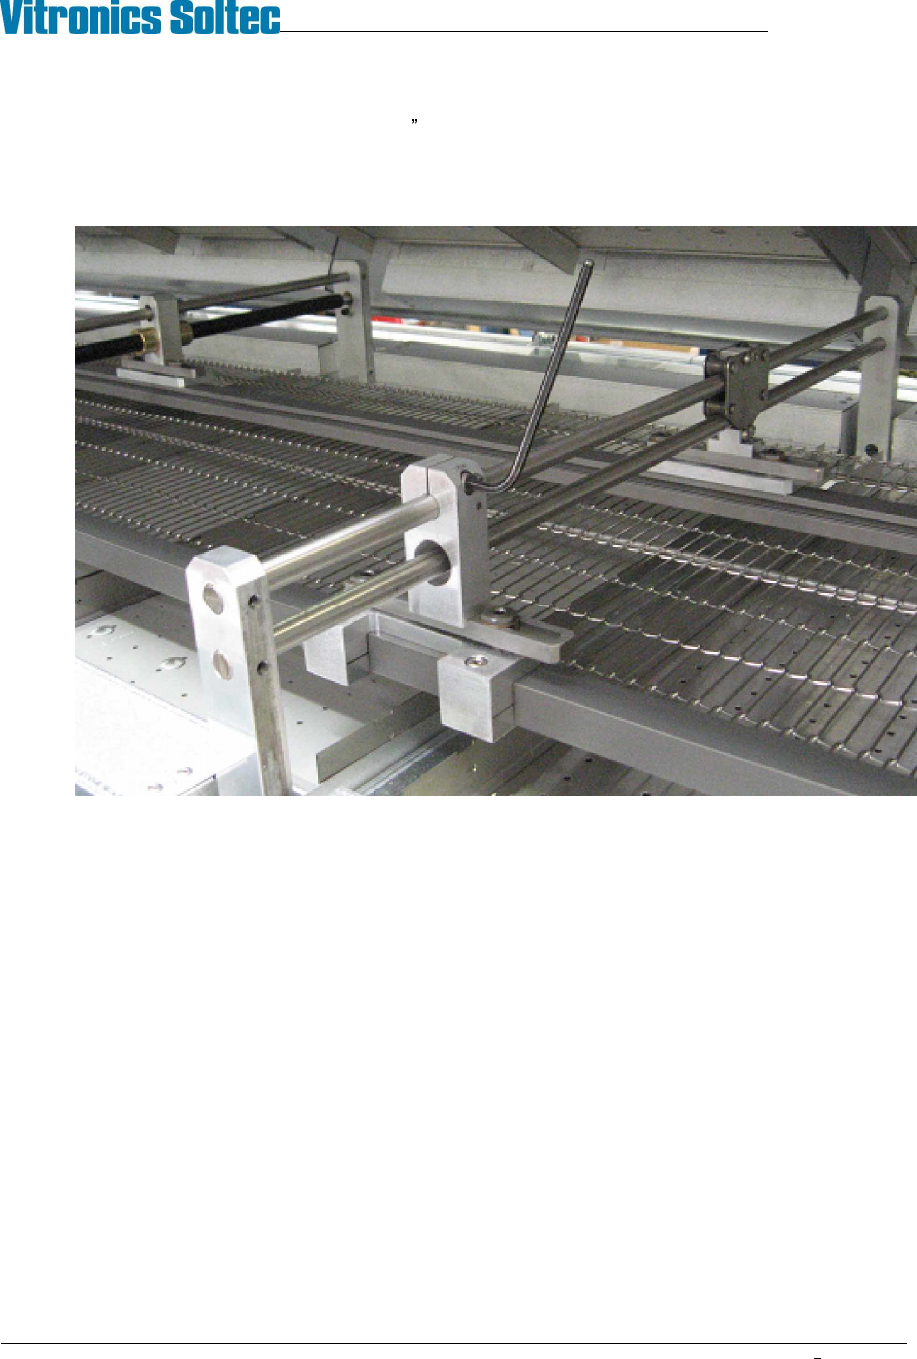
2. If adjustment is required de-couple the wormgear boxes from the width adjust shafts to allow turning one
feedscrew at a time. Adjust feedscrews by hand to bring the lane width variation into specification then
reconnect the width adjust shafts.
Decouple worm gear box and turn by hand to adjust parallel
VITRONICS-SOLTEC REFLOW SOLDERING SYSTEMS
October 10, 2008
22
XPM2 / XPM3 Technical Reference Manual Conveyor Systems
3. Measure lane width midway between the feedscrew locations. Compare measurements to width at the
feedscrews. Allowable variation is .052 (1.32mm).
4. If adjustment is required in the span between the feedscrews move the fixed rail hanger on the gantry to
bring the measurements into specification.
VITRONICS-SOLTEC REFLOW SOLDERING SYSTEMS
October 10, 2008
23
XPM2 / XPM3 Technical Reference Manual Conveyor Systems
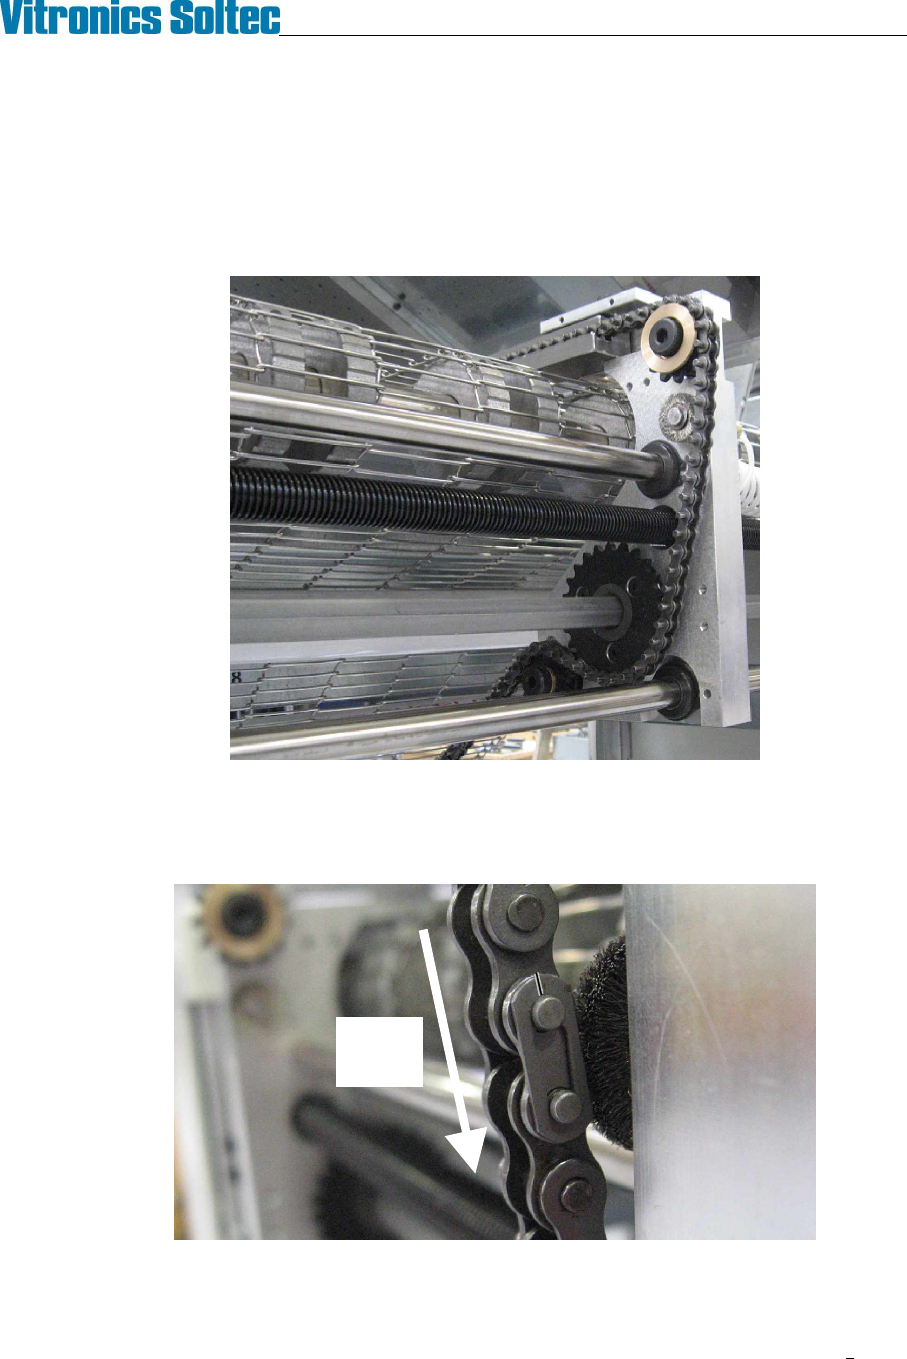
INSTALL CHAINS
1. Install the chains in the rails making sure the long pins face in toward the center of the oven. Be careful
not to twist the chains.
2. Slide the chains through the rails until they reach the off-load end of the oven.
3. Rethread the chains on the sprockets at the on-load end of the oven. Reinstall the chain guards with the
button head screws using a 1/8" hex key.
Chain routing typical, both ends
4. At the off-load end of the Oven, rethread the chains through the sprockets. Reconnect the master links in
both chains. Make sure the closed end of the keeper clip is facing the direction of conveyor travel (off-load
end). Reinstall the chain guards on the rails with the button head screws using a 1/8" hex key.
5. Make sure the chains are not hung up or twisted anywhere on top or underneath the Oven.
Direction
Of Chain
Travel