XPM2_XPM3 Technical Ref Manual Conveyor1.pdf - 第23页
VI TRO NICS-SOLTEC REFLO W SOLDERING SYSTEMS Oc tober 10, 2008 23 XP M 2 / XPM 3 Technical Reference Manual Conv eyor Sy stem s INSTALL CHAINS 1. Inst all the chains in the rail s making s u re the long pins face in towa…
VITRONICS-SOLTEC REFLOW SOLDERING SYSTEMS
October 10, 2008
22
XPM2 / XPM3 Technical Reference Manual Conveyor Systems
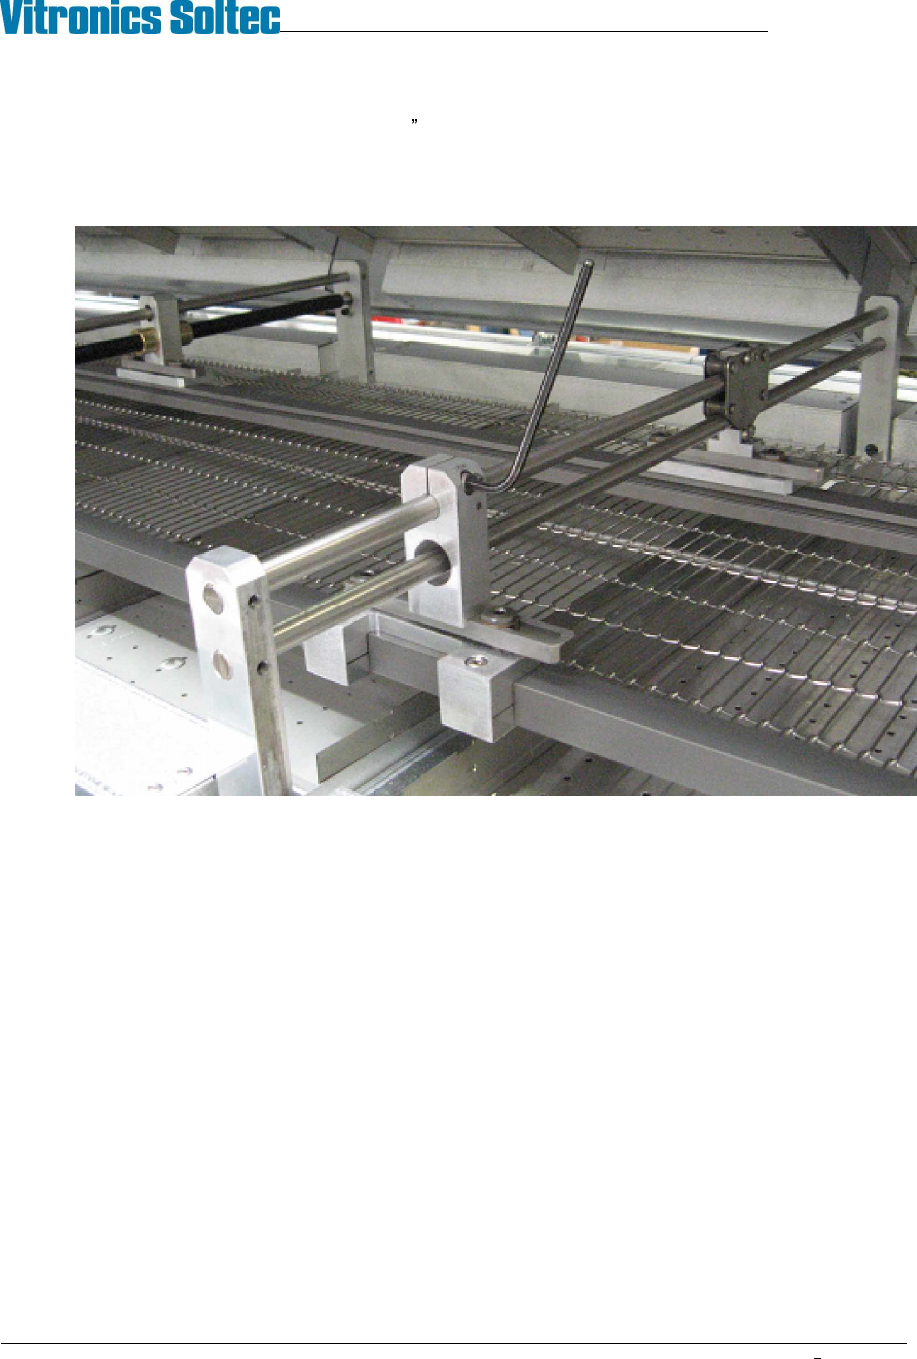
3. Measure lane width midway between the feedscrew locations. Compare measurements to width at the
feedscrews. Allowable variation is .052 (1.32mm).
4. If adjustment is required in the span between the feedscrews move the fixed rail hanger on the gantry to
bring the measurements into specification.
VITRONICS-SOLTEC REFLOW SOLDERING SYSTEMS
October 10, 2008
23
XPM2 / XPM3 Technical Reference Manual Conveyor Systems
INSTALL CHAINS
1. Install the chains in the rails making sure the long pins face in toward the center of the oven. Be careful
not to twist the chains.
2. Slide the chains through the rails until they reach the off-load end of the oven.
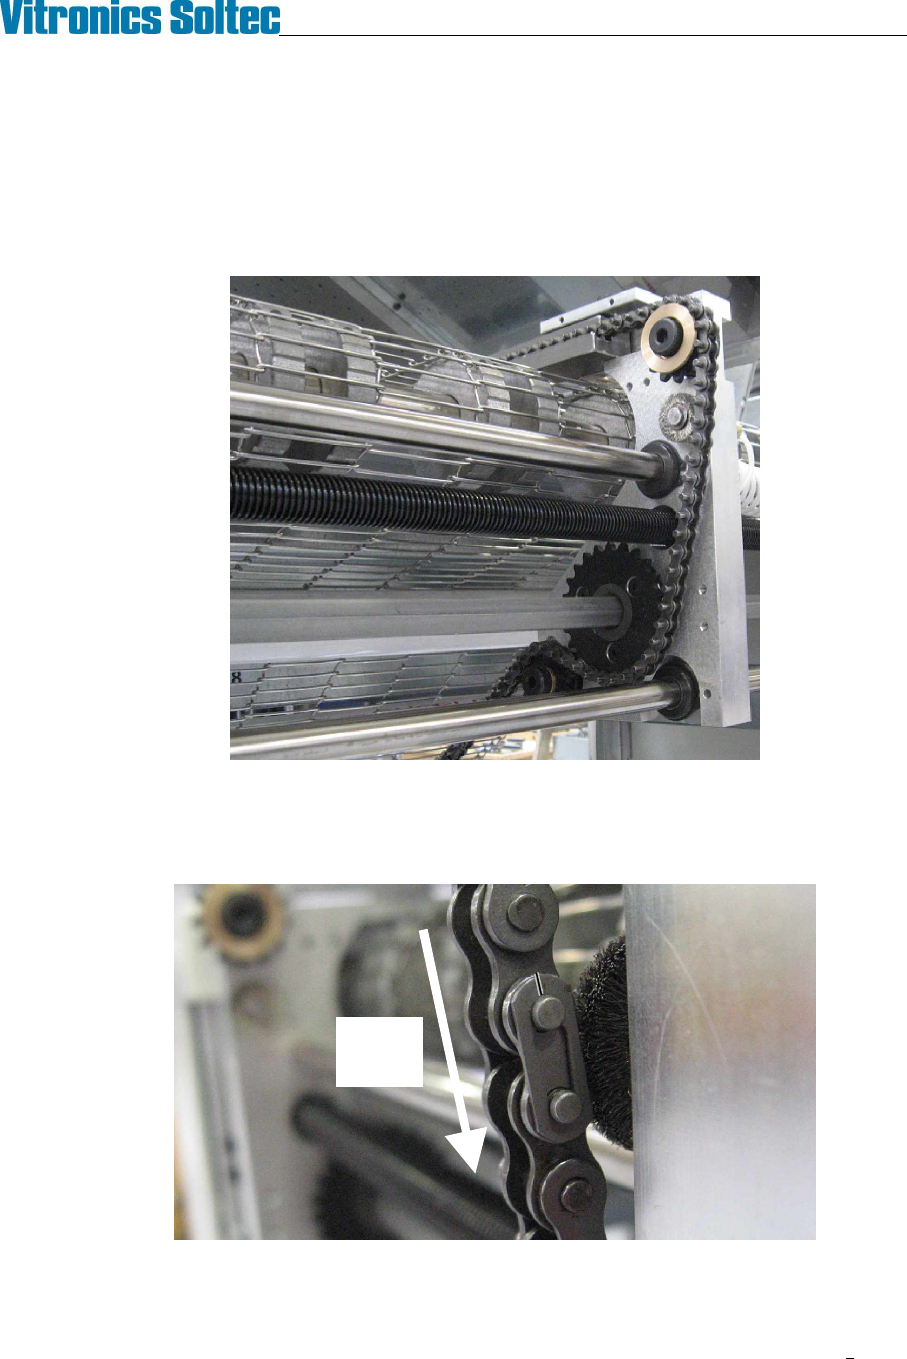
3. Rethread the chains on the sprockets at the on-load end of the oven. Reinstall the chain guards with the
button head screws using a 1/8" hex key.
Chain routing typical, both ends
4. At the off-load end of the Oven, rethread the chains through the sprockets. Reconnect the master links in
both chains. Make sure the closed end of the keeper clip is facing the direction of conveyor travel (off-load
end). Reinstall the chain guards on the rails with the button head screws using a 1/8" hex key.
5. Make sure the chains are not hung up or twisted anywhere on top or underneath the Oven.
Direction
Of Chain
Travel
VITRONICS-SOLTEC REFLOW SOLDERING SYSTEMS
October 10, 2008
24
XPM2 / XPM3 Technical Reference Manual Conveyor Systems
REMOVE AND REPLACE XCS CONVEYOR CHAIN AND RAIL
REMOVE XCS CHAIN
1. Run the conveyor until the master link in the XCS chain comes up just under the offload end of the XCS
rail. Remove the master link from the chain and unthread the chain from all of the sprockets on the
conveyor end. Tie-wrap the free end of the chain to the machine frame to keep it from running away
under the oven.
2. Move to the onload end of the oven. Pull the XCS chain out of the rail and guide it into a clean container.
REMOVE XCS RAIL
1. Remove the XCS chain (see above).
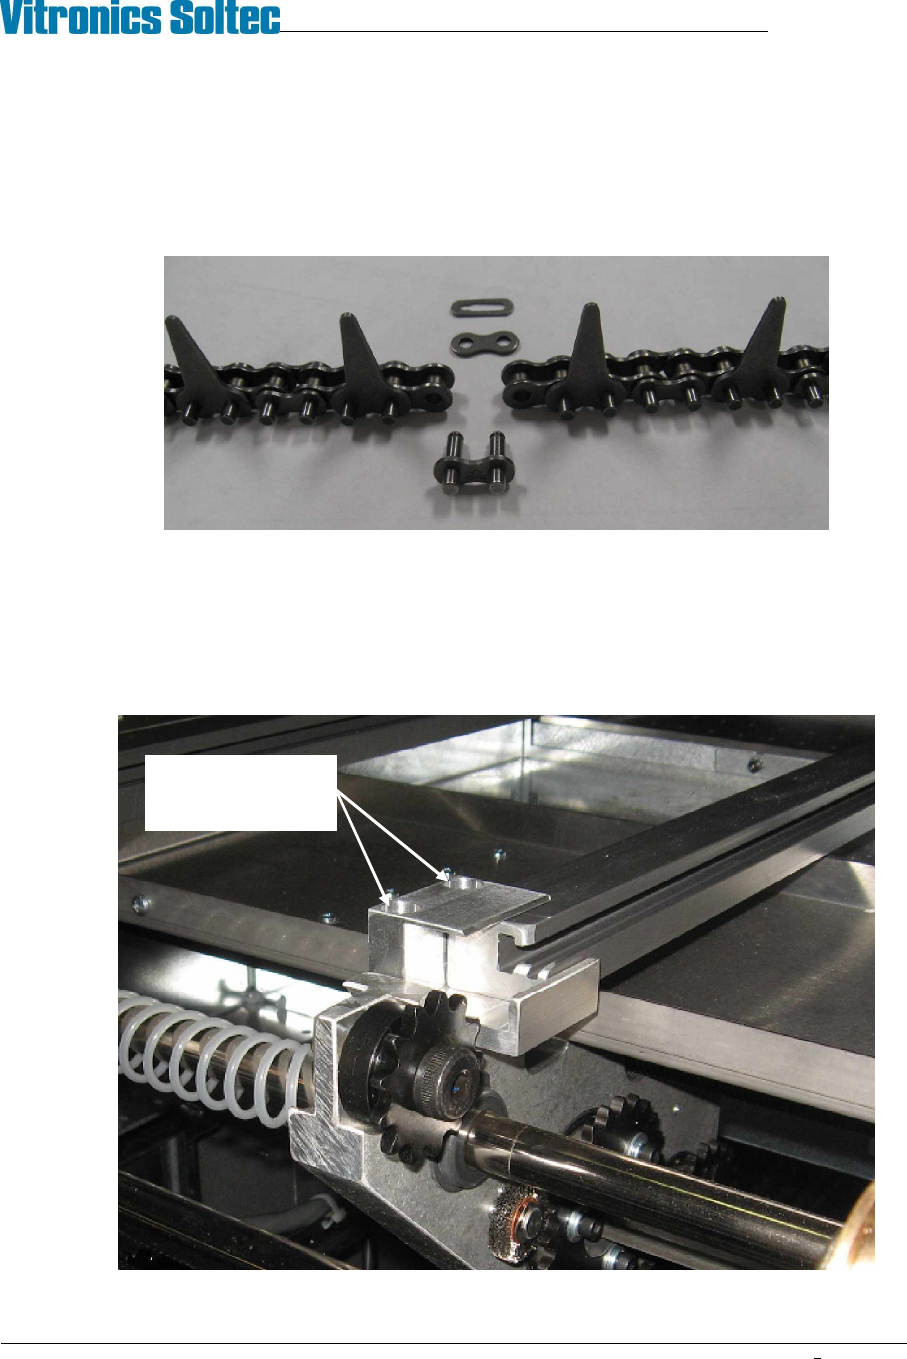
2. Use a 3/16" hex key to remove the XCS rail capture bracket from one end of the machine.
Remove 2 screws
then remove capture
bracket