EUS0153210_YFact_Standard_E.pdf - 第127页
3-7 3 Board Editor 3. [Open Board Data on New Editor] button Click this button to load board data by opening a new window of the Board Editor. The “Board data select” dialog box appears. Select the Board you want to load…
3-6
3
Board Editor
●
Toolbars
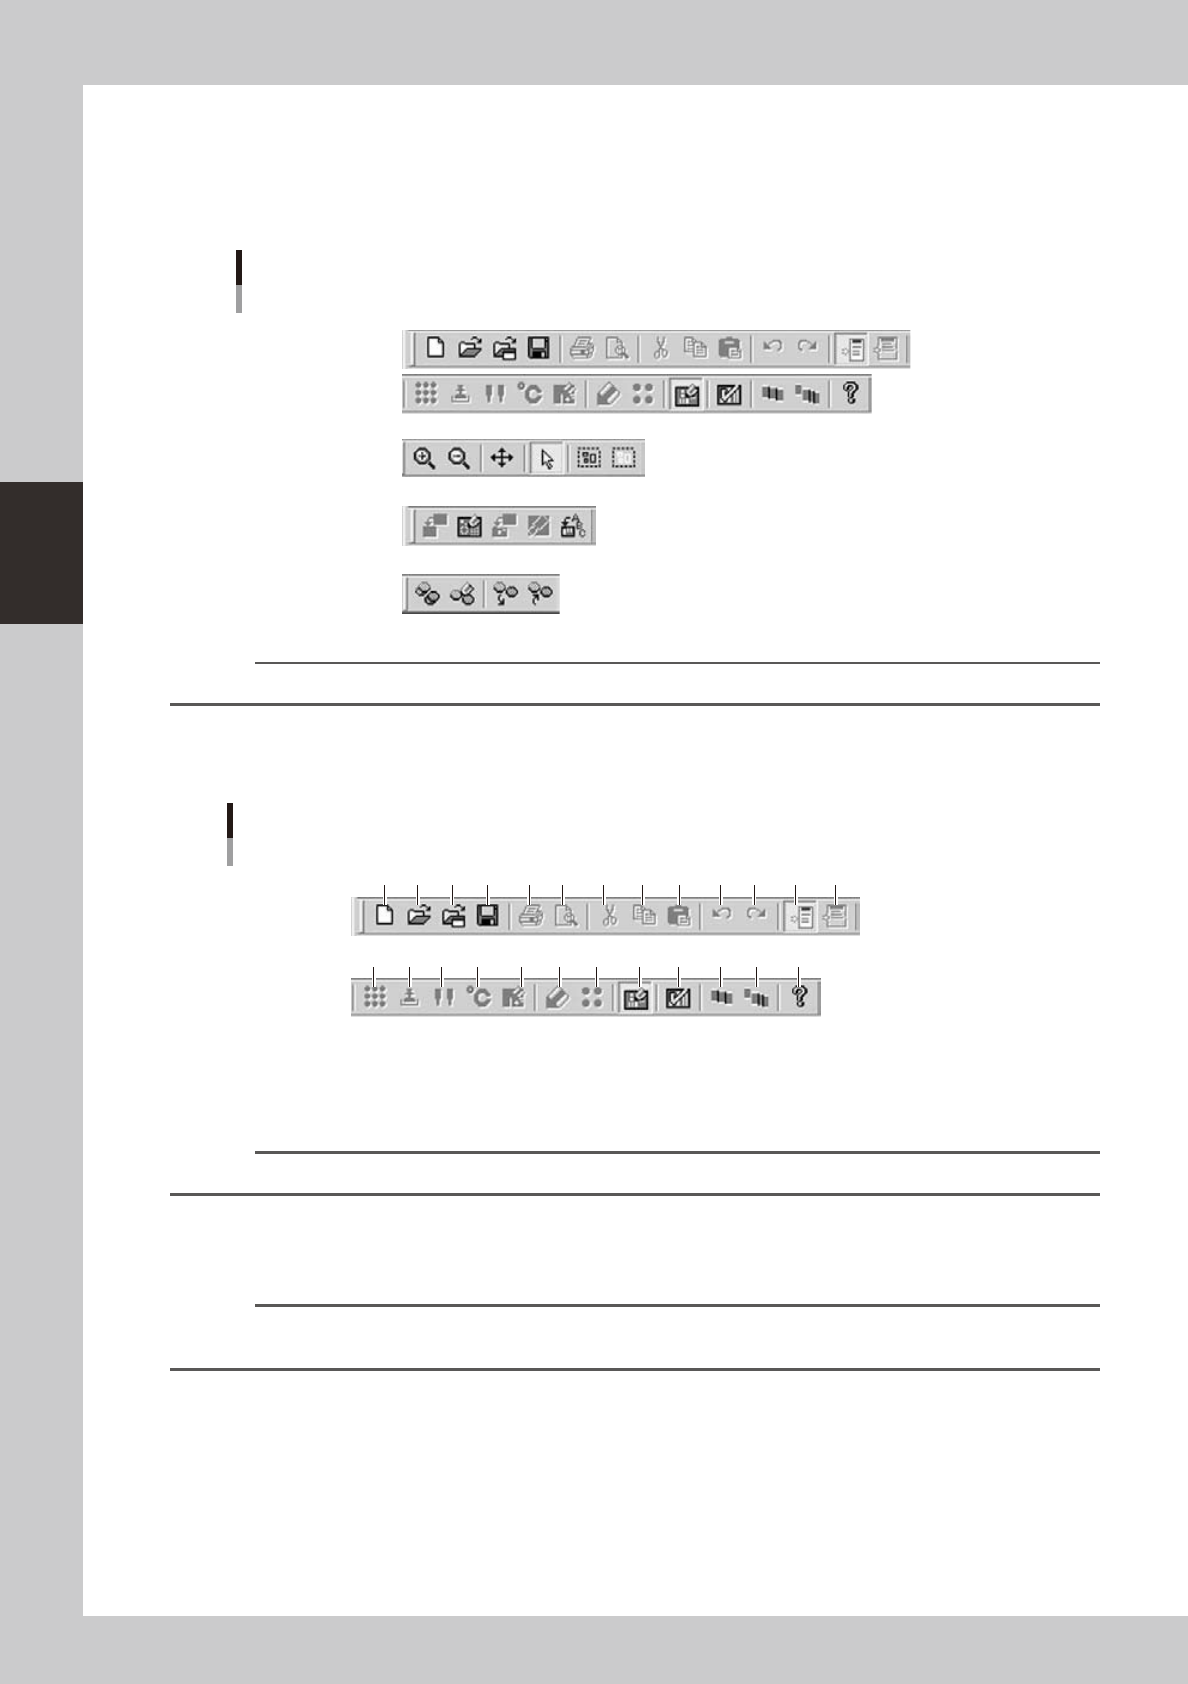
Among the Board Editor functions, those that are frequently used are registered as the toolbar buttons. There are 5 types
oftoolbars:“Standardtoolbar”,“Graphictoolbar”,“Solder-printinspectiontoolbar”(option),“Databasetoolbar”.
Each toolbar can be hidden or redisplayed by selecting it from the “Toolbar” submenu on the View menu.
Toolbars
Standard toolbar
Graphic toolbar
Solder-print inspection toolbar
Database toolbar
64308-S0-00
Reference
Some buttons on the toolbars are grayed out (dimmed) and cannot be used depending on the specifications.
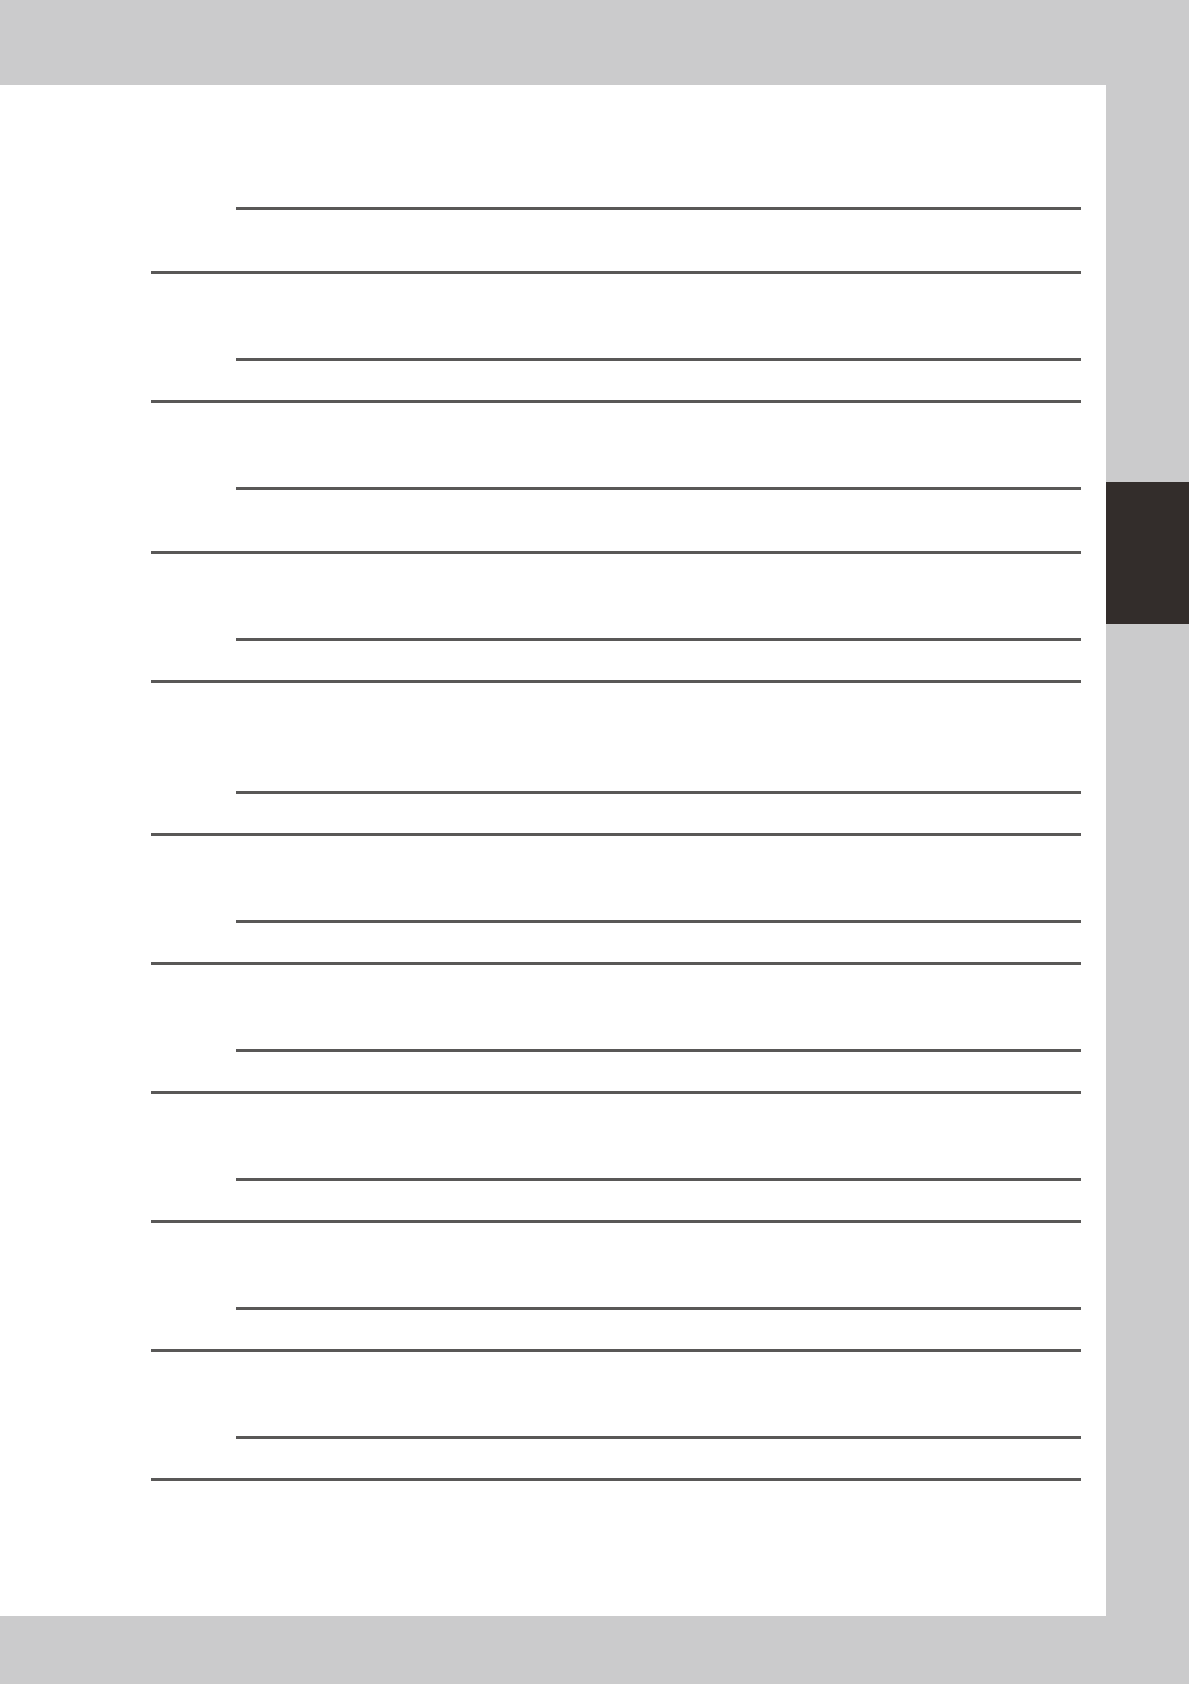
Standard toolbar
This toolbar is available when you are manipulating the Board Editor window.
1 2 3 4 5 6 7 8 9 10 11 1312
14 16 17 18 19 20 21 22 23 24 2515
Standard toolbar
64309-S0-00
1. [New Board Data] button
Click this button to create new board data.
The initial data is loaded for creating new board data.
Reference
The [New Board Data] button has the same function as the "Create New Board Data" command in the File menu.
2. [Open Board Data on This Editor] button
Click this button to load board data that is already registered.
The “Board data select” dialog box appears. Select the Board you want to load in the current window of the Board Editor.
Reference
The [Open Board Data on This Editor] button has the same function as the "Open Board Data on This Editor" command
in the File menu.
3-7
3
Board Editor
3. [Open Board Data on New Editor] button
Click this button to load board data by opening a new window of the Board Editor.
The “Board data select” dialog box appears. Select the Board you want to load in the new window of the Board Editor.
Reference
The [Open Board Data on New Editor] button has the same function as the "Open Board Data on New Editor"
command in the File menu
4. [Save Board Data] button
Saves the currently edited board data over the original data.
Reference
The [Save Board Data] button has the same function as the "Save Board Data" command in the File menu.
5. [Print] button
Prints information of the currently edited board data.
Reference
The [Print] button has the same function as the "Print" command in the File menu. For details on print functions, refer to
section 11, "Printing the board data", in chapter 1.
6. [Preview] button
Displays an image that will be printed.
Reference
The [Preview] button has the same function as the "Preview" command in the File menu.
7. [Cut] button
Cuts and removes the selected range or item.
The data that was cut is stored in the clipboard. The contents previously stored in the clipboard are overwritten.
Reference
The [Cut] button has the same function as the "Cut" command in the Edit menu.
8. [Copy] button
Copies the selected range or item into the clipboard. The contents previously stored in the clipboard are overwritten.
Reference
The [Copy] button has the same function as the "Copy" command in the Edit menu.
9. [Paste] button
Pastes the contents currently stored in the clipboard into the selected place.
Reference
The [Paste] button has the same function as the "Paste" command in the Edit menu.
10. [Undo] button
Reversesthepreviousactions.
Reference
The [Undo] button has the same function as the "Undo" command in the Edit menu.
11. [Redo] button
Redoesthepreviousactionsthatwerecanceledwiththe[Undo]button.
Reference
Clicking the [Redo] button has the same function as the "Redo" command in the Edit menu.
12. [Toggle Tree View] button
Shows or hides the tree view in the left pane of the Board Editor window.
Reference
This button has the same function as the "Tree View" command in the View menu.

3-8
3
Board Editor
13. [Toggle Detail View] button
Shows or hides the detail view of board data that appears in the lower part of the main view.
Reference
This button has the same function as the "Detail View" command in the View menu.
14. [Ball Edit] button
Opens the “BGA Edit” screen for editing ball lead layouts.
Reference
The [Ball Edit] button has the same function as the "Ball Edit" command in the Edit menu.
15. [Dipping Station Information] button
Opens the “Dipping Station Information” dialog box.
16. [Nozzle Information] button
Opens the “Nozzle Information” dialog box showing information on the currently used nozzles.
17. [Temperature Setting] button
Opens a dialog box for syringe temperature setting. Set the syringe temperature within the upper limit specified in
machine data.
Reference
The [Temperature Setting] button has the same function as the "Temperature Setting" command in the Edit menu.
18. Sequence [Monitor Information] button
Opens the “Sequence Monitor Information” dialog box.
19. [Detail Setting] button
Opens a detail setting screen for editing board data used with solder paste printers.
20. [Backup Pin Position Edit] button
Opens the “Backup Pin” screen for editing the backup pin position data used with solder paste printers.
21. [Show Graphic View] button
Shows or hides the graphic view of board data.
Reference
The [Graphic View] button has the same function as the "Graphic View" command in the View menu.
22. [Data Check] button
Displays the “Data Check” dialog box to check the board data that is currently open.
Reference
The [Data Check] button has the same function as the "Data Check" command in the Tool menu.
23. [Pitch Distribution] button
Opens the “Pitch Distribution” dialog box to set pitch distribution for block offset.
Reference
The [Pitch Distribution] button has the same function as the "Block Offset" - "Pitch Distribution" command in the Tool
menu.
24. [Block Distribution] button
Opensthe“BlockDistribution”dialogboxtoconvertblock-offsetboarddataintoasingleblockboarddata.
Reference
The [Block Distribution] button has the same function as the "Block Offset" - "Block Distribution" command in the Tool
menu.
25. [Version] button
Displays the information and version of Factory Tools.
Reference
The [Version] button has the same function as the "Version" command in the Help menu.
Graphic toolbar
This toolbar is available when you are manipulating the graphic view window.
For detailed information on this toolbar, see section 3.2, “Manipulating the graphic view”, in this chapter.