YG12_英文保养手册.pdf - 第64页
3-14 3 Periodic maintenance items 6 Raise and low er the push-up unit manually . After cancel emergency stop, raise and lower the push-up unit several times manually to spread the grease evenly. After the grease is well …
3-13
3
Periodic maintenance items
2.4 Inspecting, cleaning and greasing the push-up shaft
The push-up shaft is designed to prevent flexing or warping of the board during clamping and is important
because it prevents depressing of the board during component mounting.
The push-up shaft also prevents deviations in the component mounting accuracy due to the board depressing
during component mounting, so it is important to regularly clean and inspect the push-up shaft to ensure it
operates correctly.
c
cleaning of the push-up shaft by the user will void the warranty.
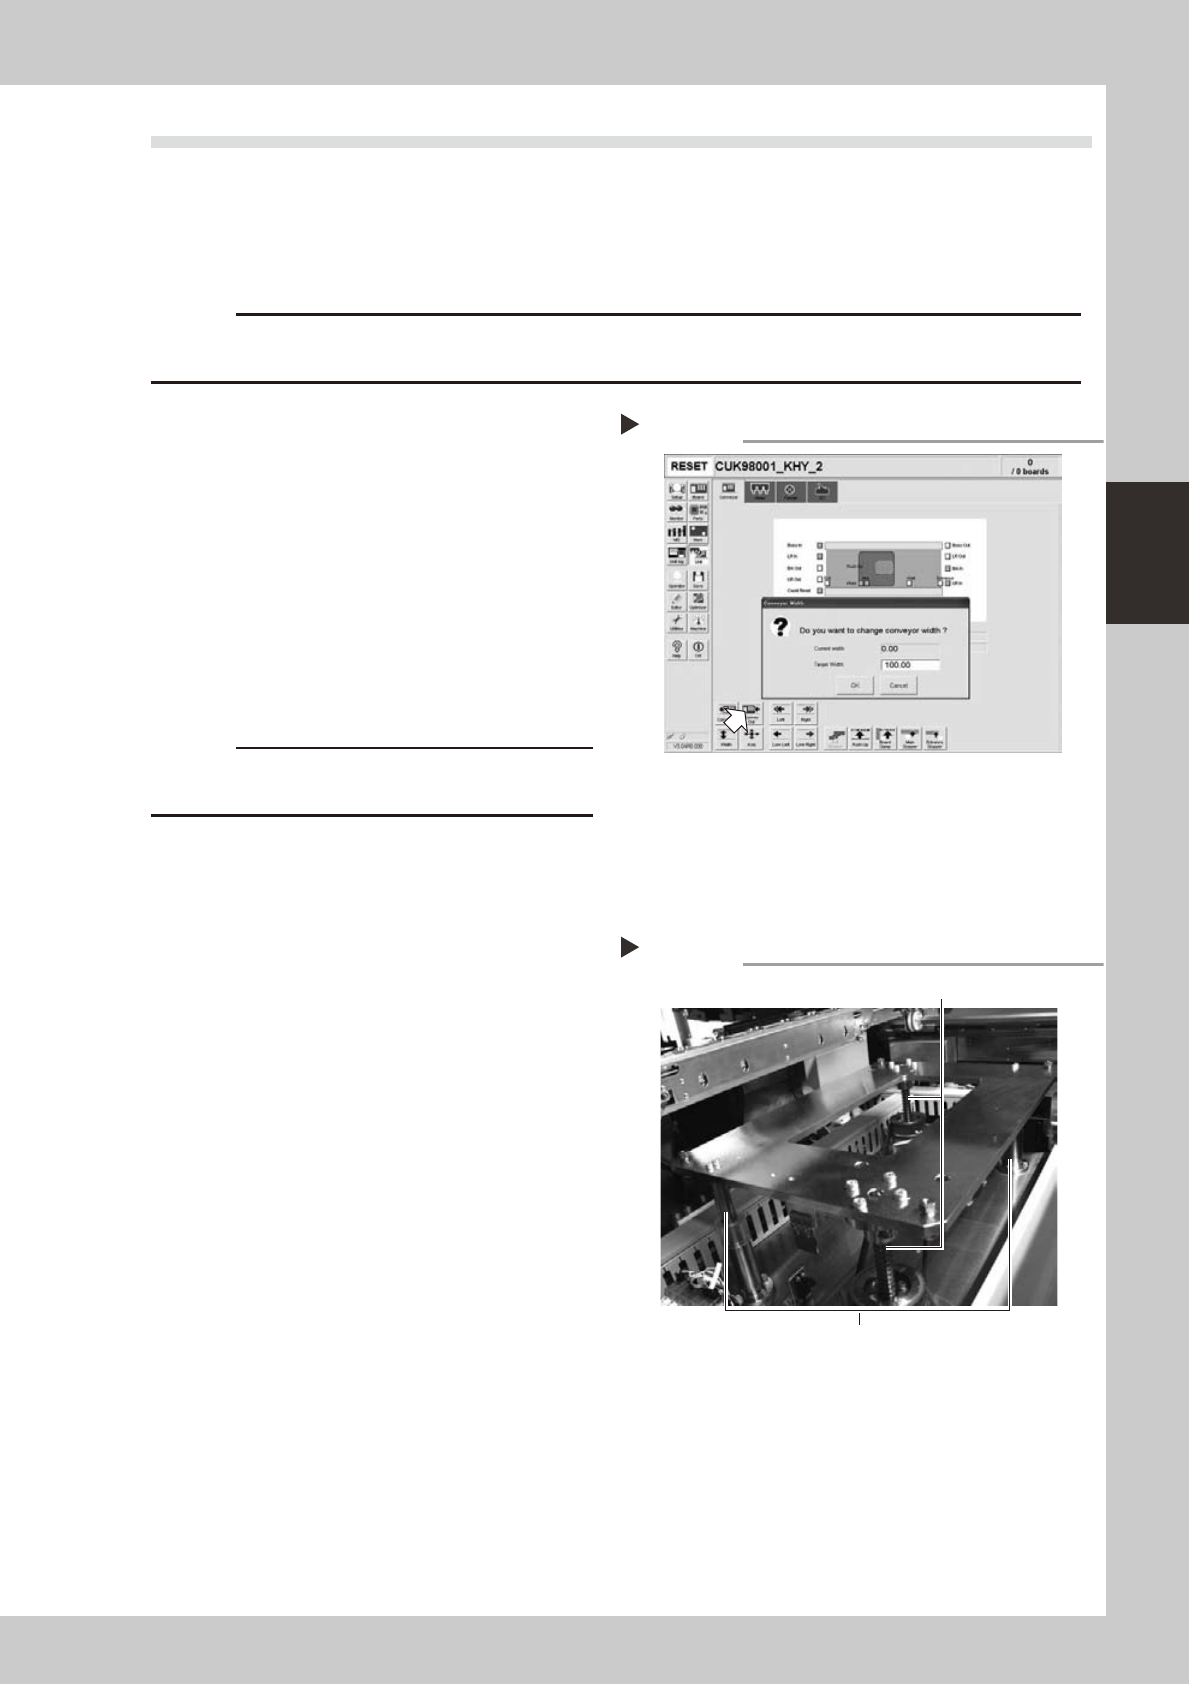
1
Set the conveyor width to
maximum.
Press the [Width] button to display the
"Conveyor Width" dialog. Enter the maximum
conveyor width from the specifications and
press [OK]. The conveyor is changed to the
width that was just entered.
54310-L5-00
e
2
Remove the push-up plate.
Press the emergency stop button and then
remove the push-up plate using a hex
wrench.
c
The push-up plate is heavy so use plenty of caution
during handling.
3
Raise the push-up unit.
Cancel emergency stop and raise the
push-up unit manually.
e
4
Remove the old grease by hand.
After pressing the emergency stop button,
thoroughly remove the old grease from the
two ball screws and the two ball guides by
hand.
5
Apply the new grease by hand.
Ball screw
Apply as much as 2 cm of new grease to
your finger, and rub it evenly into the ball
screw grooves.
Ball guide
Apply as much as 2 cm of new grease to
your finger, and coat it evenly on the ball
guides.
53331-L5-00
Setting the conveyor width
Step 1
Applying the grease
Step 5
Ball guides (2 places)
RU-axis ball guides (2 places)

3-14
3
Periodic maintenance items
6
Raise and lower the push-up unit
manually.
After cancel emergency stop, raise and
lower the push-up unit several times
manually to spread the grease evenly. After
the grease is well spread, raise the push-up
unit and leave it in that state.
e
7
Wipe away excess grease by hand.
After pressing the emergency stop button,
wipe away excess grease by hand.
Again raise and lower the push-up unit
several times manually and if there is no
problem then lower the push-up unit.
8
Reinstall the pushup plate to its
original position.
Reinstall in the reverse procedure of step 2.
c
The push-up plate is heavy so use plenty of caution
during handling.
3-15
3
Periodic maintenance items
2.5 Inspecting the board conveyor unit
2.5.1 Inspecting and cleaning the conveyor belt
As the belt wears away, slippages may occur that prevent securely conveying the boards. It is therefore
necessary to make periodic checks for wear of the conveyor belt.
Belt wear may also cause trouble such as erroneous detection of the conveyor sensor due to dust from belt
wear accumulating on the sensor surface, or dust from belt wear accumulating in the belt guide grooves may
cause the belt to stick, etc.
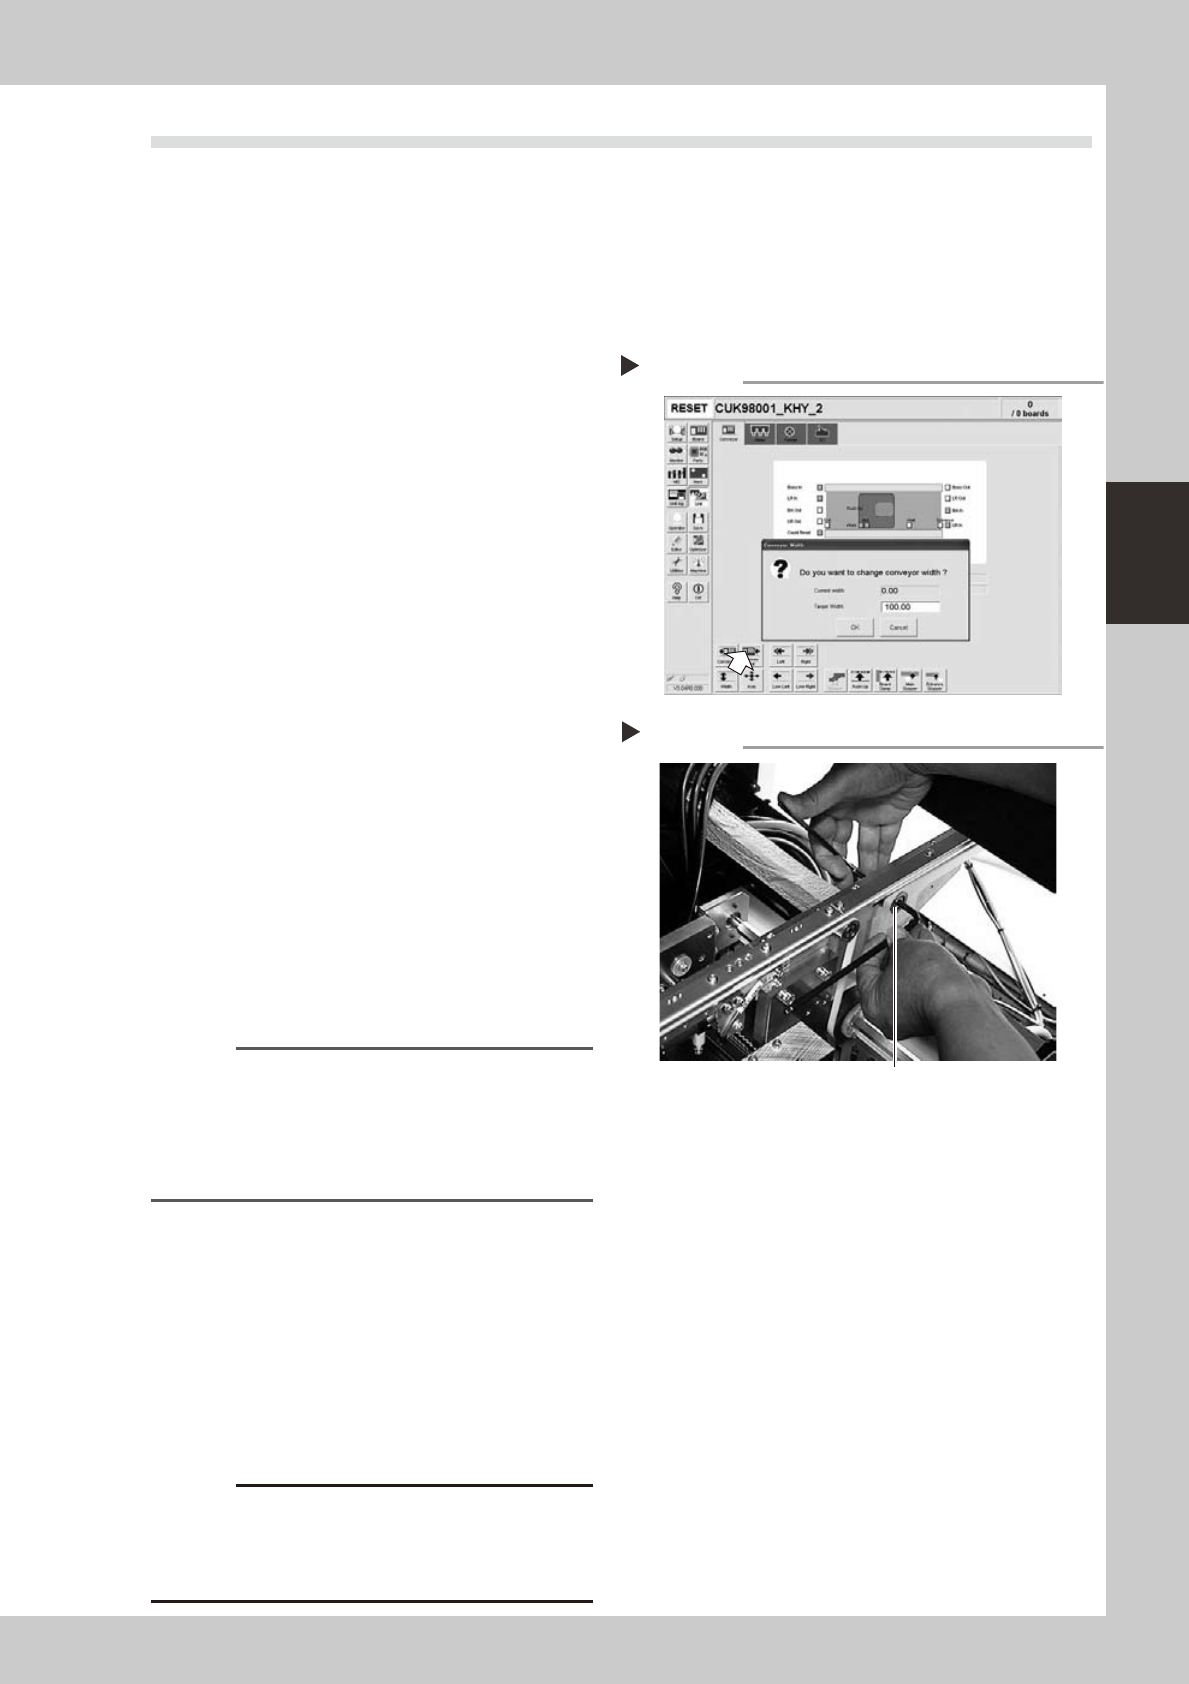
1
Change the conveyor width to a
convenient width for maintenance
work.
1. Press the [Width] button to display the
"Conveyor Width" dialog.
2. In the "Target Width" box, enter a width
large enough for maintenance work
(about 200mm) and press [OK].
The conveyor is changed to the width
that was just entered.
54304-L5-00
e
2
Loosen the tension on the conveyor
belt.
Press the emergency stop button and then
use a 4mm and 5mm hex wrenches to
loosen the belt tension.
53332-L5-00
3
Remove the conveyor belt.
Remove the conveyor belt from the pulley
and the belt groove of the board guide.
4
Check for wear on the board
conveying side of the conveyor belt.
After removing the belt in step 3, check for
wear on the board conveying side of that
conveyor belt.
Reference
About half (3 to 4 mm) the belt width is used for board
conveying. If the board conveying side of the conveyor
belt is worn, then you can still reuse the belt by
switching the used side with the opposite side. However,
this will cause errors after long-term use, so early belt
replacement is recommended.
5
Clean the pulley and the belt
groove on the board guide.
Using a vacuum cleaner or similar device,
suction up the belt wear dust deposited in
the belt groove or on the sensor surface.
Also use a vacuum cleaner while brushing
debris away with the brush supplied with the
machine.
Also clean the pulley and other parts for the
conveyor belt.
c
Though it rarely occurs, dust from belt wear might
sometimes adhere to and darken the outer
circumference of the pulley. If that happens, then
remove it with a metallic spatula, etc.
Changing the conveyor width
Step 1
Step 2
Tensioner bolt
Loosening the tension on the belt