PPS Pro version 8.2.pdf - 第175页
4022 591 98 247 U ser Manual 05.07 P PS-Pro v8.2 171 Guidelines for using PPS-Pro APPENDIX C W hat to do in case of a pr oblem C.1 Surve y T o e n a bl e A s se m b lé on t o f i n d a so lu t io n d a ta m u s t b e g a…

User Manual 4022 591 98247
170 PPS-Pro v8.2 05.07
Guidelines for using PPS-Pro
components that the system would search for in the Gerber file. However,
standard pad layout designs often change and many designers customize their
pad groupings for various reasons, rendering these libraries useless. The
operator then needs to “teach” the new groupings. As you can imagine, this
becomes a time intensive and aggravating task for the operator of the appli
-
cation. Finally, until recently, the fastest means of extracting reference desig-
nators from the file was a text recognition system that looks for text of a
certain size and then joins it to the closest part on the board. This process
takes a very long time and is not always reliable. As anyone who works with
boards knows, the reference designators are often difficult to associate with
component locations on dense assemblies— imagine how hard it is for a
computer lacking intuition! Also imagine how hard it is to find the errors the
computer made on a 400-component board! You might as well enter the data
manually in the first place. Finally, present digitizers cannot process layers
with traces on them and need special, time-consuming manipulation of rastered
pads.
(See definition below)
B.3 What is a rastered pad?
Pads are often drawn as a single “flash” in Gerber files. However, as technology
changes, more files are using “rastered pads.” Each pad can be constructed of
many lines (40-60) drawn in a zigzag fashion to fill in the pad area. In order for
most Gerber digitizers to accept this type of pad, extra manual manipulation is
needed on each component to change the pads into flashes! This is a time-
consuming step on your way to a digitized assembly.

4022 591 98247 User Manual
05.07 PPS-Pro v8.2 171
Guidelines for using PPS-Pro
APPENDIX C What to do in case of a problem
C.1 Survey
To enable Assembléon to find a solution data must be gathered, some checks
can be performed that may lead to a solution right away. These checks are
described in the ‘pre-gather-stage’. If eventually no solution is found, all
information must be gathered. This is described in the ‘gather-stage’. After
this stage, all information can be sent to the local Customer Support
(hereafter CS). This is described in the ‘post-gather-stage’. All three stages are
related to PPS 8.1.
If you are familiar with gathering information, the checklist can directly be
used
(see C.4 on page 178).
C.2 Pre gather stage
Before submitting the information, you can try to find the solution by
yourself. This chapter provides you with some checks which can be performed
in order to attempt this:
■ Check the Release Notes if it is documented and known
■ Use the manual, maybe the solution is already described.
■ Ensure that the latest software version has been installed.
■ Place the project on a local drive if it is not already placed.
■ Check if the length of the total path does not exceed the maximum path-
length which is described in the user manual.
■ Delete all spaces in path and file names.
■ Delete all forbidden characters which are described in the user manual.
■ Use the correct ALE file.
■ Use the correct PSI file.
■ Use the correct aperture files
■ Check that there is enough free diskspace available (20Mb).
■ Check the read/write rights on the involved files and/or directories.
■ Use Help (see SCREEN 86 on page 172).
User Manual 4022 591 98247
172 PPS-Pro v8.2 05.07
Guidelines for using PPS-Pro
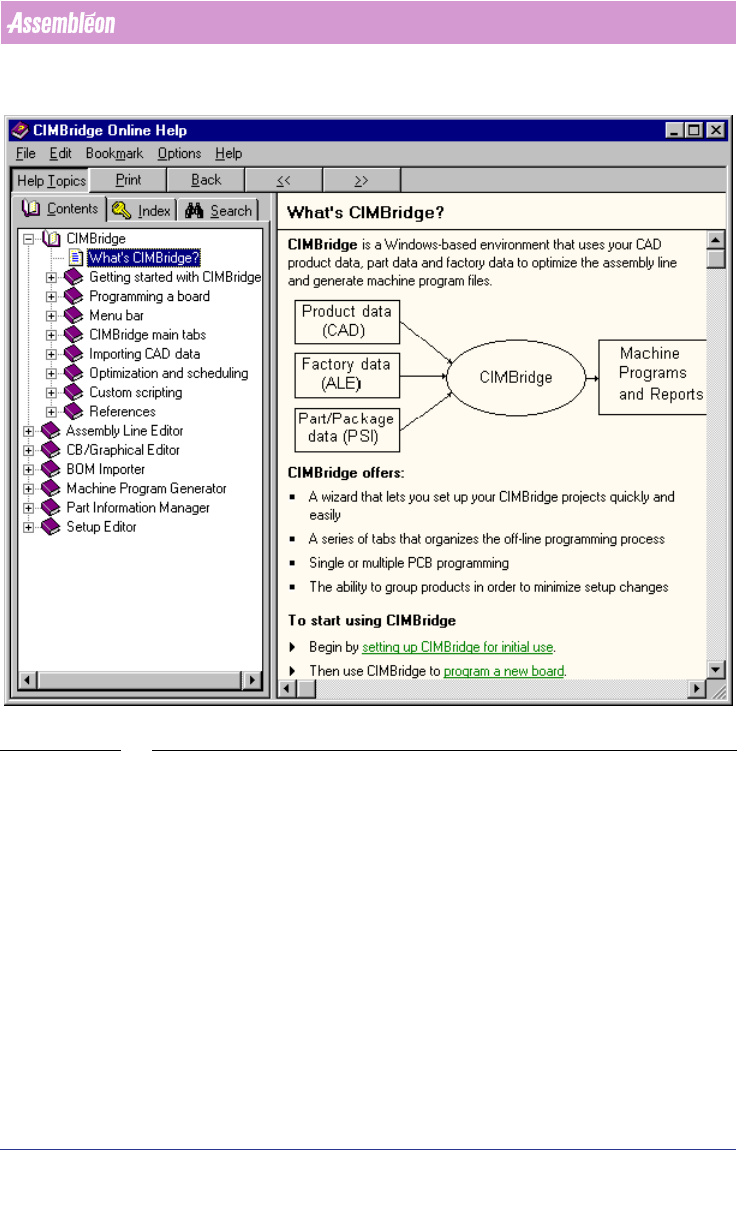
SCREEN 86 PPS-Pro Help
C.3 Gather stage
If the actions described in the ‘pre-gather-stage’ do not lead to a solution, all
information must be gathered and send to the local CS provider
(see C.4 on
page 178). The calculation can only be reproduced when they have the same
circumstances and information available. This is very important, it is for the
benefit of all parties that correct and useful and understandable information
is provided. If language is a barrier then ask the local CS provider to translate
the information.
1. Describe the project.
■ Make a screendump of the error or warning which is shown. The
screendump can be made by pressing the Alt+Print Screen keys when the
error or warning is the active window. Further, copy this screendump into
a new file of an image-editor and save it.