PPS Pro version 8.2.pdf - 第181页
4022 591 98 247 U ser Manual 05.07 P PS-Pro v8.2 177 Guidelines for using PPS-Pro The fir st way is via th e Import Data tab (see SCREEN 91 on pag e 177) . Just foll ow th e lin e to fin d th e fil e . SCREEN 91 Import B…
User Manual 4022 591 98247
176 PPS-Pro v8.2 05.07
Guidelines for using PPS-Pro
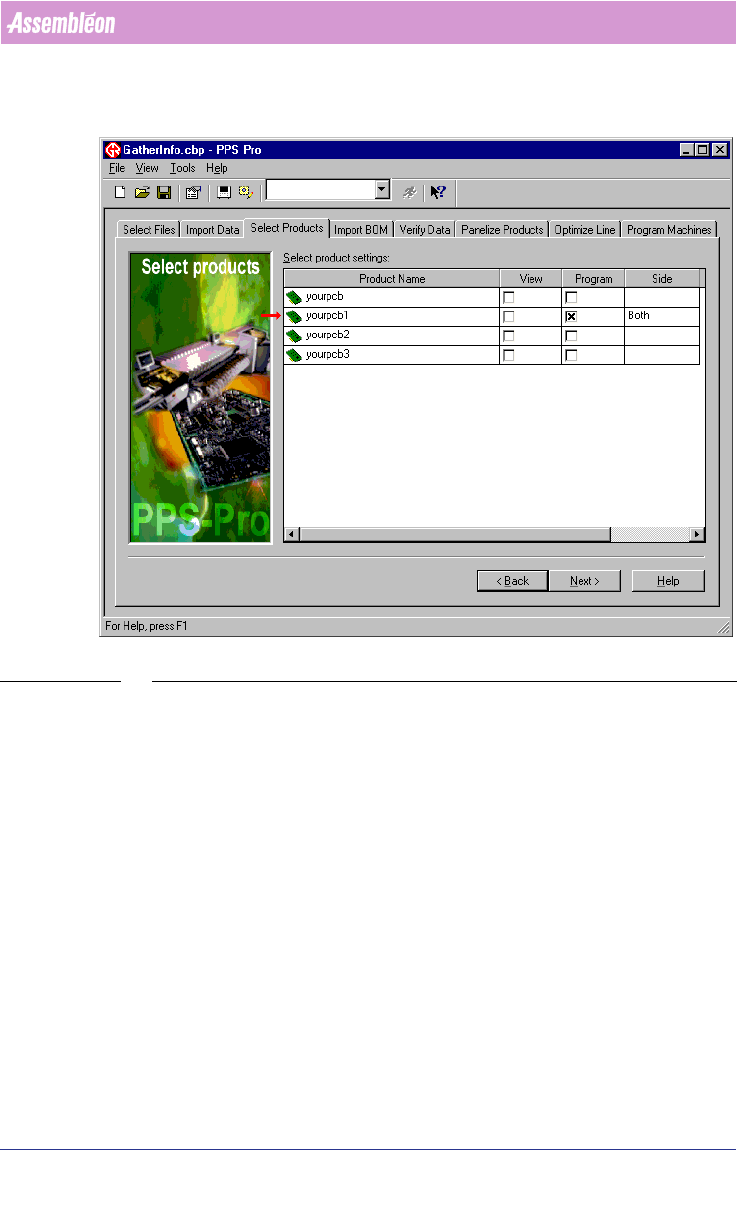
Action: Write down the name(s) of the pcb’s and their corresponding side
which must be optimized.
SCREEN 90 Optimized PCB
10. BOM-file (if used)
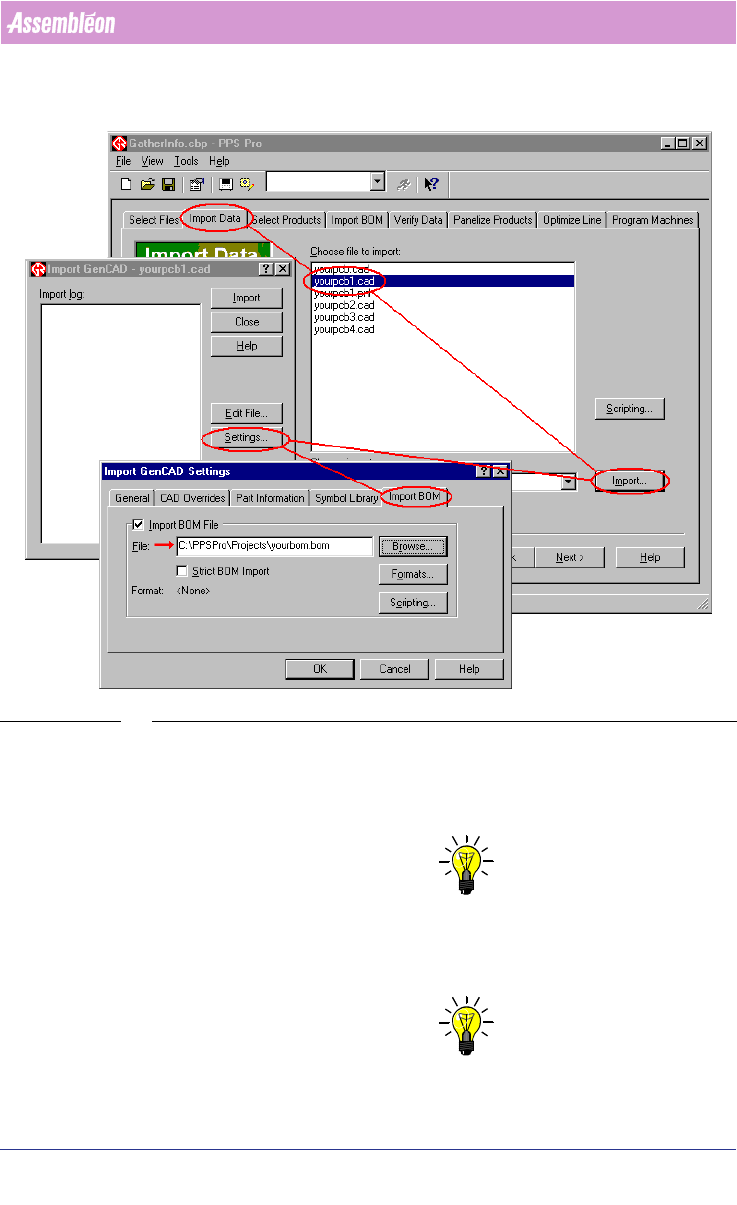
There are two ways to find out where the used BOM-file is placed.
4022 591 98247 User Manual
05.07 PPS-Pro v8.2 177
Guidelines for using PPS-Pro
The first way is via the Import Data tab (see SCREEN 91 on page 177). Just
follow the line to find the file.
SCREEN 91 Import BOM - GenCad Settings
The second way is via the Import BOM tab.
Action: Make a copy of this file.
11. Gerber and aperture files (A-Series)
NOTE: Gerber and aperture files are only needed if artwork extraction is applied.
Make sure that all relevant gerber and aperture files are send.
12. Ini-files (Powerline, only if modified)
NOTE: Ini files are only needed for Powerline optimizing.

User Manual 4022 591 98247
178 PPS-Pro v8.2 05.07
Guidelines for using PPS-Pro
NOTE: Maintain directory structure in the zip-file.
A zip-file of the entire ‘Dat’ directory can be made in the Windows™ Explorer.
Right-click ‘Dat’ from the directory where PPSPro™ is installed (default
‘C:\Assembleon\PPSPro\Site\Template\Philips\Dat’) and select
Add to
Dat.zip from the menu.
Action: Make a copy of this directory.
13. Optimizer files (Powerline)
14. Maintain directory structure in the zip-file.
A zip-file of the entire ‘philips’ directory can be made in the Windows™
Explorer. Right-click ‘philips’ from the directory where PPSPro™ is installed
(default ‘C:\Assembleon\PPSPro\
Bin\philips’) and select Add to philips.zip from the menu.
Action: Make a copy of this directory.
15. Optimizer files (A-Series)
16. Maintain directory structure in the zip-file.
A zip-file of the entire ‘optimizer’ directory can be made in the Windows™
Explorer. Right-click ‘optimizer’ from the directory where PPSPro™ is installed
(default ‘C:\Assembleon\PPSPro\Optimizer\ ’) and select
Add to
Optimizer.zip from the menu.
17. Action: Make a copy of this directory.
C.4 Post gather stage
When all information is gathered (see TABLE 37 on page 179), it can be send
to your local Customer Support provider.
C.4.1 Checklist
If not all information is gathered (use the list below to check) then go back to
the ‘gather-stage’
(see C.3 on page 172) and take all necessary steps.
Description Check [√]
Description of the exact project and error message
including screendumps.
Description of the already made investigation.
Copy of the whole project-directory (zip-file).
Used “Build Version”
Name of the used line optimizer.
Name of the used line.