1_NXT Conveyor(1.0)E.pdf - 第13页
4. Also if the tilt of the cam follower rail is more than 0.1mm the set bolt can be used to adjust it. 5. Old type conveyor back up plate height setti ng. Similarly bring the dial gage from the head. Use jig (PM06320). L…
9. As a final check use a 0.3~0.5mm thickness gage as shown in the photo below. Check
whether the push amount is 0 when a board is clamped.
1.5 Conveyor up/down height adjustment (previous M3 and current M6 type)
PM06340 down type 27±0.05 ㎜
PM06330 up type 63±0.05㎜
1. Remove the parts camera and check that there is no rust, then place the jig. Remove
the head and set the jig from which the handle has been removed (AA1TT00). Attach
the dial stand to the jig and set the dial to 0.
2. Measure the lower surface of the cam follower in relation to the jig. Check that it is the
same as the jig (0 ~ 0.1mm).
3. If adjustment is necessary remove the cylinder cover and loosen the 10mm nut.
NXT Repair Training Textbook
Conveyor Unit
FK-9F98-43-0E
Edition 1.0 11 / 46 FUJI Machine Mfg. Co., Ltd.
4. Also if the tilt of the cam follower rail is more than 0.1mm the set bolt can be used to
adjust it.
5. Old type conveyor back up plate height setting. Similarly bring the dial gage from the
head. Use jig (PM06320). Loosen 2 M5 bolts and use the hollow bolt to adjust the rail
height to the same height as the jig (0 ~ 0.1mm).
6. Use the 4 x M3 bolts to adjust the position of the linear guide so that the left and right
hand flatness of the rail becomes 0.05mm or less.
NXT Repair Training Textbook
Conveyor Unit
FK-9F98-43-0E
Edition 1.0 12 / 46 FUJI Machine Mfg. Co., Ltd.
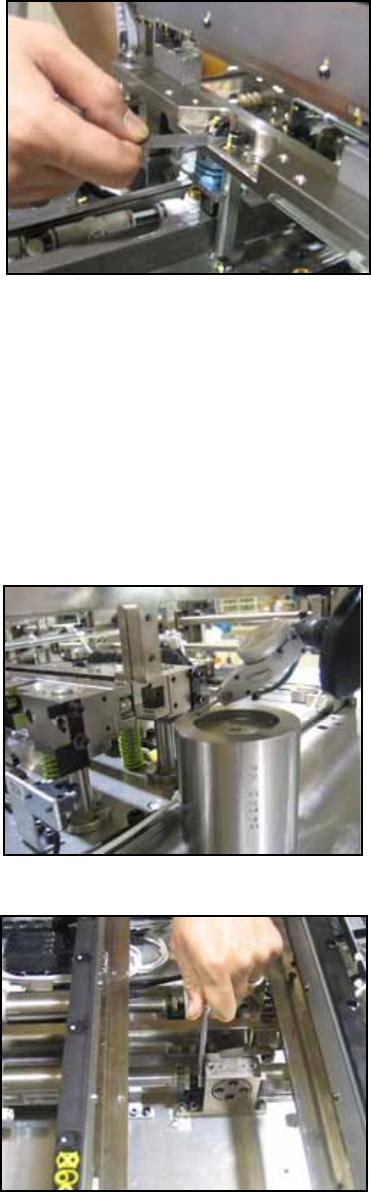
1.6 Board transport rail height adjustment
Z0 board top surface height measurement jig 203mm PM36290
1. Remove the reject parts box and place the jig. Set the dial gage to 0 on surface A.
Loosen and adjust the M5 x 10 bolt so that the surface with the reference rail removed
becomes 0. However, be aware that it is necessary to check the parallelism of the
reference rail if it is removed.
2. B is the same height as the Z0 height detection sensor installation surface.
3. C is the same height as a clamped board (203mm).
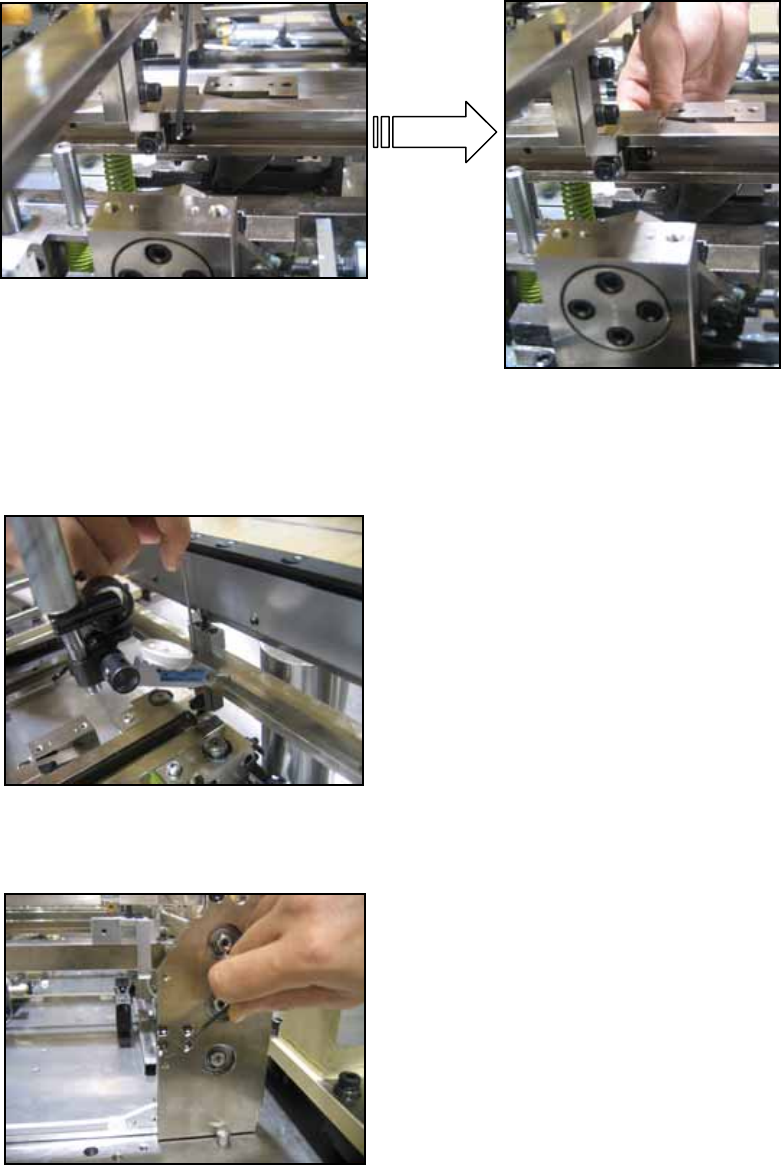
1.7 Lifter up/down sensor adjustment (current type)
1. Raise the lifter and loosen the installation bolts for the Lane 1 sensor flag.
2. Lower the lifter and set the lane 1 width to 100.5mm.
3. Place the combination plate jig (PM45770) in lane 1 with the 7.4mm sides parallel to
the conveyor rails.
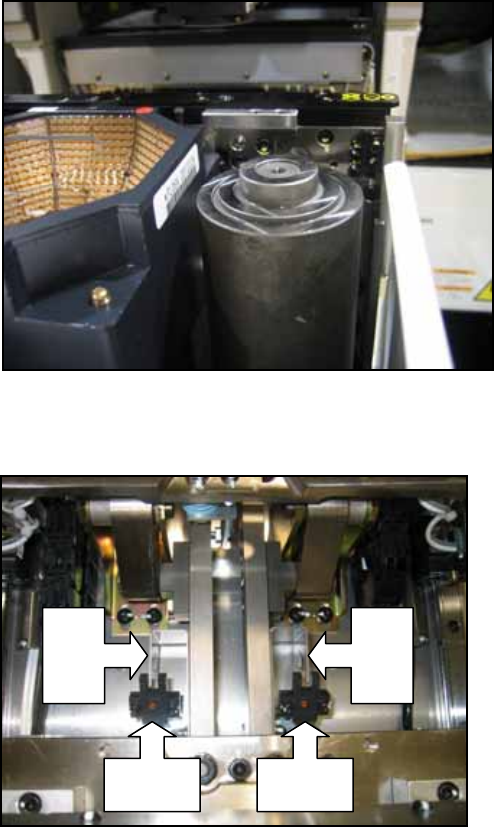
Lane 1
Sensor
Lane 2
Sensor
Sensor
Flag
Sensor
Flag
NXT Repair Training Textbook
Conveyor Unit
FK-9F98-43-0E
Edition 1.0 13 / 46 FUJI Machine Mfg. Co., Ltd.