1_NXT Conveyor(1.0)E.pdf - 第24页
7. Select [Programs] – [Accessories] – [C ommunications] – [HyperTerminal] – [Conveyor] to open the HyperTerminal window. 8. Turn ON the CID power. 9. The conveyor firmware version should di splay in the HyperTerminal wi…
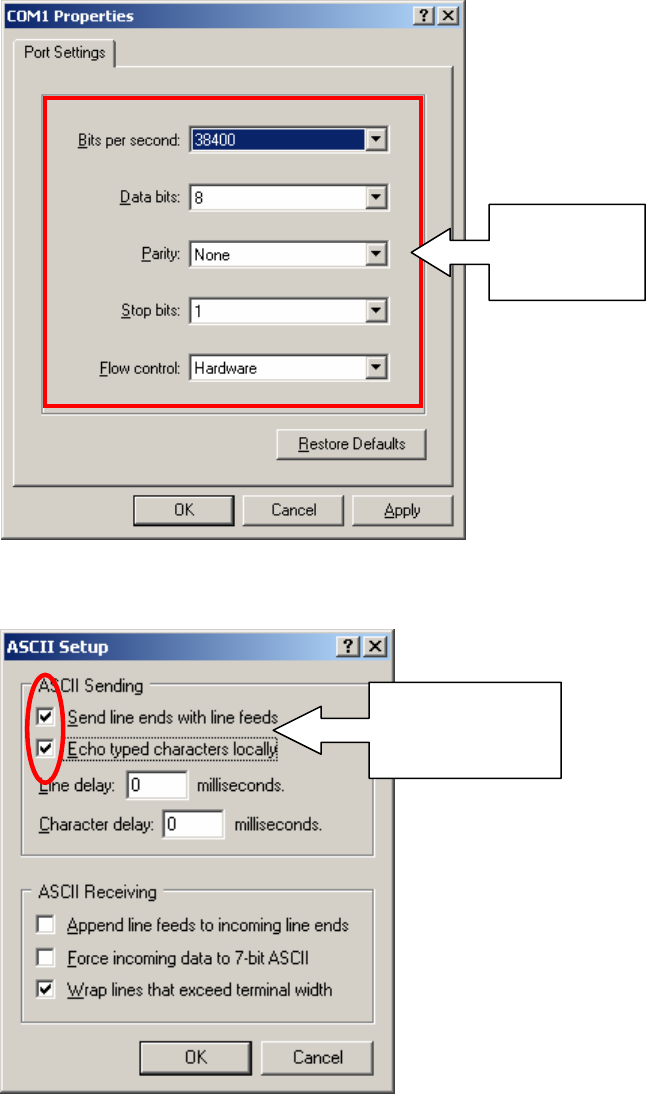
4. Click [OK] and make the following settings in the COM1 Properties dialog:
5. On the HyperTerminal task bar select [File] – [Properties] and select the [Settings] tab.
Click [ASCII Setup…] and put check marks in the two check boxes indicated below:
6. Click [OK] to finish.
Make the
settings
shown here
Put check marks
in these two
check boxes
NXT Repair Training Textbook
Conveyor Unit
FK-9F98-43-0E
Edition 1.0 22 / 46 FUJI Machine Mfg. Co., Ltd.
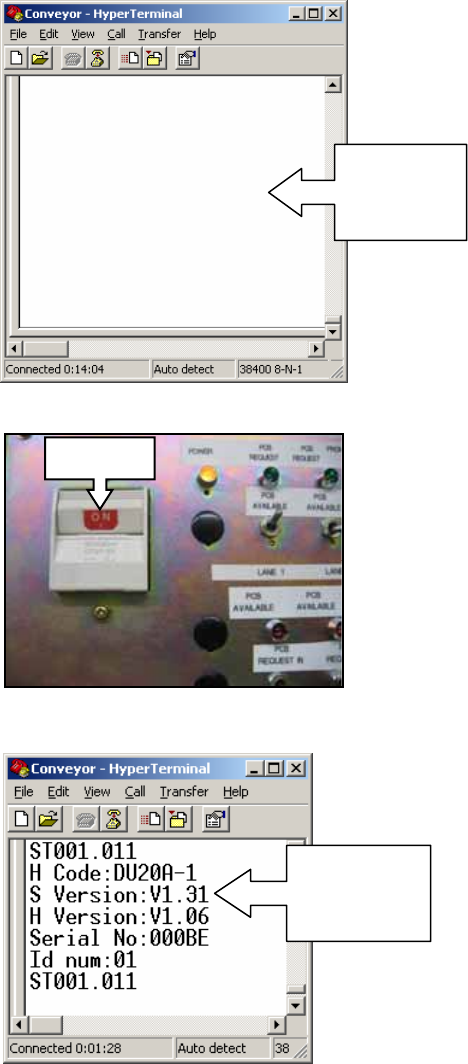
7. Select [Programs] – [Accessories] – [Communications] – [HyperTerminal] – [Conveyor]
to open the HyperTerminal window.
8. Turn ON the CID power.
9. The conveyor firmware version should display in the HyperTerminal window as shown:
10. If the firmware version does not display, check the cable connections.
Open
Hyper
Terminal
ON
Conveyor
firmware
version
NXT Repair Training Textbook
Conveyor Unit
FK-9F98-43-0E
Edition 1.0 23 / 46 FUJI Machine Mfg. Co., Ltd.
2.4 Calibrating the conveyor motors
1. Turn the CID power OFF.
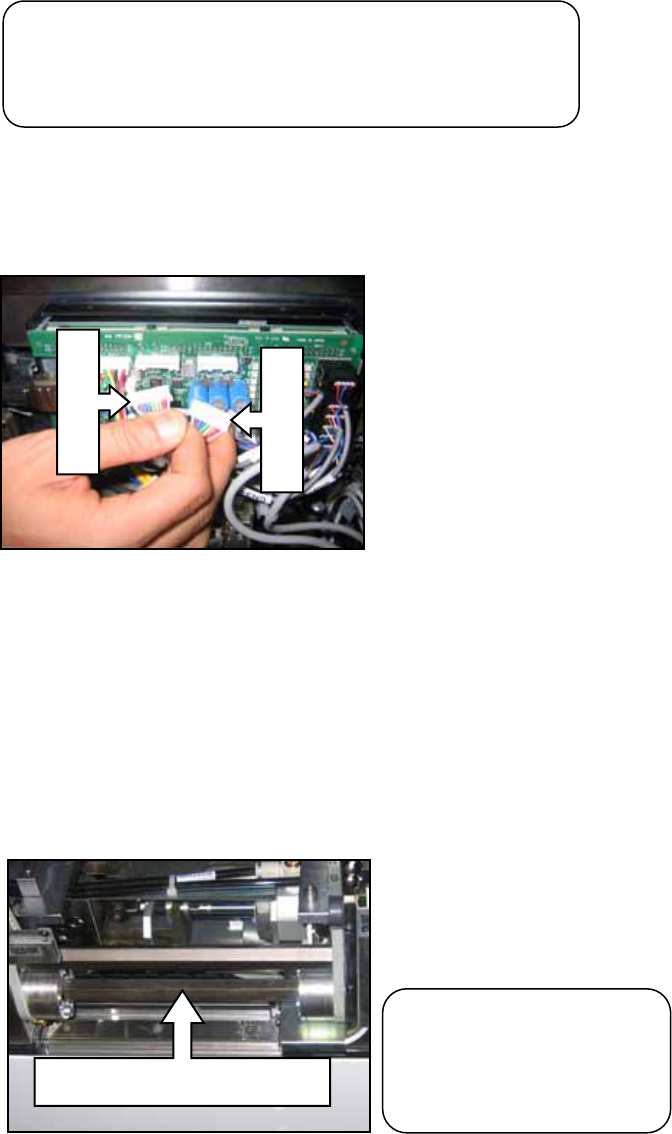
2. Disconnect the CN4-1 and CN4-2 connectors from the conveyor controller board as
shown below.
3. Turn the CID power ON.
4. Turn the CID power OFF.
5. Reconnect the CN4-1 and CN4-2 cables.
6. Turn the CID power ON and the calibration proceeds automatically. The shaft shown
in the photo below will rotate slightly.
7. Wait approximately 10 seconds and then turn the CID power OFF.
CN4-1
CN4-2
This shaft rotates slightly
Caution! The motion of
the motor may be
unstable if this calibration
is not carried out correctly.
Note: this calibration procedure is necessary if the
conveyor motor encoder cables have been
disconnected from the conveyor controller board.
NXT Repair Training Textbook
Conveyor Unit
FK-9F98-43-0E
Edition 1.0 24 / 46 FUJI Machine Mfg. Co., Ltd.