1_NXT Conveyor(1.0)E.pdf - 第18页
Chapter 2 – Checking the Conveyor 2.1 Connecting the conveyor to the conveyor inspection devic e 1. Connect the RS232C cable to the Com1 port on the computer and to the RS232C port on the NXT Conveyor Inspection Device (…

C
C
h
h
a
a
p
p
t
t
e
e
r
r
2
2
C
C
h
h
e
e
c
c
k
k
i
i
n
n
g
g
t
t
h
h
e
e
C
C
o
o
n
n
v
v
e
e
y
y
o
o
r
r
NXT Repair Training Textbook
Conveyor Unit
FK-9F98-43-0E
Edition 1.0 16 / 46 FUJI Machine Mfg. Co., Ltd.

Chapter 2 – Checking the Conveyor
2.1 Connecting the conveyor to the conveyor inspection device
1. Connect the RS232C cable to the Com1 port on the computer and to the RS232C port
on the NXT Conveyor Inspection Device (hereafter referred to as CID).
2. Connect the power cable (POWER RH09900) to the CID.
3. Connect the CN1 (RH09910) and CN2 (RH09920) cables to the CID.
Com 1
RS232C
POWER
CN1
CN2
NXT Repair Training Textbook
Conveyor Unit
FK-9F98-43-0E
Edition 1.0 17 / 46 FUJI Machine Mfg. Co., Ltd.
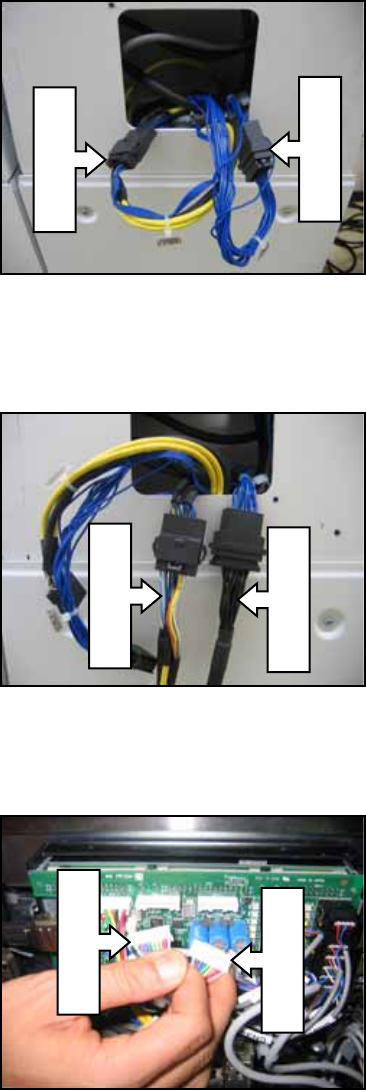
4. Turn the NXT power OFF, and then remove the cover at the back of the module. Pull
out the EXCNC/V1 RH07021 and EXCNC/V2 RH07031 cables.
5. Disconnect the EXCNC/V1 and EXCNC/V2 cables and connect them to the CN1 and
CN2 cables from the CID as shown below.
6. Disconnect the CN4-1 and CN4-2 connectors from the conveyor controller board as
shown below.
EXCNC/V2
EXCNC/V1
RH09920
RH09910
CN4-1
CN4-2
NXT Repair Training Textbook
Conveyor Unit
FK-9F98-43-0E
Edition 1.0 18 / 46 FUJI Machine Mfg. Co., Ltd.