1_NXT Conveyor(1.0)E.pdf - 第7页
1.2 Belt guide positioning jig AA1BT00 1. Contact the board transport rail with the belt-guide positioning jig (AA1BT00) as shown in the photo below. Adjust the belt height so that the belt guide just touches the jig low…
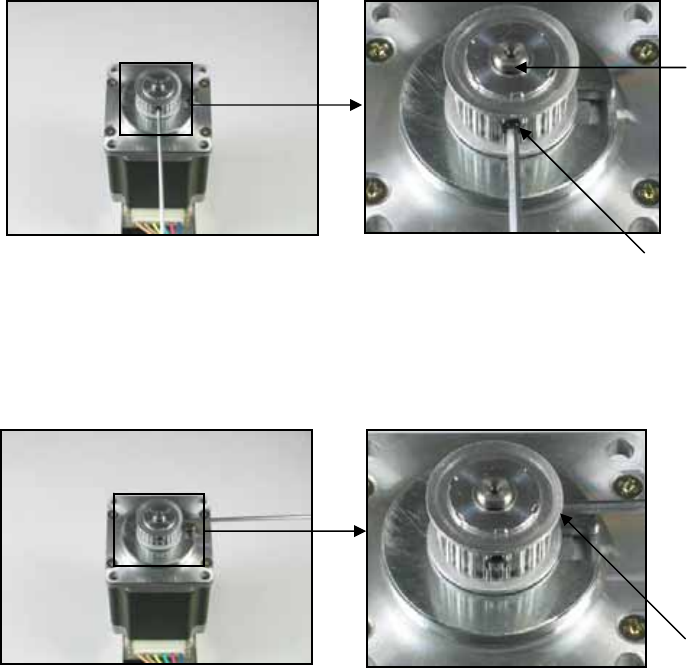
8. Dip the tip of the M4 x 6 hollow bolt in Loctite 222 and tighten it in the first tapping hole
on the pulley (the tip of the hollow bolt should contact the flat cutout section on the
motor shaft).
9. Dip the tip of the M4 x 4 hollow bolt in Loctite 222 and tighten it in the second tapping
hole on the pulley.
10. Remove the jig.
11. Clean the tapping holes to remove any excess adhesive.
12. Put check marks on the tapping holes.
Flat cutout
section of
motor shaft
M4x6 Hollow bolt
(Loctite 222)
M4x4
Hollow bolt
(Loctite
222)
NXT Repair Training Textbook
Conveyor Unit
FK-9F98-43-0E
Edition 1.0 5 / 46 FUJI Machine Mfg. Co., Ltd.
1.2 Belt guide positioning jig
AA1BT00
1. Contact the board transport rail with the belt-guide positioning jig (AA1BT00) as shown
in the photo below. Adjust the belt height so that the belt guide just touches the jig
lower surface.
2. The jig thickness is 1.2mm therefore it is possible to use a 1.2mm thickness gage
instead.
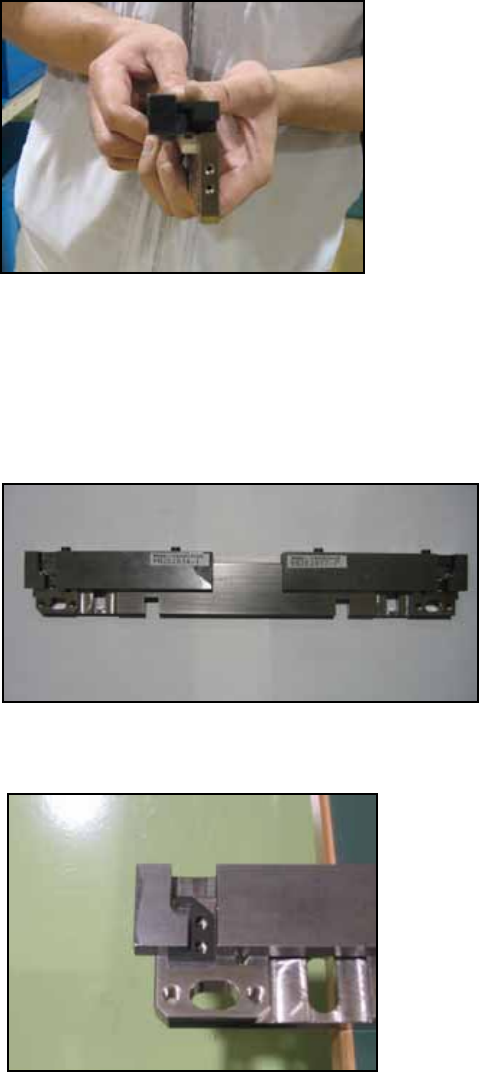
1.3 Board pass check sensor positioning bracket alignment
PM21030 & PM21040
1. Attach the jig as shown in the photo.
2. Mate the bracket undersurface with the jig undersurface and join them. M3×8 + M3
spring washer + special flat washer(W1041F)
NXT Repair Training Textbook
Conveyor Unit
FK-9F98-43-0E
Edition 1.0 6 / 46 FUJI Machine Mfg. Co., Ltd.
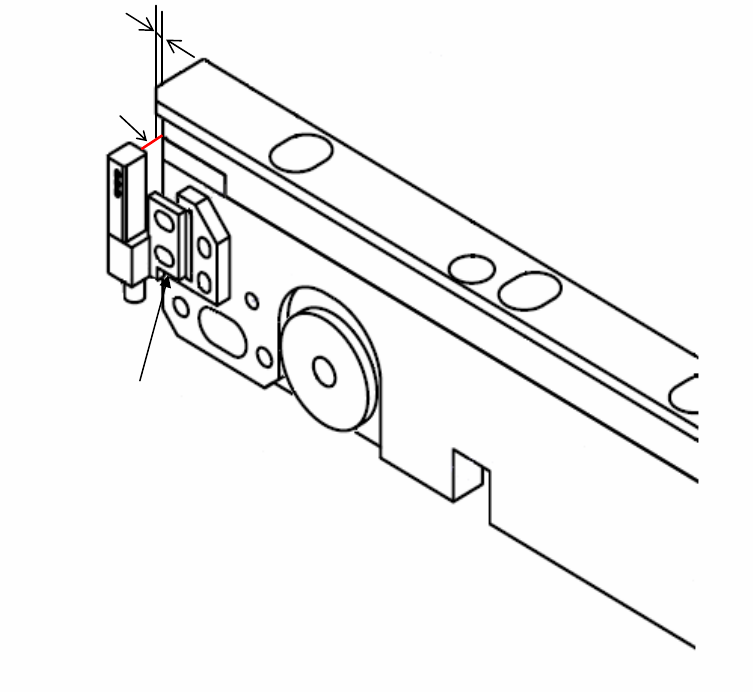
3. Glue the sensor to the surface of the aligned bracket and position it.
1mm
Sensor Beam
Glue this surface
to the bracket
NXT Repair Training Textbook
Conveyor Unit
FK-9F98-43-0E
Edition 1.0 7 / 46 FUJI Machine Mfg. Co., Ltd.