ACT - Accuracy Check Tool.pdf - 第124页
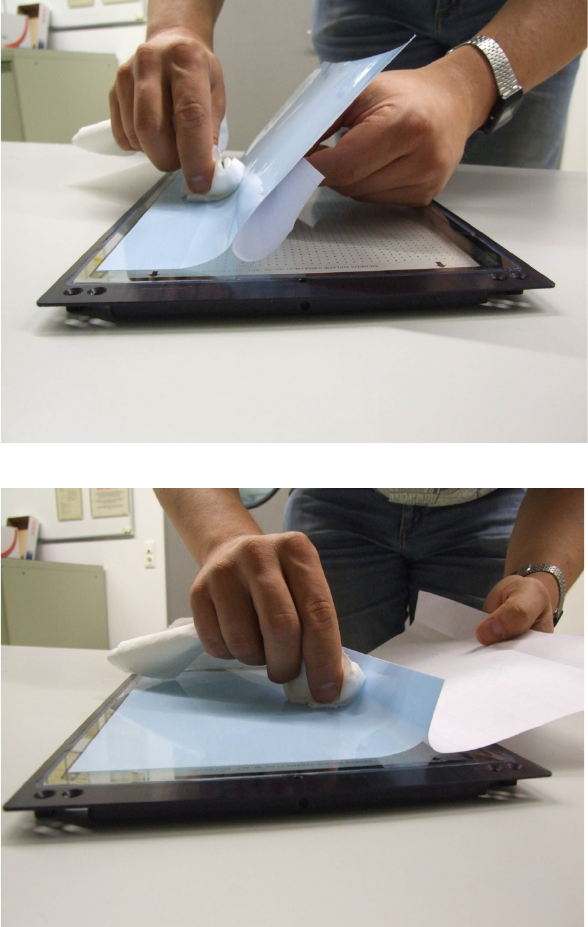
ACT with SSW 7xx / User Manual 07/2017 Edition 16 ► Take a cloth and smooth the foil beginning at the m iddle as displayed in Figu re 3-6 and Figure 3-7 . Figure 3-6: ACT measuring plate with adhesive foil Figure 3-7: AC…
ACT with SSW 7xx / User Manual 07/2017 Edition
15
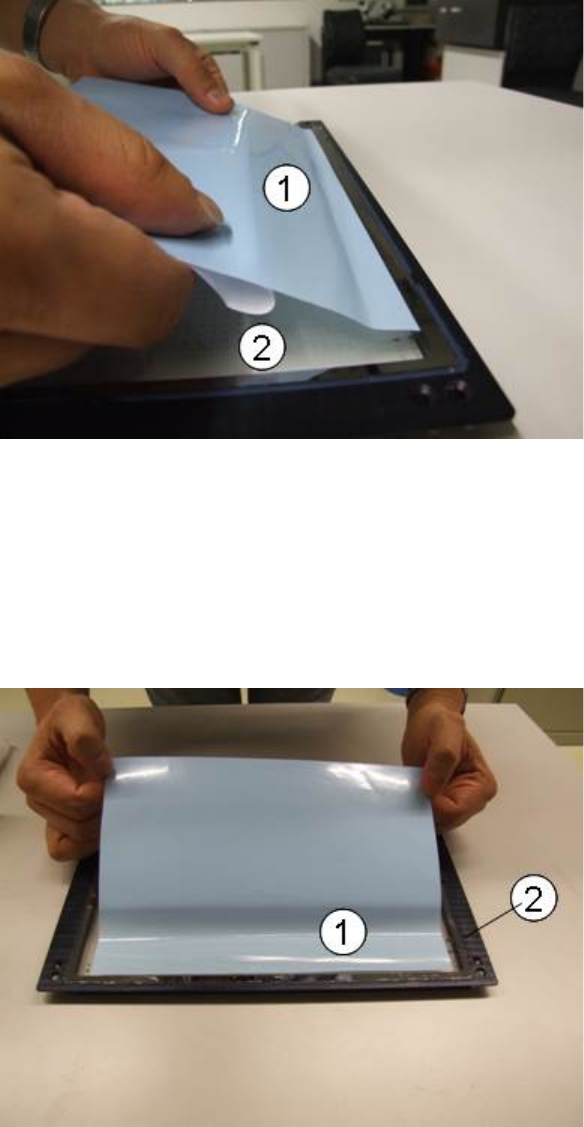
► Apply the foil.
► Start at the wide side of the measuring plate (Figure 3-4).
► Smooth any air bubbles out towards the side.
Figure 3-4: ACT measuring plate with adhesive foil
Key:
(1) Protective sheet on
adhesive foil
(2) ACT measuring plate
► Apply the foil as displayed in Figure 3-5.
Figure 3-5: ACT measuring plate with adhesive foil
Key:
(1) Protective sheet on
adhesive foil
(2) ACT measuring plate
ACT with SSW 7xx / User Manual 07/2017 Edition
17
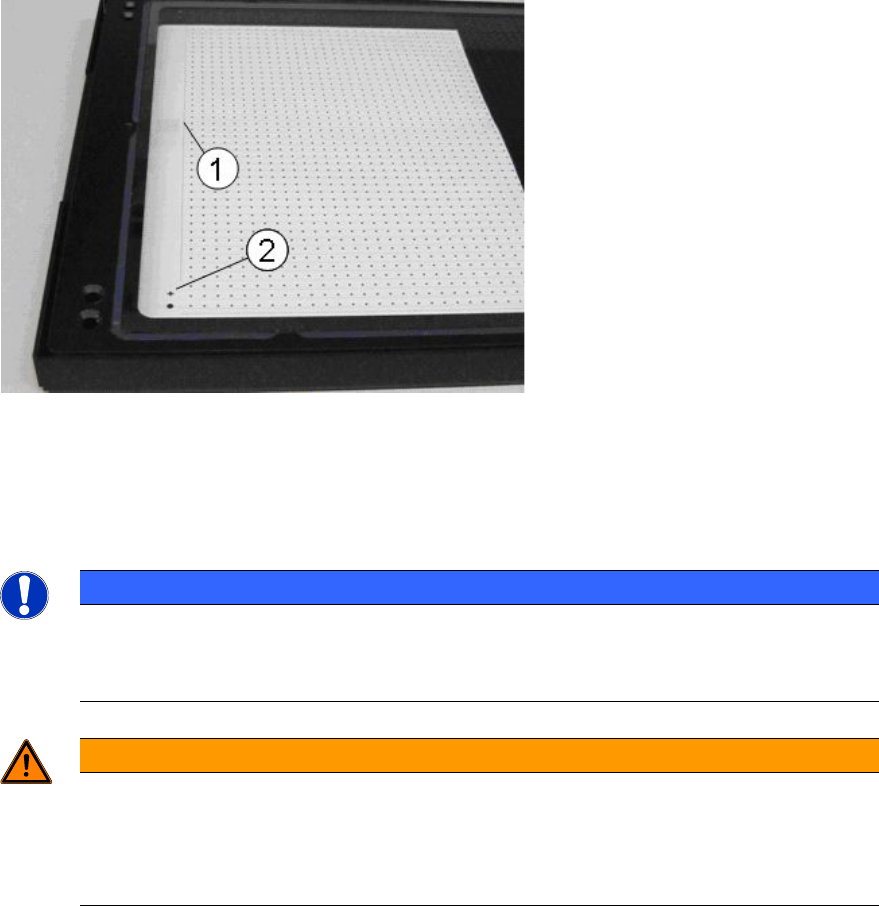
► Pull off the upper blue foil.
The adhesive foil should cover the measuring plate up to the silver edge (1) (Figure 3-8).
► Make sure that the global fiducials (2) are kept free of the foil.
Figure 3-8: ACT measuring plate with silver edge and cross fiducial
Key:
(1) Silver edge
(2) Cross fiducial
NOTICE
Foil can be used several times
After measurement, the components can be carefully scraped off from the foil.
Thus, several placements/measurements (up to 20) can be performed with one foil.
WARNING
Avoid scratching the grid!
The grid (3) is not covered by the foil and thus not protected!
► Therefore, always scrape the foil away from the grid (3) so that the components do
not slide over the grid!