ACT - Accuracy Check Tool.pdf - 第131页
ACT with SSW 7xx / User Manual 07/2017 Edition 23 If data is to be ov erwritten, t he following screen is di splayed: Figure 3-14: Vision data import ► Activate the Overwrite Vision data opti on. ► Click Next. Figure 3-1…
ACT with SSW 7xx / User Manual 07/2017 Edition
22
NOTICE
Import of data
► Please do not change the destination folder.
► Do not select the Flatten directories check box.
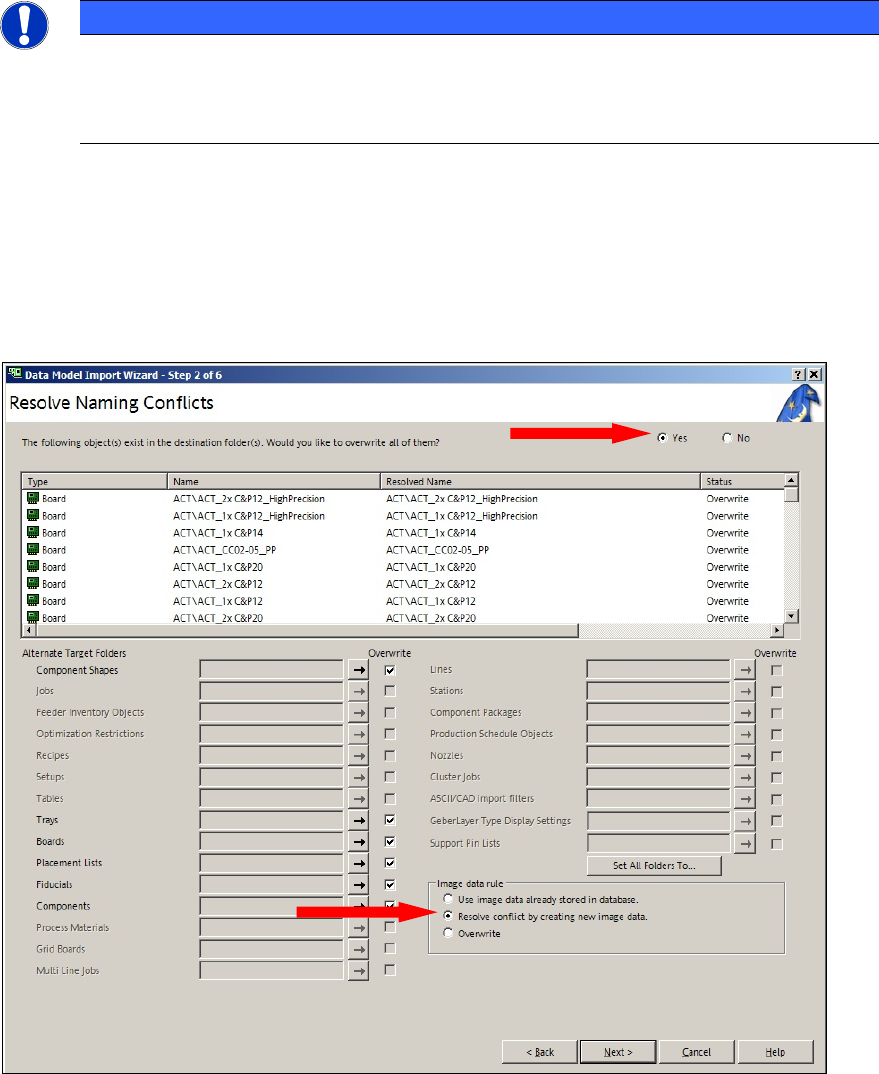
If ACT data has already been imported, the following screen will be displayed (Figure 3-13).
► To overwrite the objects, set the option The following object(s) exist in the destination
folder(s). Would you like to overwrite them? to Yes.
► Enable the option Resolve conflict by creating new image data.
► Click Next.
Figure 3-13: Information screen: Resolve conflict by creating new image data
ACT with SSW 7xx / User Manual 07/2017 Edition
23
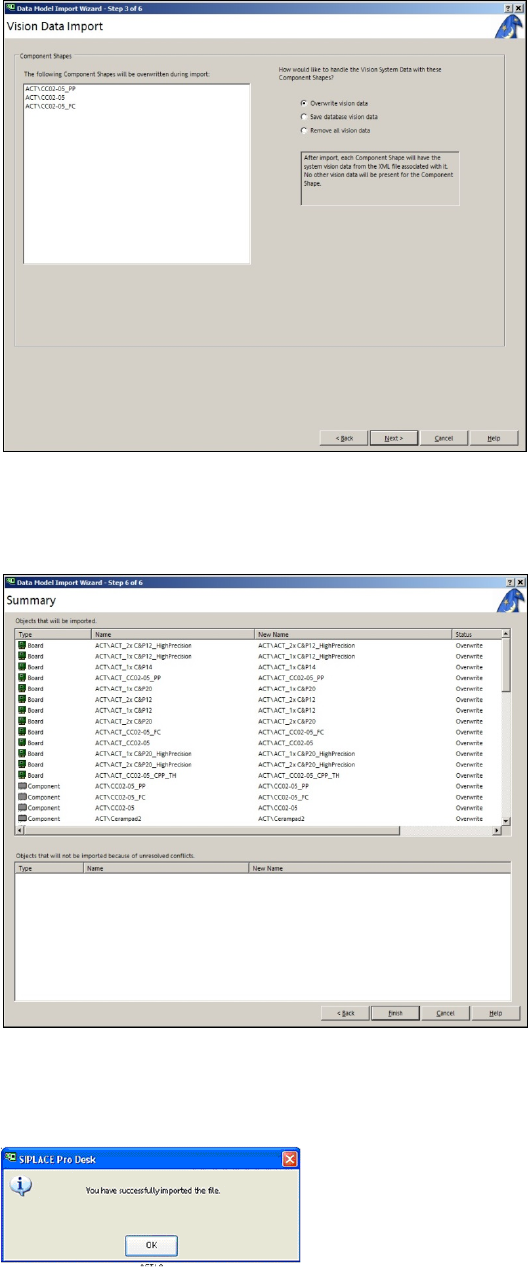
If data is to be overwritten, the following screen is displayed:
Figure 3-14: Vision data import
► Activate the Overwrite Vision data option.
► Click Next.
Figure 3-15: Screen for finishing the import of files for ACT
► Click Finish.
The following message is displayed on the screen:
Figure 3-16: Screen for finishing the import of files for ACT
► Click OK.
The next screen is displayed in which you will see the folder structure for the boards.
ACT with SSW 7xx / User Manual 07/2017 Edition
24
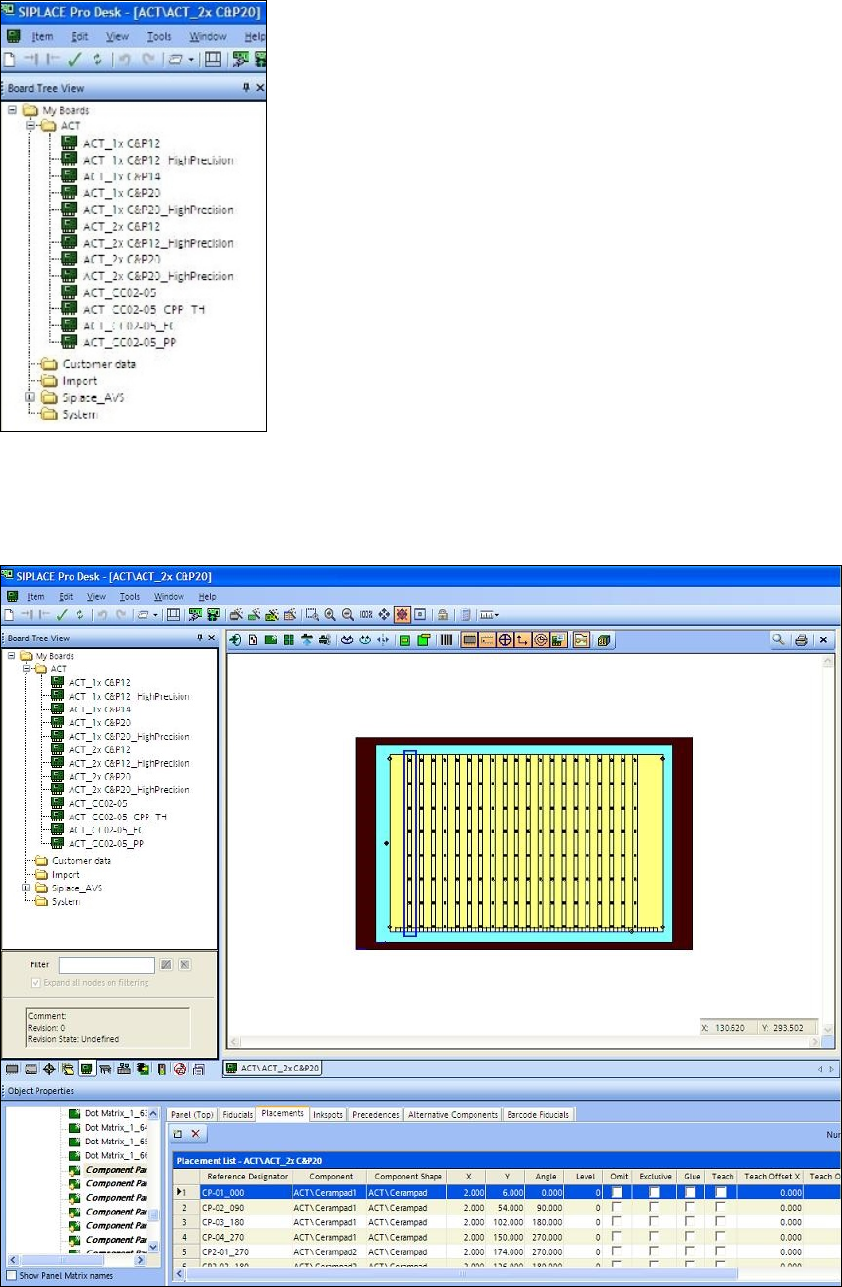
Figure 3-17: Folder structure in SIPLACE Pro
Figure 3-18 displays the ACT board with placed ceramic components, as an example. You can
also see the folder structure and the alternating component designations Cerampad1 and
Cerampad2 for alternating placement by both C&P20 heads.
Figure 3-18: Example: Board description for ACT in SIPLACE Pro for 2xC&P20