ACT - Accuracy Check Tool.pdf - 第202页
ACT with SSW 7xx / User Manual 07/2017 Edition 94 6.1.3 Preparations for ACT 15 µm Measurement The use of a vacuum tooli ng is one of the ba sic prerequi sites of the ACT 15 μ m meas urement. A complete vacu um tooling i…

ACT with SSW 7xx / User Manual 07/2017 Edition
93
6.1.2 Contents "Accuracy Test Device 15 µm" (Item No. 03159543-01)
Item description Item number Number
ACT package TX2i micron 15 03156157-01 1 x
ACT Test dummy 250 x 100 x 3 03156158-01 1 x
VacTool ACT SP1 cpl. 03156327-01 1 x
VacTool ACT SP2 cpl. 03156332-01 1 x
ACT Plate TX micron 03146927-01 1 x
Cover for ACT Plate TX micron 03156166-01 1 x
Ceram Pads 2x2mm on tapes 00359505-02 1 reel
Thermof. Revalpha
3195 V - 0,038 mm 230 x 95
03157505-01 50 x
Nozzle type 4204/6204 cpl. ceramic 03149000-xx 20 x
Nozzle magazine type 40xx 03101503-01 1 x
Nozzle 2204 cpl. cerami 03153518-xx 12 x
Nozzle magazine type 20xx 03066107-02 1 x
UM ACT withSSW 7xx 00198363-01 1 x
Case for ACT 1 x
Table 6-2: Contents of toolkit ACT 15 µm
ACT with SSW 7xx / User Manual 07/2017 Edition
94
6.1.3 Preparations for ACT 15 µm Measurement
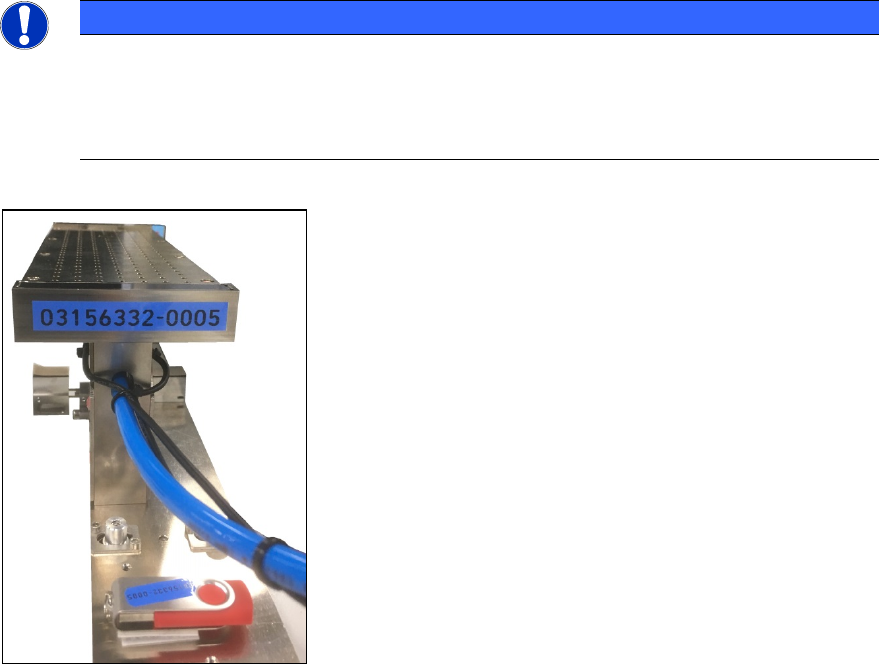
The use of a vacuum tooling is one of the basic prerequisites of the ACT 15 μm measurement.
A complete vacuum tooling is available for each lane.
NOTICE
The vacuum toolings
are screwed together with the suction plate and measured together
with the plate.
The data is available on the enclosed USB stick. Uninstalling the suction plate or other
components is not permitted and would require a new calibration in Munich!
Figure 6-2: Vacuum tooling
ACT with SSW 7xx / User Manual 07/2017 Edition
95
6.1.3.1 Installing the ACT Vacuum Tooling
► Switch off the machine.
► If necessary, uninstall the customer vacuum tooling.
The set includes a vacuum tooling for each conveyor lane.
"VacTool ACT SP1 cpl." [03156327-01] for conveyor lane 1 und "VacTool ACT SP2 cpl."
[03156332-01] for conveyor lane 2.
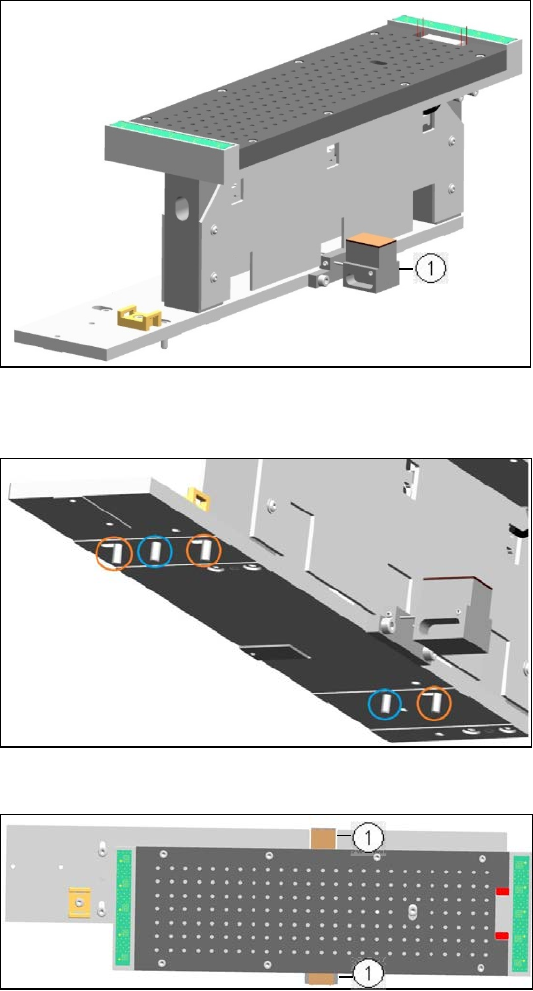
1. Lifting table limitation
Figure 6-3: Example vacuum tooling for ACT 15 µm, Lane 1
On the underside of the base plate there are 2 pins (blue circles) and 3 screws (orange circles).
► Position the vacuum tooling on
the lifting table plate with the 2
pins.
► Fasten the vacuum tooling with
3 screws to the lifting table
plate.
Figure 6-4: Installing vacuum tooling at lifting table. 2 pins3 screws
1. Lifting table limitation
► Ensure that the two metal
blocks of the lifting table
limitation are below the
conveyor rails.
Otherwise, the vacuum tooling
cannot be used.
Figure 6-5: Installing vacuum tooling at lifting table. 3 screws