ACT - Accuracy Check Tool.pdf - 第194页
ACT with SSW 7xx / User Manual 07/2017 Edition 86 5.2.2.2 SIPLACE Pro – Setup (Tables) ► In SIPLACE Pro, on t he gantry side on whi ch the measurem ent is to be perfo rmed, set up the Conveyor Carrier X tray carrier from…
ACT with SSW 7xx / User Manual 07/2017 Edition
85
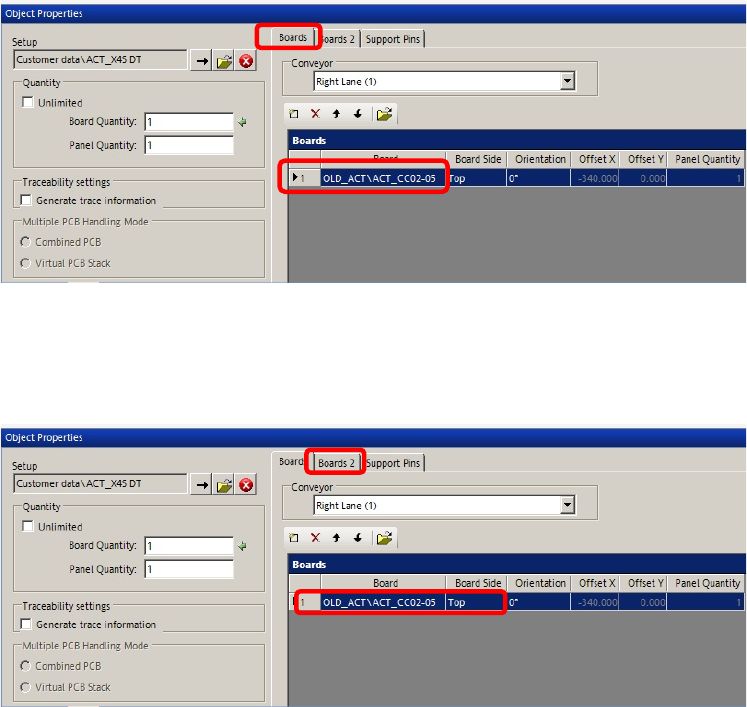
► Create a recipe.
Figure 5-5: Creating a recipe – ACT plate
► Use a normal board description for the ACT plate as described in section 4.1.1.
► Select the empty ACT_Spacer in other Lane for ConveyorTray plate as placeholder for the
second conveyor lane in which the tray is to be fed.
Figure 5-6: Creating recipe – second board as placeholder
Feeding in single conveyor mode
► Connect the tray with the glass plate as described in section 5.2.1.
► Set the conveyor width to 428.00 mm using the Automatic width adjustment.
The tray enters the machine together with the plate.
ACT with SSW 7xx / User Manual 07/2017 Edition
86
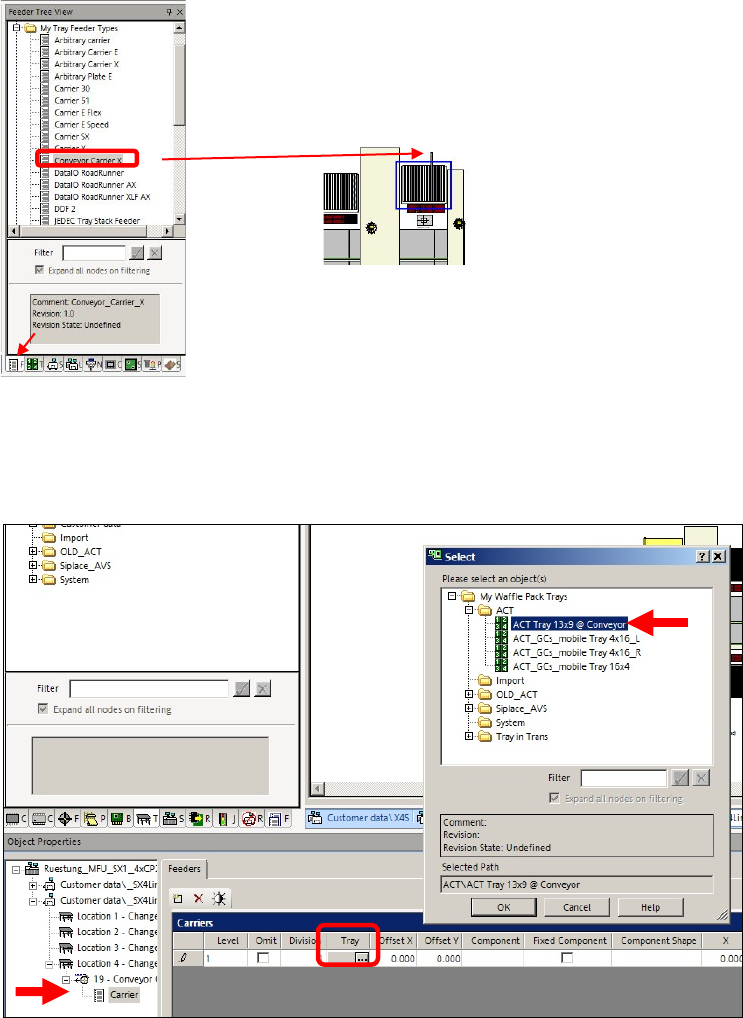
5.2.2.2 SIPLACE Pro – Setup (Tables)
► In SIPLACE Pro, on the gantry side on which the measurement is to be performed, set up the
Conveyor Carrier X tray carrier from the My Tray Feeder Types directory.
► Draw the tray carrier to an empty track on the
corresponding table.
Figure 5-7: Selecting Conveyor Carrier X
► Select the tray carrier so that it is displayed in the editor screen below.
► Click on the button in the field of the Tray column und select the ACT Tray 13x9 @ Conveyor
tray from the My trays directory.
Figure 5-8: Selecting tray
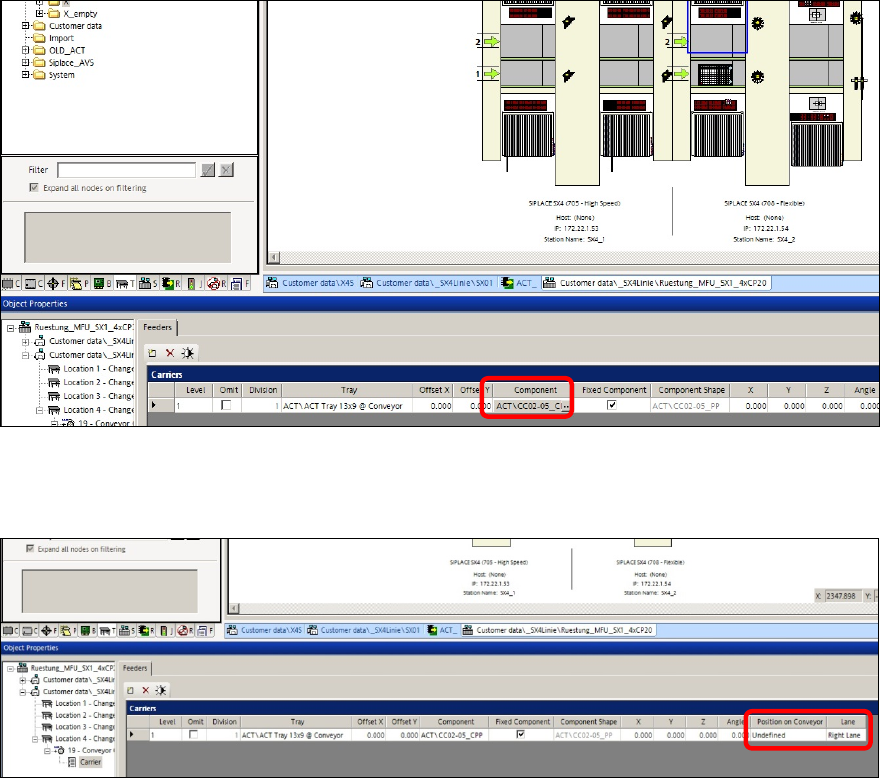
► Then select the component you want to feed in the tray.
ACT with SSW 7xx / User Manual 07/2017 Edition
87
Figure 5-9: Selecting component
For determining the position of the tray in the conveyor, the two Position on Conveyor and Lane
parameters have to be considered.
Figure 5-10: Determining the position of the tray