ACT - Accuracy Check Tool.pdf - 第203页
ACT with SSW 7xx / User Manual 07/2017 Edition 95 6.1.3.1 Installing the ACT Vacuum Tooling ► Switch off the machine. ► If necessary, uni nstall the custom er vacuum t ooling. The set includes a va cuum tooling for each …
ACT with SSW 7xx / User Manual 07/2017 Edition
94
6.1.3 Preparations for ACT 15 µm Measurement
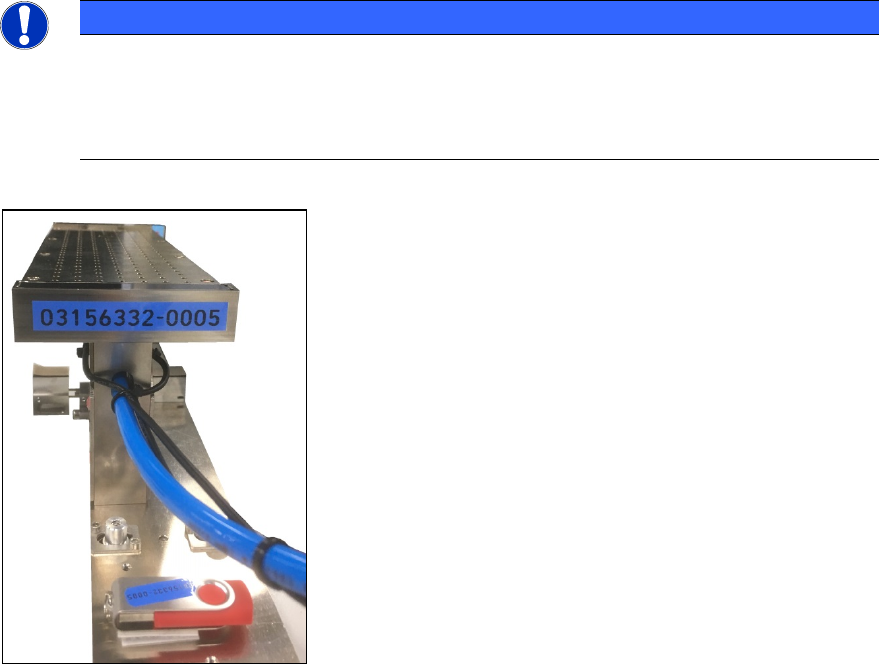
The use of a vacuum tooling is one of the basic prerequisites of the ACT 15 μm measurement.
A complete vacuum tooling is available for each lane.
NOTICE
The vacuum toolings
are screwed together with the suction plate and measured together
with the plate.
The data is available on the enclosed USB stick. Uninstalling the suction plate or other
components is not permitted and would require a new calibration in Munich!
Figure 6-2: Vacuum tooling
ACT with SSW 7xx / User Manual 07/2017 Edition
95
6.1.3.1 Installing the ACT Vacuum Tooling
► Switch off the machine.
► If necessary, uninstall the customer vacuum tooling.
The set includes a vacuum tooling for each conveyor lane.
"VacTool ACT SP1 cpl." [03156327-01] for conveyor lane 1 und "VacTool ACT SP2 cpl."
[03156332-01] for conveyor lane 2.
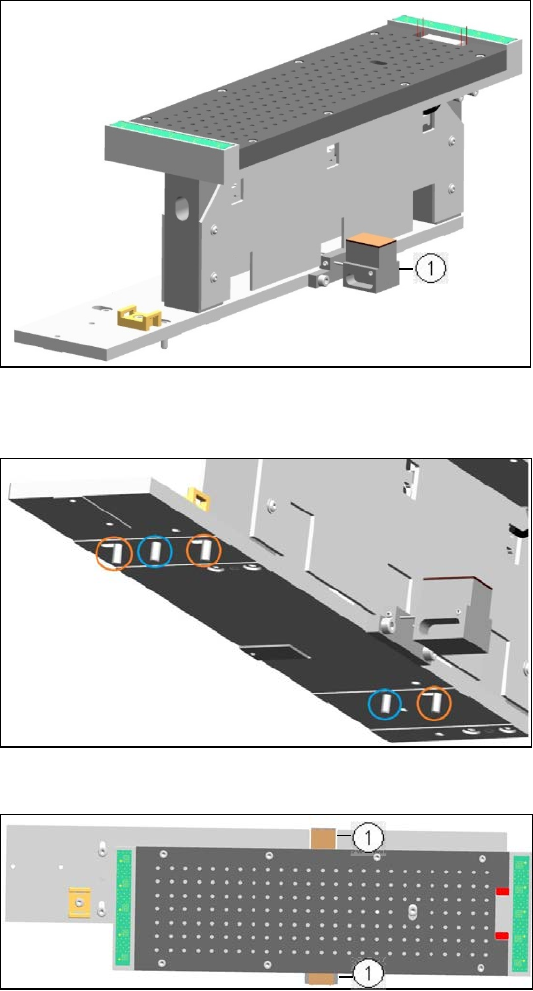
1. Lifting table limitation
Figure 6-3: Example vacuum tooling for ACT 15 µm, Lane 1
On the underside of the base plate there are 2 pins (blue circles) and 3 screws (orange circles).
► Position the vacuum tooling on
the lifting table plate with the 2
pins.
► Fasten the vacuum tooling with
3 screws to the lifting table
plate.
Figure 6-4: Installing vacuum tooling at lifting table. 2 pins3 screws
1. Lifting table limitation
► Ensure that the two metal
blocks of the lifting table
limitation are below the
conveyor rails.
Otherwise, the vacuum tooling
cannot be used.
Figure 6-5: Installing vacuum tooling at lifting table. 3 screws
ACT with SSW 7xx / User Manual 07/2017 Edition
96
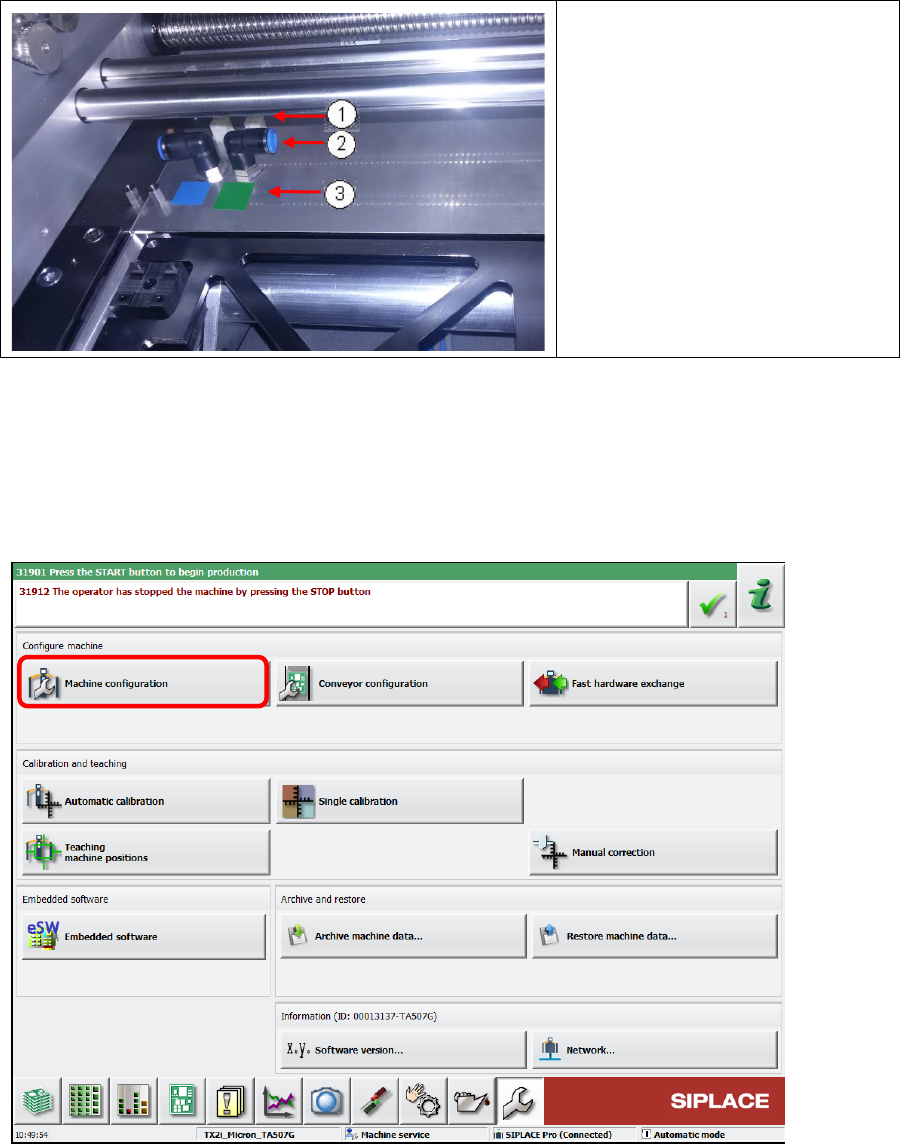
1. Connector
2. Vacuum hose connection
3. Color coding:
Green = Lane 1
Blue = Lane 2
► Connect the compressed air
hose and the cable of each
vacuum tooling according to the
color coding.
Figure 6-6: Connecting vacuum tooling
6.1.3.2 Software Settings of the ACT Vakuum Toolings
► Switch on the machine.
► Log in as Machine service user.
► Select Machine Configuration.
Figure 6-7: Machine configuration