Printer 600 Machine Programming.pdf - 第10页
0$&+,1( 352*5$00 ,1* 67$*( (',7$ 352'8&7),/( 1.10 User Manual Software Ve rsion 07SP04 7. Use either the Incr . and Decr . keys (F6 - F7) o r the forwar d slash key (/) on the keyboard to chang…
0$&+,1(352*5$00,1*
67$*((',7$352'8&7),/(
Software Version 07SP04 User Manual 1.9
STAGE 3 - EDIT A PRODUCT FILE
1. Select Edit Data (F3).
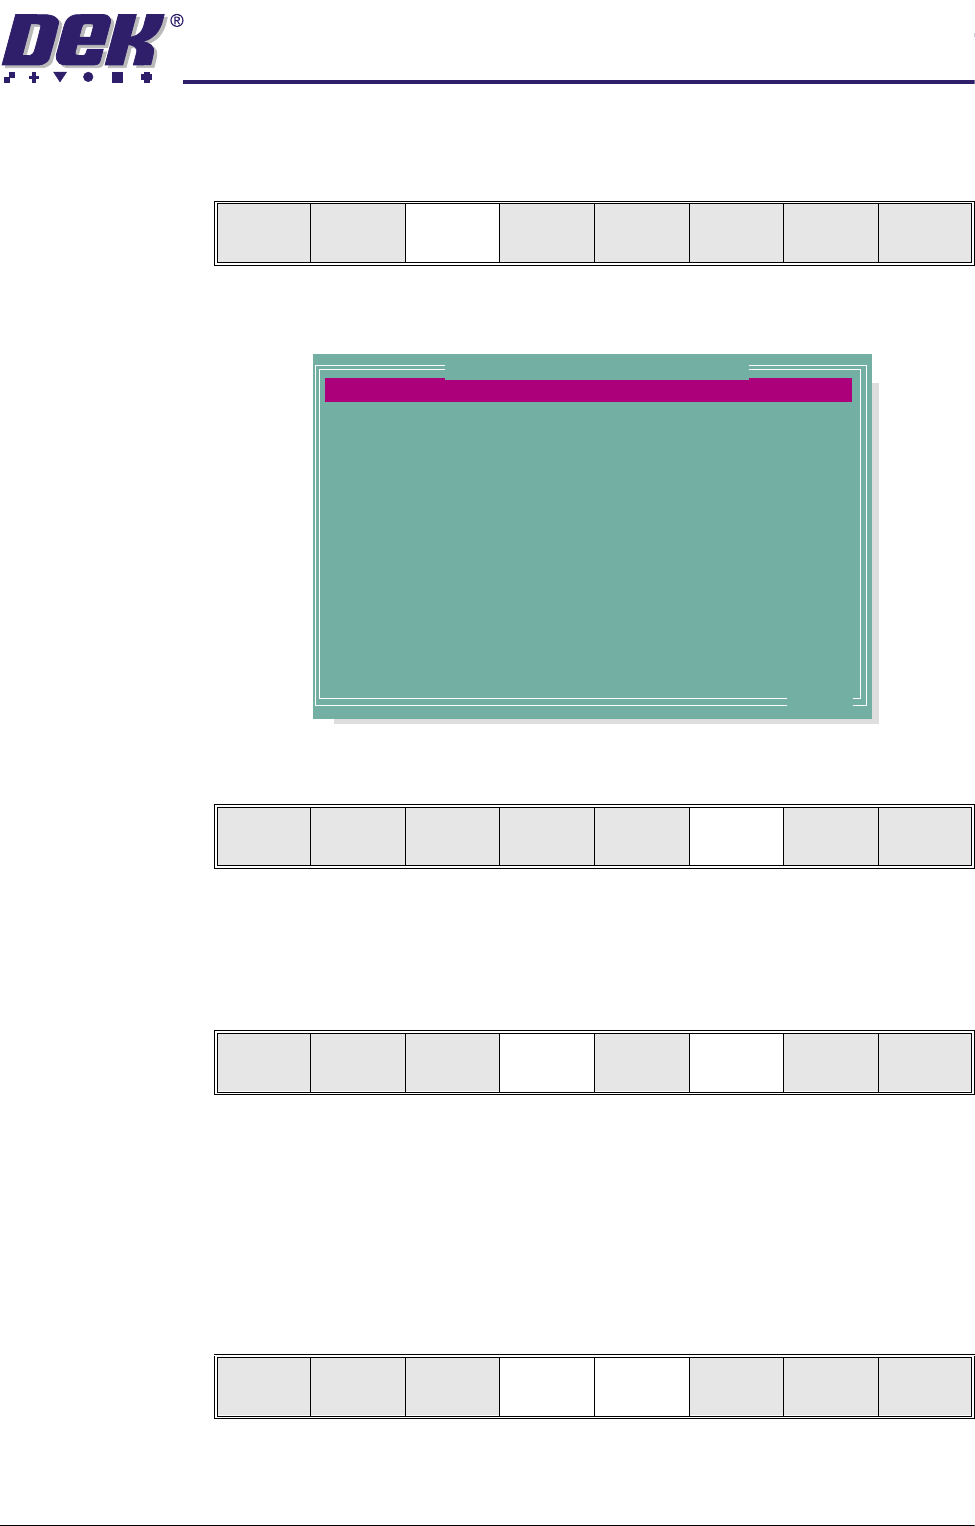
The following Edit Current Process Parameters window is displayed:
2. Select Incr. (F6). The message ‘Please type in the text, then press
Return’ is displayed. The menu softkeys are blanked out.
3. Type in the required product name and press Return using the keyboard.
4. Highlight Product ID using the Next key (F4). Select Incr. (F6). The
message ‘Please type in the text, then press Return’ is displayed. The
menu softkeys are blanked out.
5. Type in the required product ID and press Return using the keyboard.
NOTE
If 2D Inspection is enabled and the product file being copied has an
assigned inspection file, the user is prompted to make a copy of the file.
(See 2Di Setup in 2Di Inspection chapter later in this manual.)
6. Use the Next and Previous keys (F4 - F5) to highlight the relevant param-
eter.
Mode
Load
Data
Edit
Data
Setup
Squeegee
Change
Screen
Change
Tool ing
Change
Language
Exit
PRODUCT NAME
PRODUCT ID
DWELL HEIGHT
DWELL SPEED
SCREEN ADAPTOR
SCREEN IMAGE
CUSTOM SCREEN
BOARD WIDTH
BOARD LENGTH
BOARD THICKNESS
FRONT PRINT SPEED
REAR PRINT SPEED
FLOOD SPEED
PRINT FRONT LIMIT
Dek04
Dek04
30
24
NONE
EDGE
DISABLED
101.5
152.5
1.6
150
150
20
0.0
mm
mm/s
mm
mm
mm
mm/s
mm/s
mm/s
mm
.. more
Edit Current Process Parameters
Save Next Previous Incr. Decr. Exit
Save Next Previous Incr. Decr. Exit
Save Next Previous Incr. Decr. Exit
0$&+,1(352*5$00,1*
67$*((',7$352'8&7),/(
1.10 User Manual Software Version 07SP04
7. Use either the Incr. and Decr. keys (F6 - F7) or the forward slash key (/) on
the keyboard to change the parameter value.
NOTE
A definition of all editable parameters is contained at the end of this chapter.
If the board width is changed, the Auto Rail Width in Set Prefs must be set
to enabled to allow the rear rail to move to the new board width.
8. Select Save (F2). The message ‘Saving fiducial data - Please wait Board
data file saved’ is displayed.
9. Repeat Steps 6 - 8 for the remaining parameters.
10.Select Exit (F8).
Save Next Previous Incr. Decr. Exit
Save Next Previous Incr. Decr. Exit
Save Next Previous Incr. Decr. Exit

0$&+,1(352*5$00,1*
67$*($),7648((*((6
Software Version 07SP04 User Manual 1.11
STAGE 4A - FIT SQUEEGEES
If ProFlow was used when running the last product, carry out the ProFlow to
Squeegee Replacement Procedure, (Squeegee Module Chapter - Replace-
ment Procedures of Technical Reference Manual refers).
1. Select Setup (F6).
2. Select Setup Squeegee (F4).
3. Select Change Squeegee (F1).
4. Either:
a. Open the front printhead cover.
or
b. Raise the printhead shutter.
5. Before fitting the squeegees to the machine, fix the paste deflectors to each
end of the squeegee assemblies, using the screws supplied. Ensure that
the bottom edge of the deflector is above the lower edge of the squeegee
blade. The setting of the paste deflectors is carried out later in this chapter.
NOTE
The deflectors are handed so care must be taken to fix the correct deflector
to each end of the squeegee assemblies.
Run
Open
Cover
Paste
Load
Clean
Screen
Adjust Setup Monitor Maint.
Mode
Load
Data
Edit
Data
Setup
Squeegee
Change
Screen
Change
Tool ing
Change
Language
Exit
Change
Squeegee
Calibrat
Heights
Exit