DECAN_S1_Administrator′s_Guide(Eng_Ver1.5)_Print.pdf - 第286页
8-28 Next Generation, Multi-Functional Plac er DECAN S1 Administrator’s Guide <1Pocket> As shown in the following figure, input the coord inates of the center point of pocket No. 1 and the pocket p itch in the X …
8-27
Feeder Setup
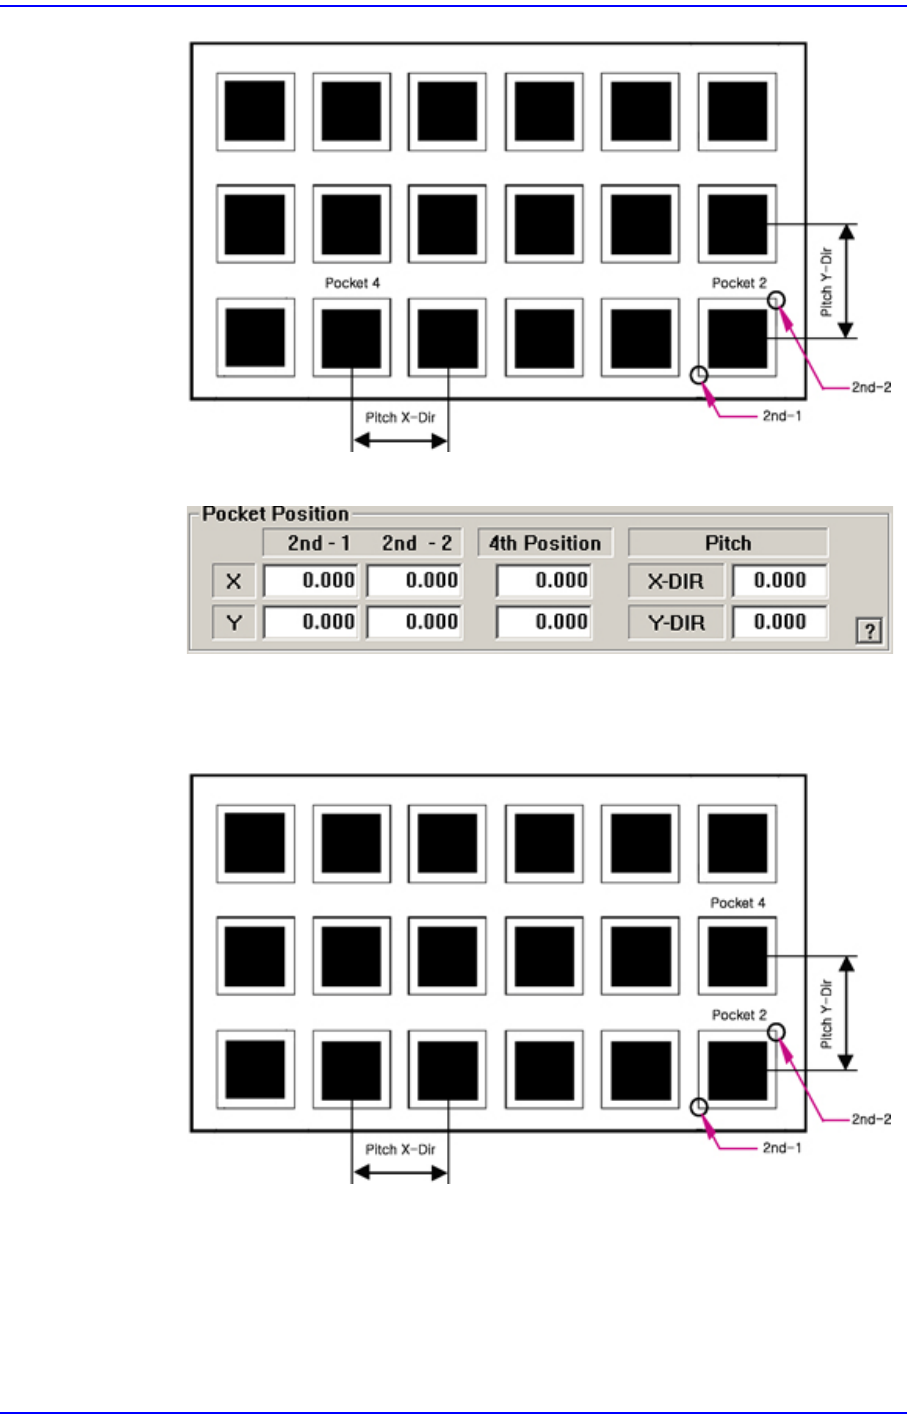
<2Pocket Y-Axis>
As shown in the following figure, input the coordinates of the center point of any
one pocket in the Y direction, the coordinates of the two corners in the diagonal
position of the second pocket and the pocket pitch in the X and Y directions.
8-28
Next Generation, Multi-Functional Placer DECAN S1 Administrator’s Guide
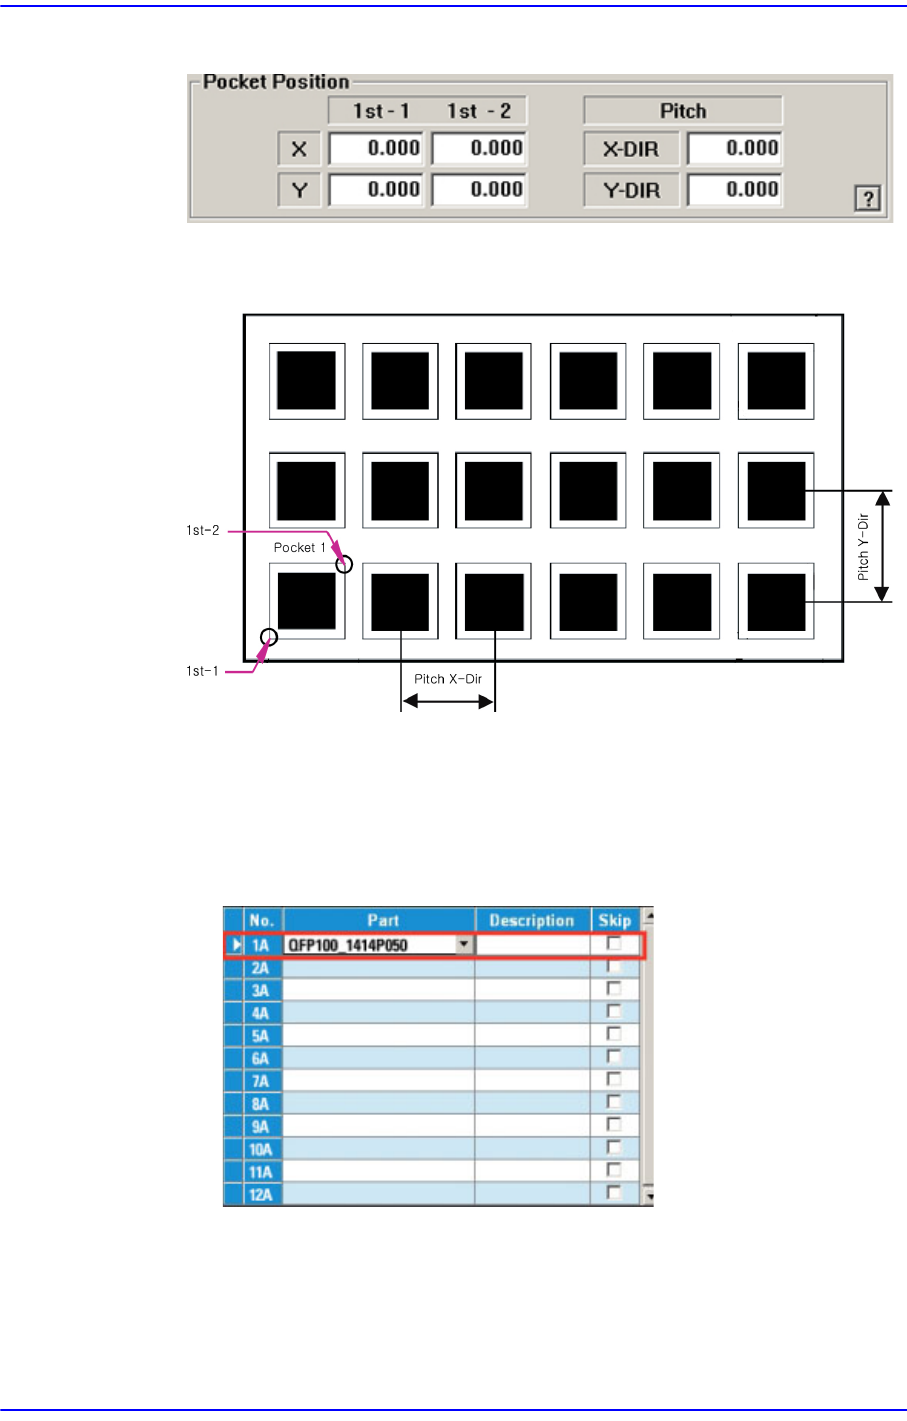
<1Pocket>
As shown in the following figure, input the coordinates of the center point of
pocket No. 1 and the pocket pitch in the X and Y directions.
<1Poket with Angle>
This is a teaching method that is useful when the the fiducial camera is movable to
a definite area of the tray and when the tray is installed on an angle, and not in
parallel with the X-axis of the tray. (When 2 Trays on a palette is applied)
1. Select the required tray feeder.
2. Perform pocket teaching in the following order.
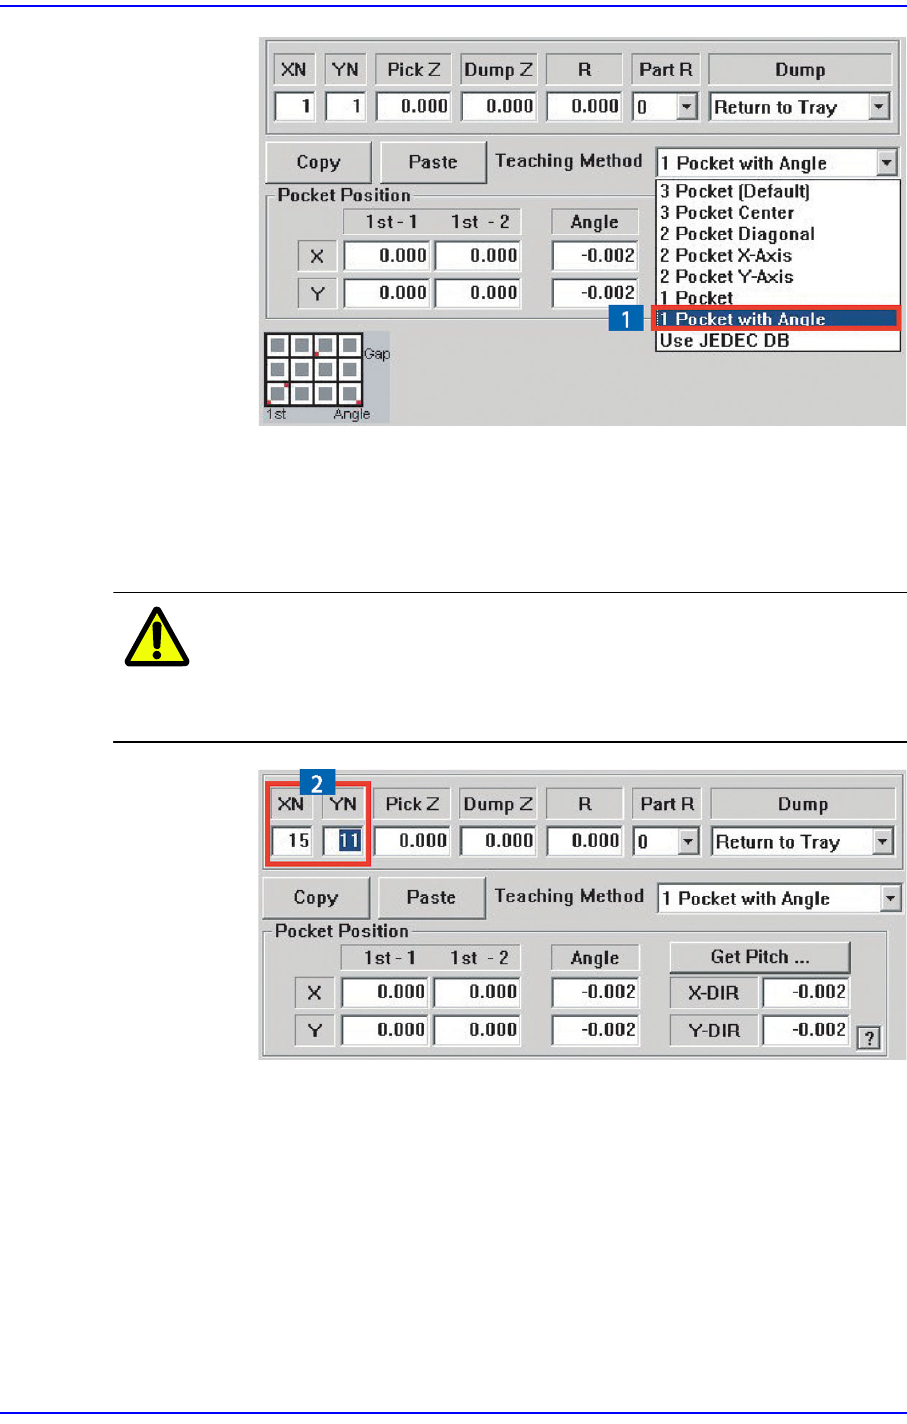
(1) Select the [1 Pocket with Angle] in the scroll menu on the right.
8-29
Feeder Setup
(2) Enter the XN and YN values first to input the total number of pockets of
the tray.
XN: Total number of pockets in X direction
YN: Total number of pockets in Y direction
Caution Be sure to input the XN and YN values first before teaching
the coordinates of a pocket. If not, wrong data will be
inputted.
(3) In order to teach the coordinates of each corners in the first pocket (1St-1,
1St-2), move the fiducial camera to the corresponding position, match the
corresponding point to the center of the camera, and enter the coordinates
of the corresponding point by clicking the <Get> button.
(4) In order to obtain the accurate installation angle (slope) of the tray, move
the fiducial camera to the coordinates of the left lower corner of a pocket
in the first row, match the corresponding point to the center of the camera,
and enter the coordinates of the corresponding point by clicking the <Get>
button. [refer to the following figure]