DECAN_S1_Administrator′s_Guide(Eng_Ver1.5)_Print.pdf - 第528页
15-62 Next Generation, Multi-Functional Plac er DECAN S1 Administrator’s Guide <Use Return Picked Part T o Pocket> check box This function returns the picked up part to the pocket. The detailed description for th…
15-61
System Setup
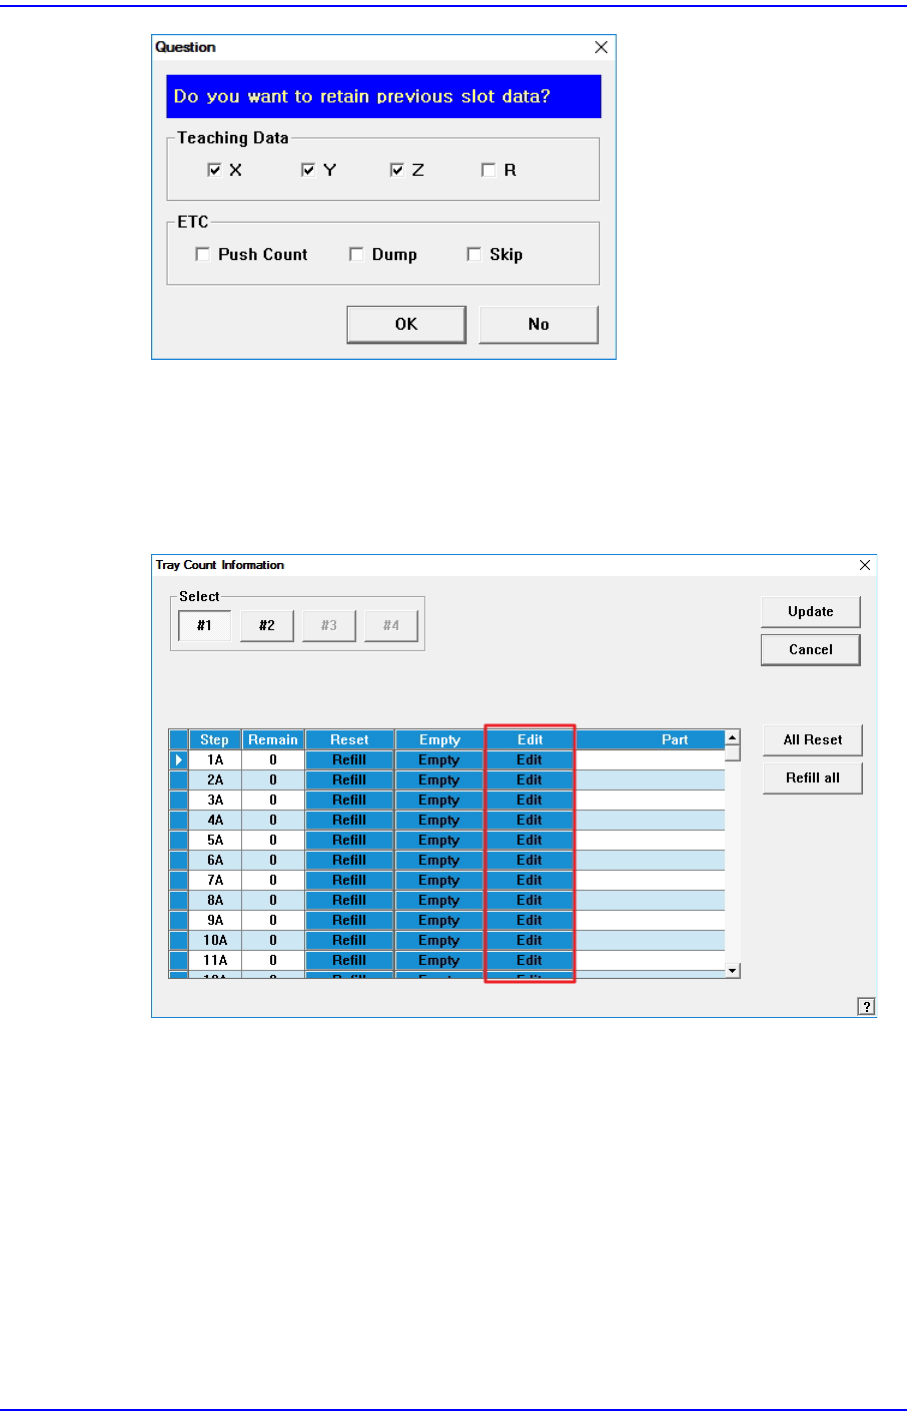
Select the items to be applied to the feeder information of Model B, and then click the
<OK> button.
<Use tray manage by pocket> check box
When this check box is ticked, the <Edit> column is activated in the “Tray Cnt
Information” window. For details on this function, refer to “13.6. T/F Cnt”.
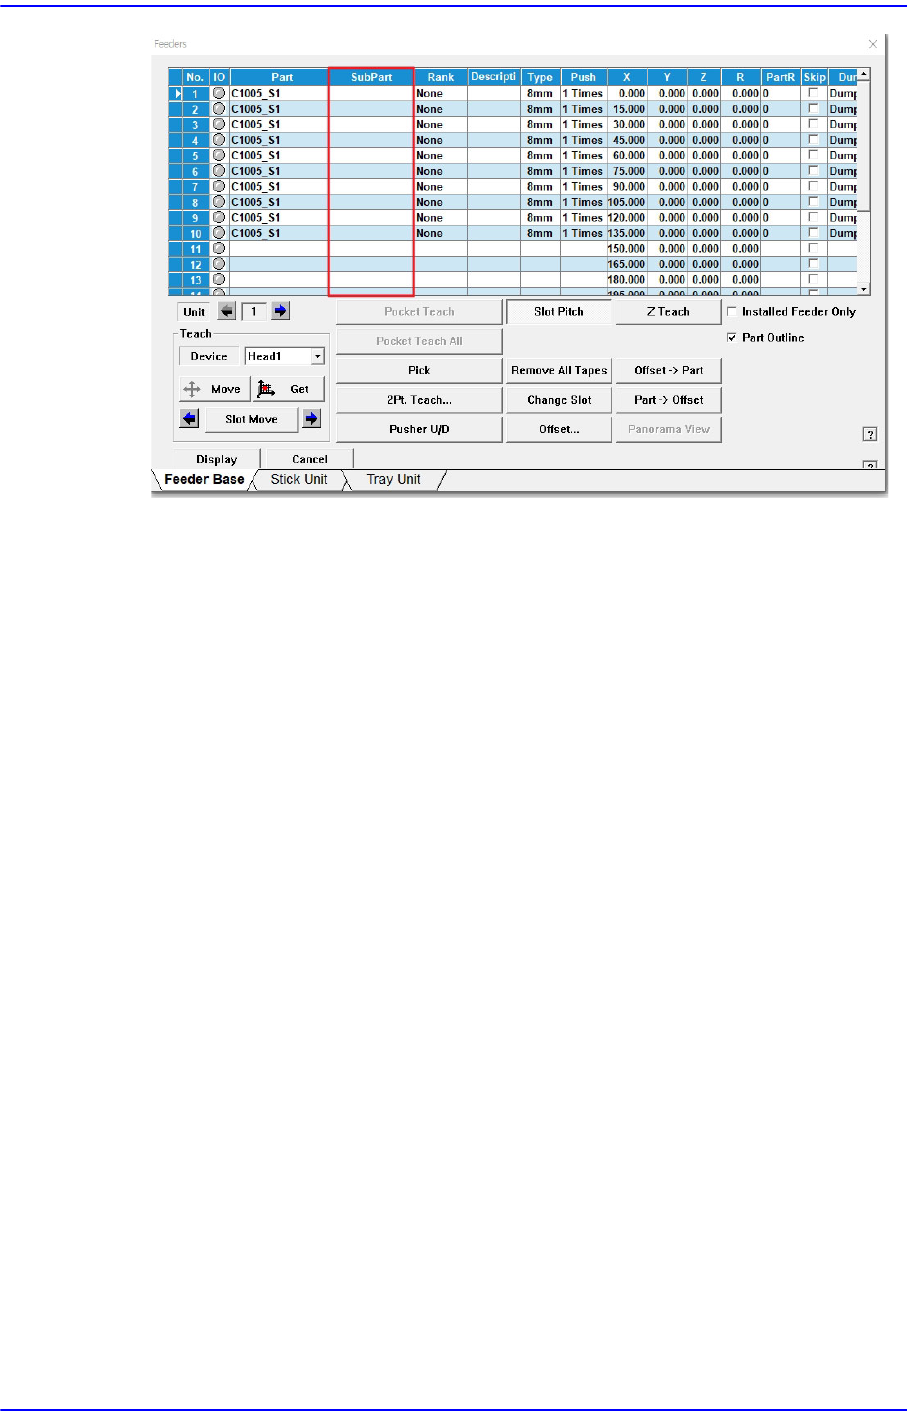
<Use Multi-Vendor> check box
This function is used to produce PCBs by using parts made by several manufacturers
for a part.
Allows work to be automatically performed using sub parts when placing them on a
PCB after registering them.
Selecting this check box activates the <Sub Part> column in the “Feeder” window.
15-62
Next Generation, Multi-Functional Placer DECAN S1 Administrator’s Guide
<Use Return Picked Part To Pocket> check box
This function returns the picked up part to the pocket. The detailed description for this
feature will be updated in the future.
<Update> button
Transmits the change data to the equipment and closes the dialog box.
15-63
System Setup
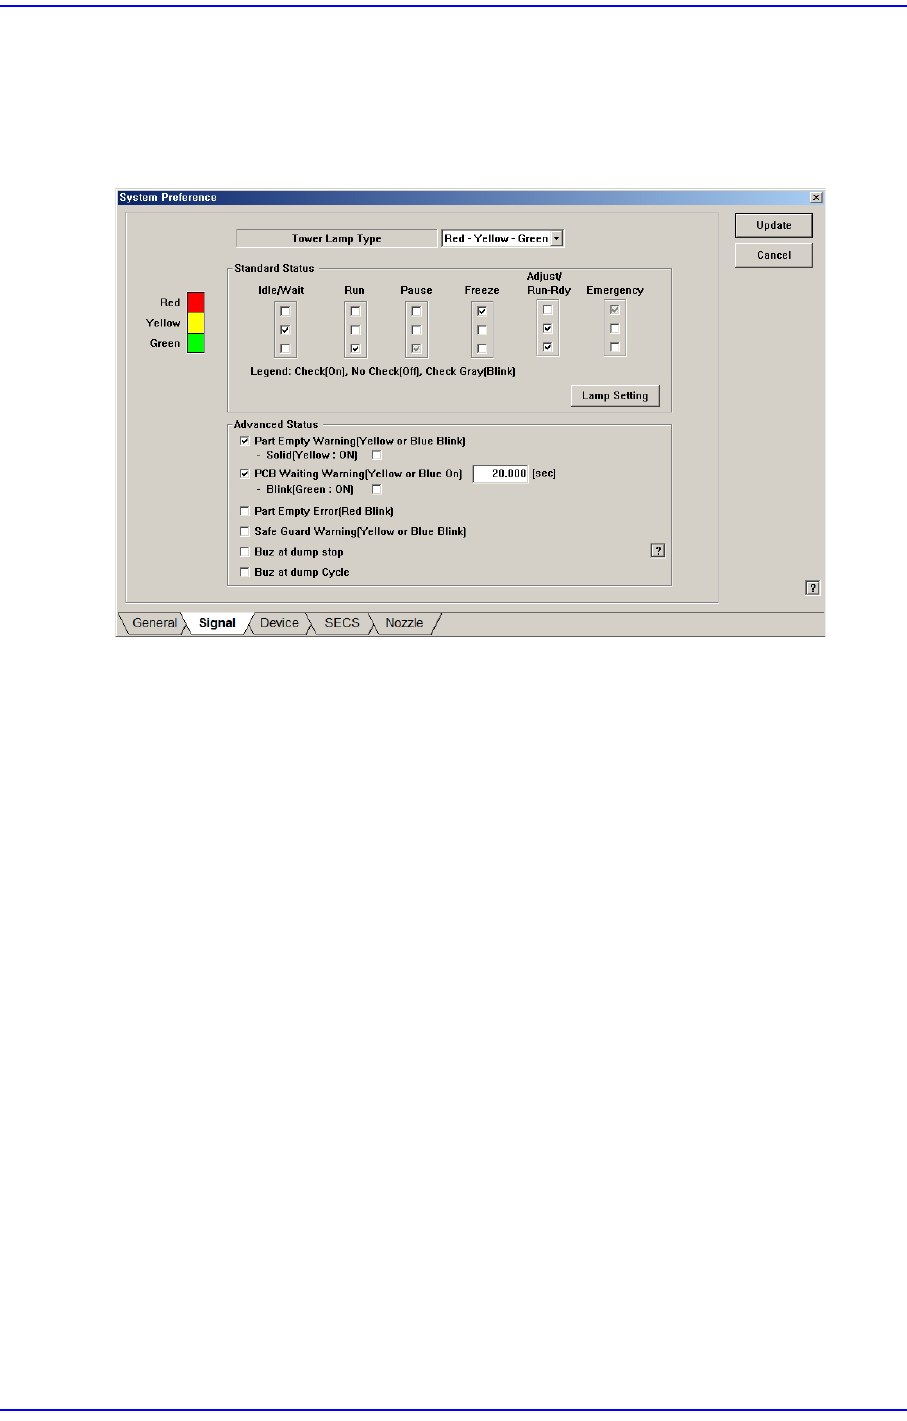
15.5.2. <Signal> tab dialog
Set the status of the signal light. When this button is selected, the following screen is
displayed.
Figure15.20 “Signal” tab dialog
<Tower Lamp Type> combo box
Select the signal tower type. Available types are as follows.
Red –Yellow –Green: When the signal light consists of “Red –Yellow –Green”.
Red –Blue –Green: When the signal light consists of “Red –Blue –Green”.
<Standard Status> group
Set the status of the signal light corresponding to the equipment status.
For example, if you want to turn on the “Yellow” lamp of the signal tower in the idle/
wait status, check the corresponding “Yellow” lamp check box among the 3 check
boxes under the Idle/Wait.
The status and meanings of the check boxes are as follows.
Checked: Turns on the corresponding lamp.
Not checked: Turns off the corresponding lamp.
Checked in gray: Flickers the corresponding lamp.
<Lamp Setting> button
The user can perform setup concerning the error by which the red lamp of the
signal light is turned on by default so that the yellow lamp is turned on selectively
according to the error type. Clicking this button will display the following dialog
box.