00191332-01.pdf - 第58页
1 General Functions User Manual Test Program SITEST 1.6 Gantry Teaching Software Version 405.xx Issue 01/99 1 - 16 NOTE The x and y value s shown f or the cu rrent posi tion in th e "Current p osition" fi eld d…
User Manual Test Program SITEST 1 General Functions
Software Version 405.xx Issue 01/99 1.6 Gantry Teaching
1 - 15
1.6 Gantry Teaching
● Click, for example, on the
Teach
button in the "Gantry functions" (see Fig. 0.3.4) display.
The teach functions are automatically activated if the setting box below is displayed.
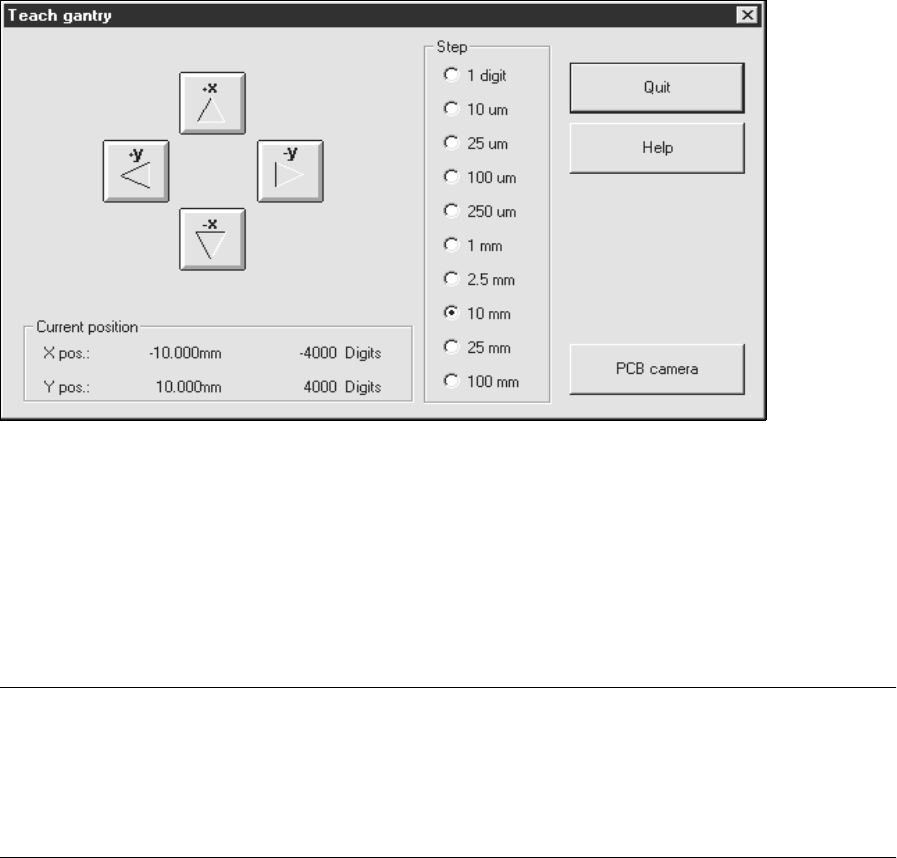
● If you wish to set the step size for traversing the gantry, activate the corresponding radio button for the
desired step size in the "Step" field, or press the corresponding number key on the keyboard ("1" repre-
senting the smallest, "0" the largest step size).
● To move the gantry, actuate the
+x
,
-x
,
+y
or
-y
buttons in the setting box, or the cursor keys ↑ ↓ ← → on
the keyboard.
NOTE
From a position in front of the machine looking in the direction of travel, the arrows on the buttons and
cursor keys correspond the gantry’s direction of travel. Every time a button or cursor key is ac-
tuated, the gantry will be traversed by one step in the step size selected. The current gantry position
at any given time is displayed in the setting box in the "Current position" field.
● Click on the
PCB camera
button. The screen display switches to the PCB camera at the gantry.
● Actuate the cursor keys ↑ ↓ ← → on the keyboard to teach, for example, the PCB reference corner
position.
● When teaching has been completed, press
ESC
to switch the monitor back to the normal program mode.

1 General Functions User Manual Test Program SITEST
1.6 Gantry Teaching Software Version 405.xx Issue 01/99
1 - 16
NOTE
The x and y values shown for the current position in the "Current position" field do not
correspond to the
values for the position of the object taught with the PCB camera (e.g. the position of the PCB reference
corner), but rather the x and y values of the current position of the RV head.
1
● Click on the
Quit
button in the setting box.
User Manual Test Program SITEST 1 General Functions
Software Version 405.xx Issue 01/99 1.7 Saving Machine Data
1 - 17
1.7 Saving Machine Data
1.7.1 Saving Calibration Data and/or Axis Data
Newly determined calibration data or modified MA data can be saved using the "Save machine data" menu com-
mand on the "Settings" menu.
● Click on
Settings
-->
Save machine data
.
The data is saved to the corresponding files (e.g. REAL.MA).
NOTE
The menu command can only be executed if data was newly determined or modified.
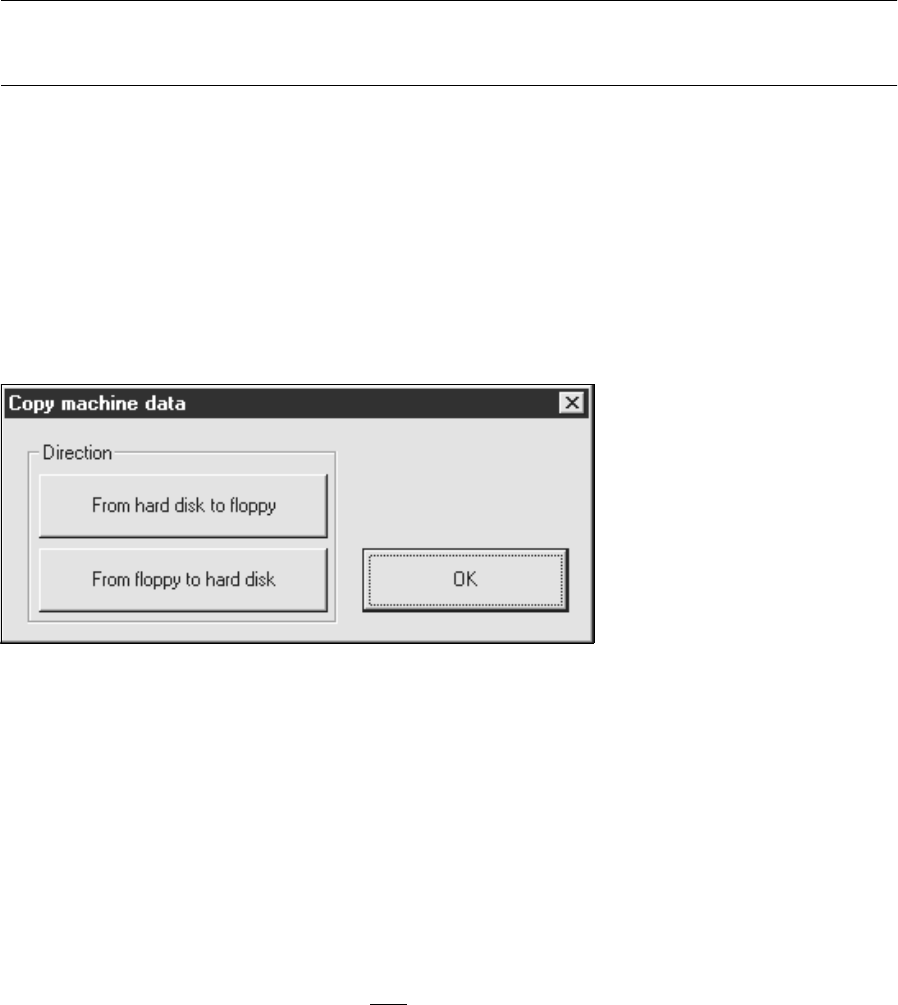
1.7.2 Copying Machine Data to Diskette or Hard Disk
MA data can be copied from the hard disk to diskette or from diskette to the hard disk using the "Copy
machine data" menu command on the "Settings" menu.
● Click on
Settings
-->
Copy machine data
.
The setting box below opens.
Copying MA data to diskette:
● Insert a blank, formatted diskette into the floppy drive.
● Click on the From hard disk to floppy button.
● Click on the OK button. The MA data will be copied to diskette.
Copying MA data to the hard disk:
● Insert the diskette containing the MA data (only version 405.xx) into the floppy drive.
● Click on the From floppy to hard disk button.