00197279-03_SM_Glue-Feeder_EN.pdf - 第92页
Replacing Spare Parts Handle assembly 3.24.2 Fitting the Handle Assembly 92 Service Manual SIPLACE Glue Feeder 3.24.2 3 . 2 4 . 2 F it t in g t h e H a n d le A s s e m b ly Fitting the H andle Assemb ly ► As shown in th…
Replacing Spare Parts
3.24.1 Removing the Handle Assembly Handle assembly
Service Manual SIPLACE Glue Feeder 91
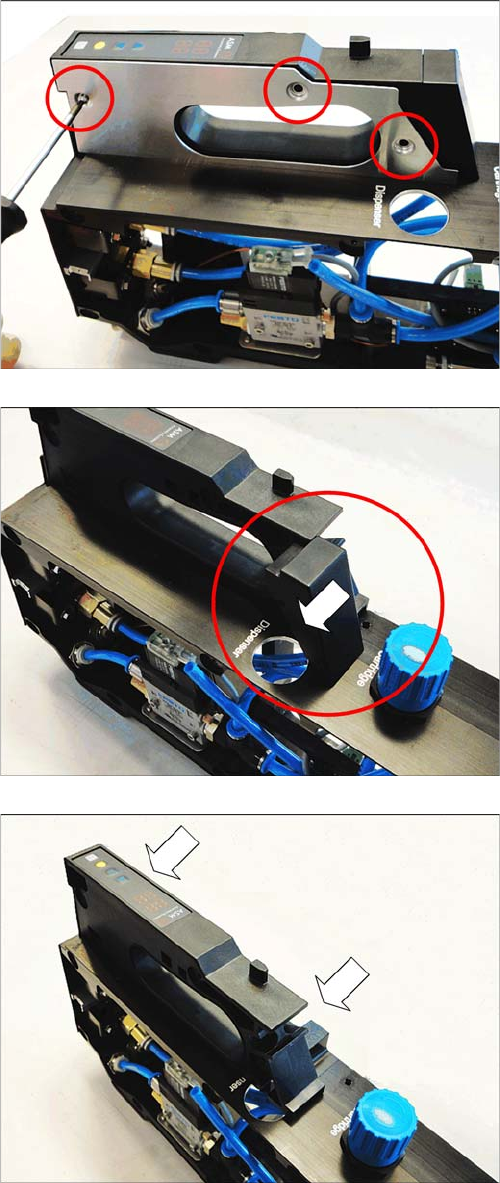
► Remove the 3 marked screws with a size T8 Torx
screwdriver and then remove the cover plate.
► Push the handle cover at the side out of the glue feed
-
er handle.
► Push the handle at the side out of the glue feeder
frame.
Replacing Spare Parts
Handle assembly 3.24.2 Fitting the Handle Assembly
92 Service Manual SIPLACE Glue Feeder
3.24.2
3.24.2 Fitting the Handle Assembly
Fitting the Handle Assembly
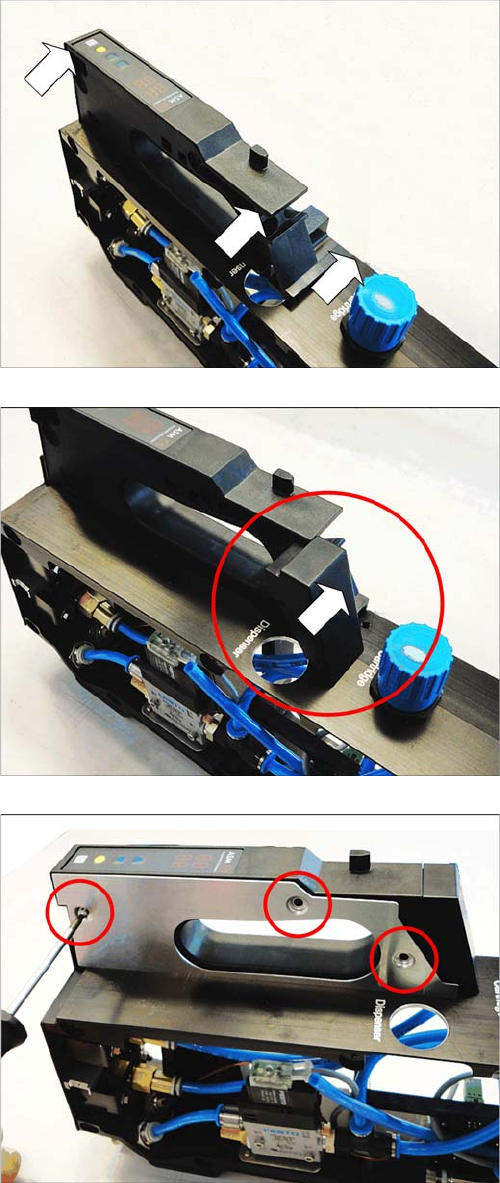
► As shown in the diagram, push the handle at the side
onto the glue feeder frame.
► As shown in the diagram, push the handle cover at
the side into the glue feeder handle.
► As shown in the diagram, fasten the cover plate with
the 3 marked Torx screws. Use a size T8 TORX
screwdriver for this.
Replacing Spare Parts
3.24.2 Fitting the Handle Assembly Handle assembly
Service Manual SIPLACE Glue Feeder 93
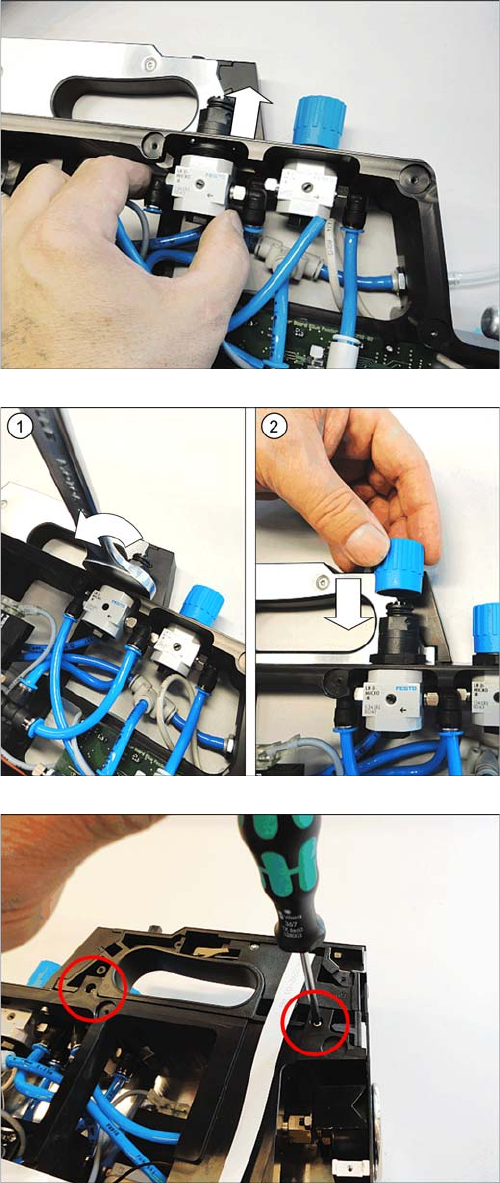
► As shown in the diagram, plug the pressure control
valve into the glue feeder frame.
► Fasten the pressure control valve with a nut. Use a
size 24 fork wrench for this. (1)
► Fit the cover as far as possible onto the pressure con
-
trol valve. (2)
► Fasten the right side cover (see "3.8.2 Fitting the
Right Side Cover" [ ➙ 21])
► Fasten the handle using the two marked Torx screws.
Use a size T8 TORX screwdriver for this.