FUJI 24 HEAD Replacing ALL syringe_IPS.pdf - 第31页
Edition 2.0 NXT/NXT2 Repair Training T ext H12HS(Q) Hea d FK-9F98-61-0E 7-3 FUJI MACHINE MFG . CO., L TD. Required Jigs and Grease: Part name Part No. Component Parts Notes Syringe insertion jig AA1XC0* - H12S head commo…
Edition 2.0 NXT/NXT2 Repair Training Text
H12HS(Q) Hea
d
FK-9F98-61-0E 7-2 FUJI MACHINE MFG. CO., LTD.
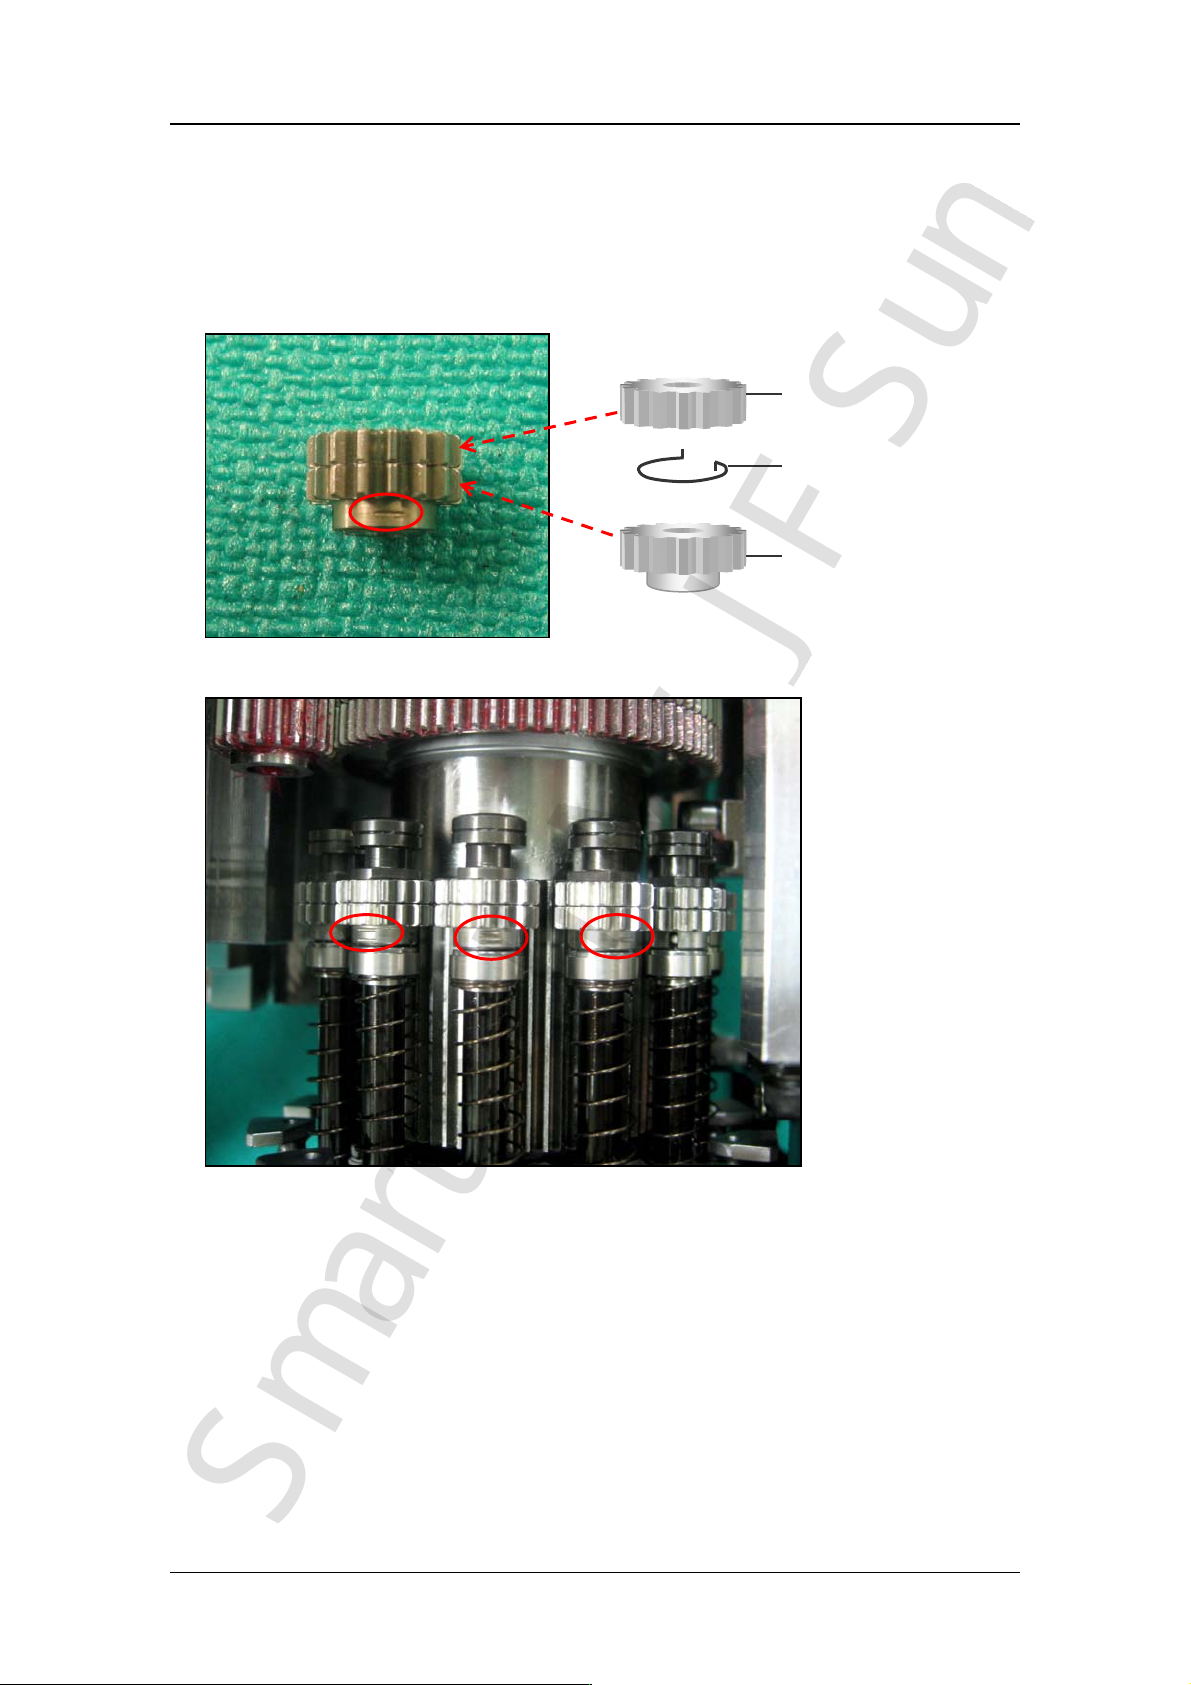
Note: There are three types of syringe gear on the H12HS head. As shown in the
above table, each gear type should only be attached to one of the specified
holders. The gear type can be identified by the number of engraved lines on
the lower part of the gear. However, early models of the H12HS head have a
number (1, 2, or 3) stamped on the top surface of the bottom gear instead of
the engraved lines.
Photo of the H12HS head syringe
Upper gear
Spring
Lower gear
Example: Gear 1(PM4MH7) (For holders A, D, G, J)
CONFIDENTIAL
SmartechMr.J FSun

Edition 2.0 NXT/NXT2 Repair Training Text
H12HS(Q) Hea
d
FK-9F98-61-0E 7-3 FUJI MACHINE MFG. CO., LTD.
Required Jigs and Grease:
Part name Part No. Component
Parts
Notes
Syringe insertion jig AA1XC0* - H12S head common use
Syringe pin extraction jig AA1WE0* - H12S head common use
H12HSθ-axis phase
alignment jig
AA6LH0*
PM6637* H12S head common use
PM07RA* Only for H12HS head
H12(S)/H12HS syringe
gear assembly 5.0 mm
torque spanner jig
AA6KK0*
PM9613* H12S head common use
CL3NX8D H12S head common use
H12HS syringe gear
assembly 5.0 mm
spanner
PB37510 - H12S head common use
H12HS syringe gear
assembly 4.0 mm
spanner
PB97690 - H12S head common use
Push-Pull gauge DPS-5 - H04, H08, H12S head common
use
Biral T&D Apply a small amount to the
syringe
MDV235-ZB Apply a small amount to the O-
ring in the syringe
Note: Some of the jigs are also used on other head types. Please be aware of this
when ordering jigs to avoid duplicating your order.
CONFIDENTIAL
SmartechMr.J FSun
Edition 2.0 NXT/NXT2 Repair Training Text
H12HS(Q) Hea
d
FK-9F98-61-0E 7-4 FUJI MACHINE MFG. CO., LTD.
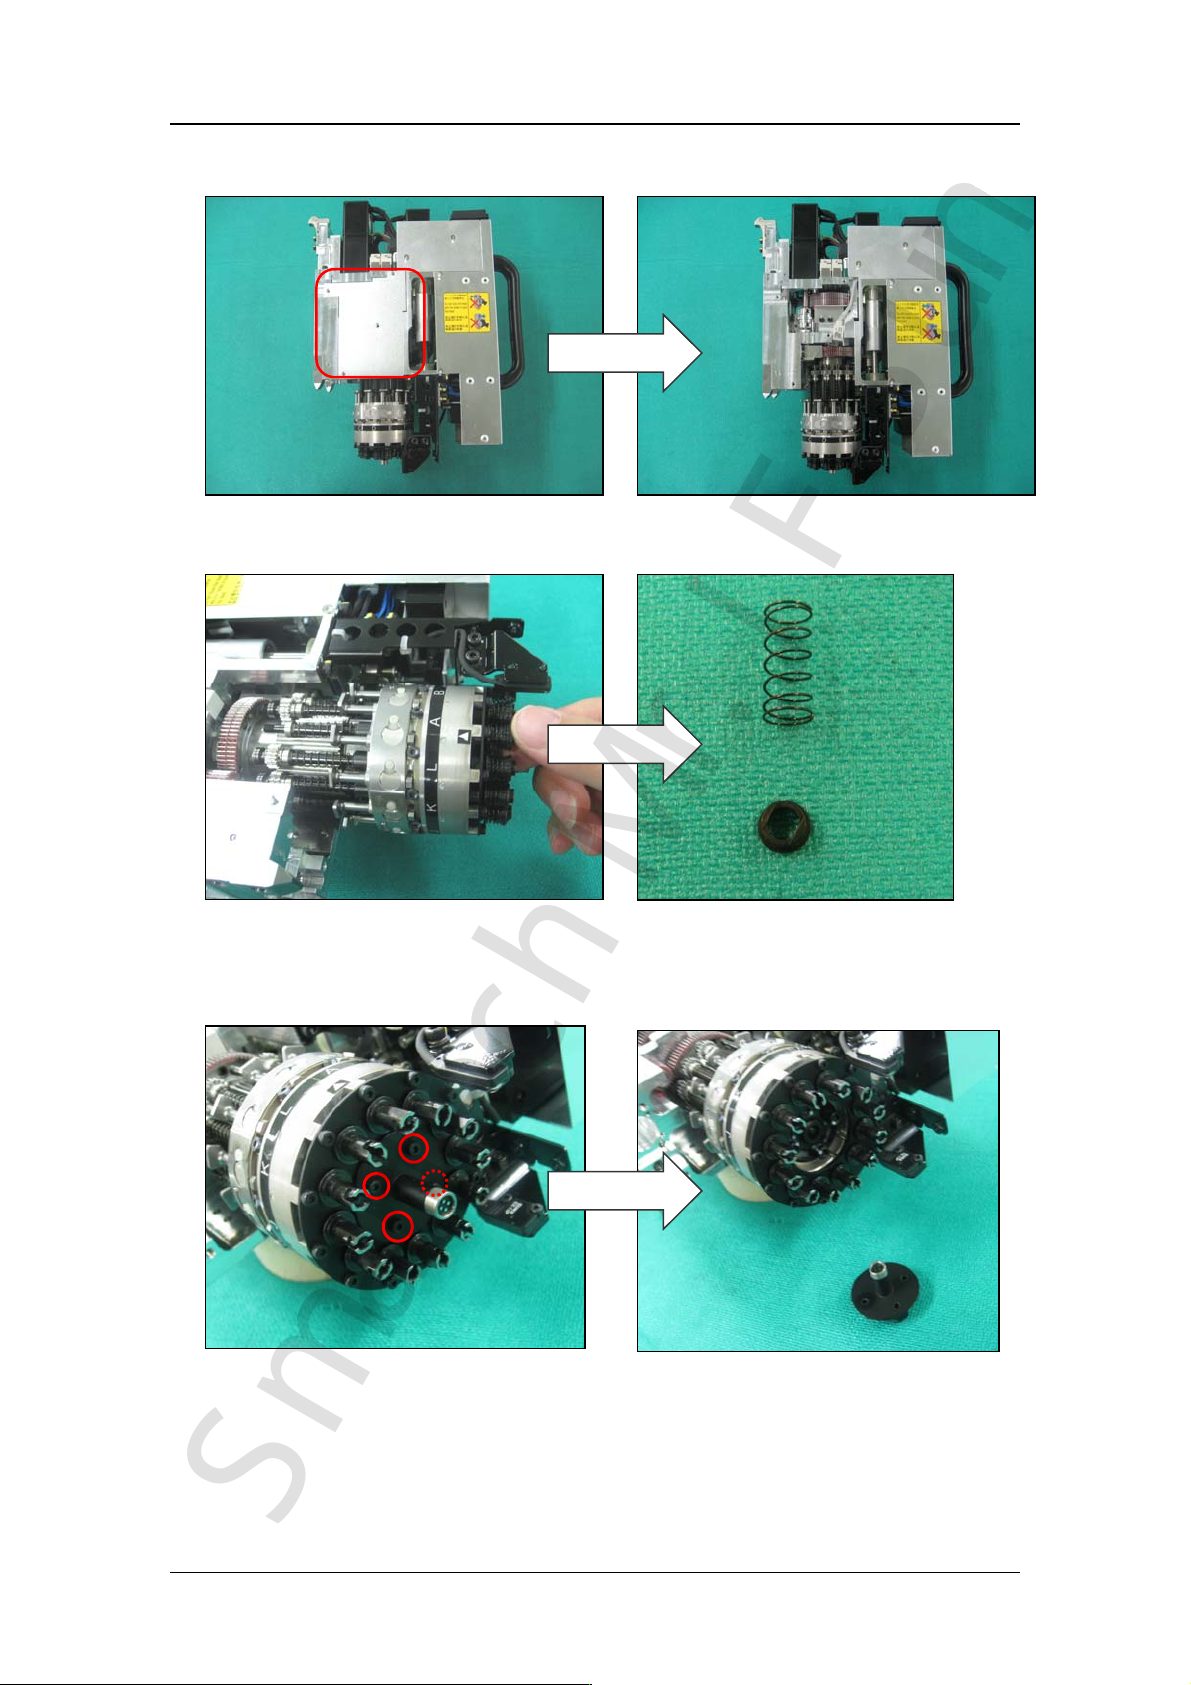
1. Remove the following cover from the head.
2. Remove the collar and spring coil from all the syringes.
3. Remove the reference pin (thermal expansion mark) from the rotary holder.
CONFIDENTIAL
SmartechMr.J FSun