TR7600 SIII_Camera_Calibration_en_v_2_0_2.pdf - 第14页
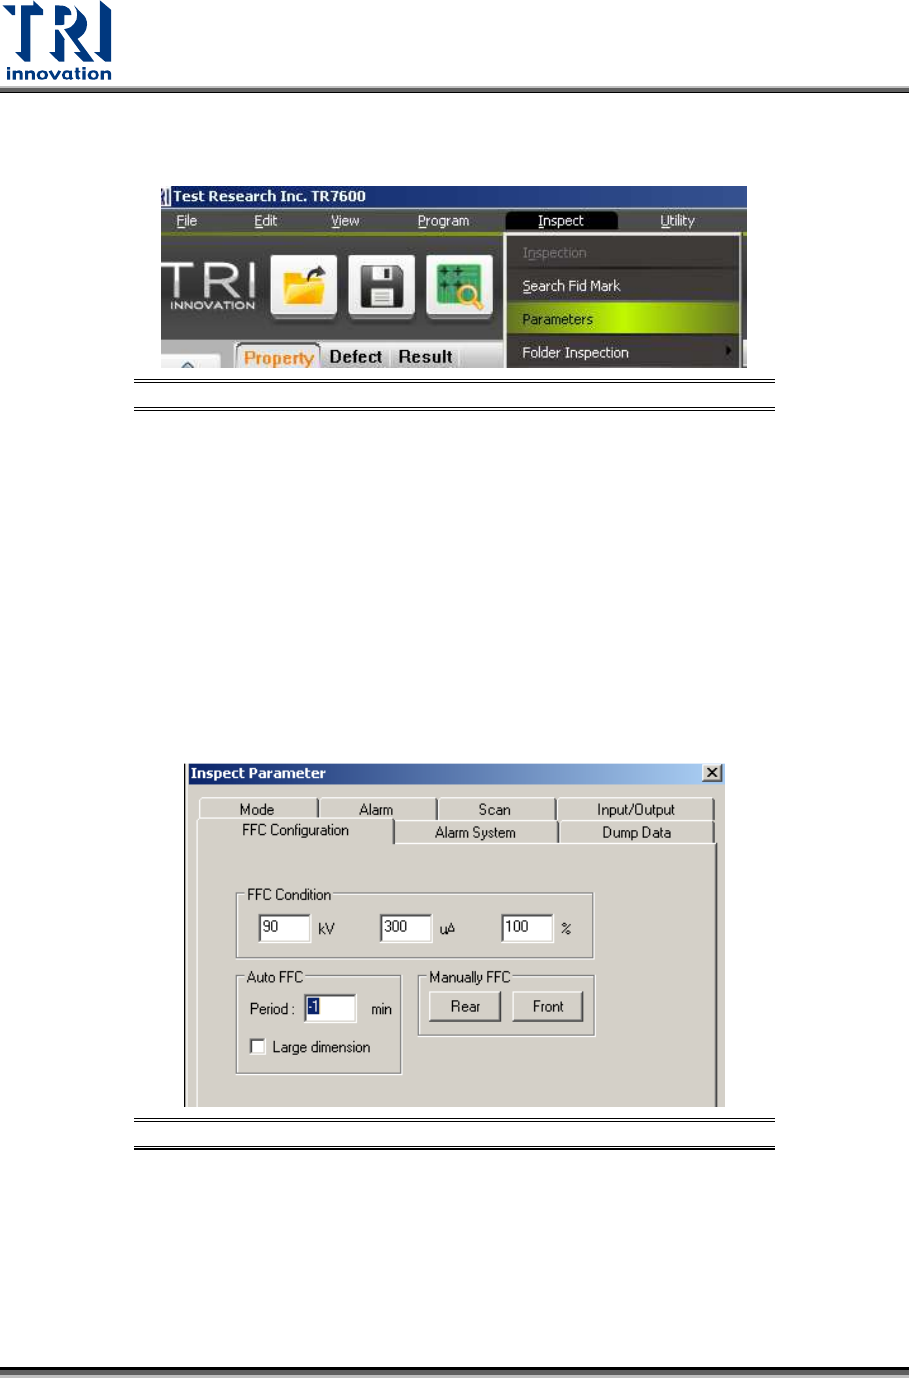
Test Research, Inc. 8 TR7600 SI II Series User Guide – Camera Ca libration 2) Set up FFC (Flat-Field Corr ection) a) Cli ck [Inspect] [Parameters]. Figure 4: Set Up FFC b) Cli ck [FFC Configuration] I. If Period field …
Test Research, Inc.
TR7600 SIII Series User Guide – Camera Calibration 7
1 P
REPARATION
B
EFORE
C
ALIBRATION
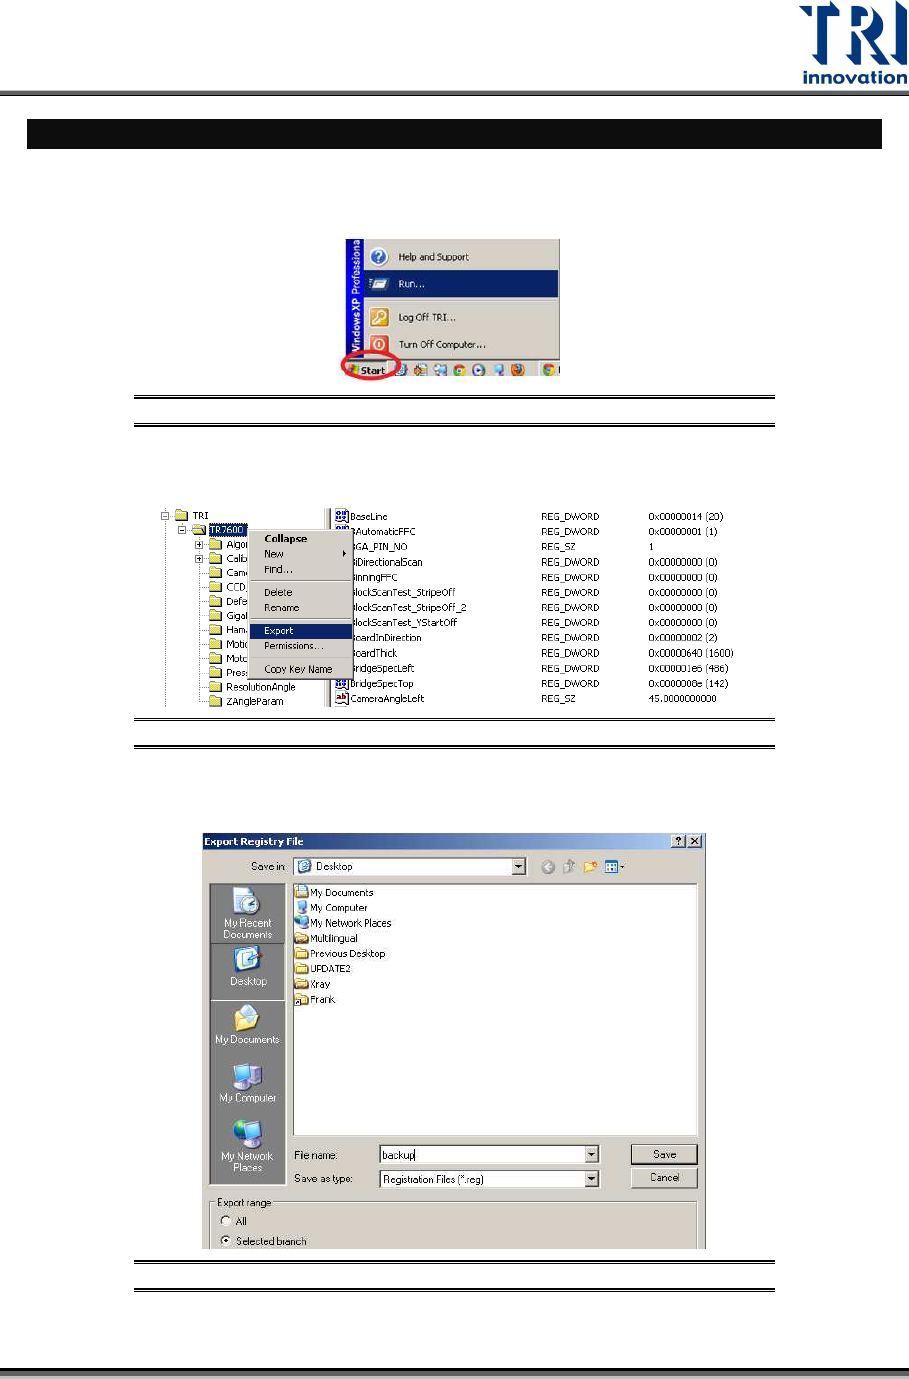
1) Back up the registry file:
a) Click [Start] [Run] Input “Regedit”.
Figure 1: Click [Start]
[Run]
b) Right-click on the TR7600 folder Select [Export].
Figure 2: Export the Backup to the Desktop
c)
Back up the registry file as "backup.reg" on the desktop.
Figure 3: Save the Registry File
Test Research, Inc.
8 TR7600 SIII Series User Guide – Camera Calibration
2) Set up FFC (Flat-Field Correction)
a) Click [Inspect] [Parameters].
Figure 4: Set Up FFC
b) Click [FFC Configuration]
I. If Period field is -1, the machine won't do FFC.
II. If Period field is 0, the machine will do FFC automatically every time
before scanning the board.
III. If Period field is a positive number, such as 50, the machine will do FFC
every 50 minutes automatically.
IV. For manual FFC with board width more than 250 mm, please click [Front]
to use front correction boards to do FFC.
V. For manual FFC with the board width less than 250mm, please click
[Rear] to use the rear correction board to do FFC.
Figure 5: Inspection Parameters
c) Click [OK] to exit.
Test Research, Inc.
TR7600 SIII Series User Guide – Camera Calibration 9
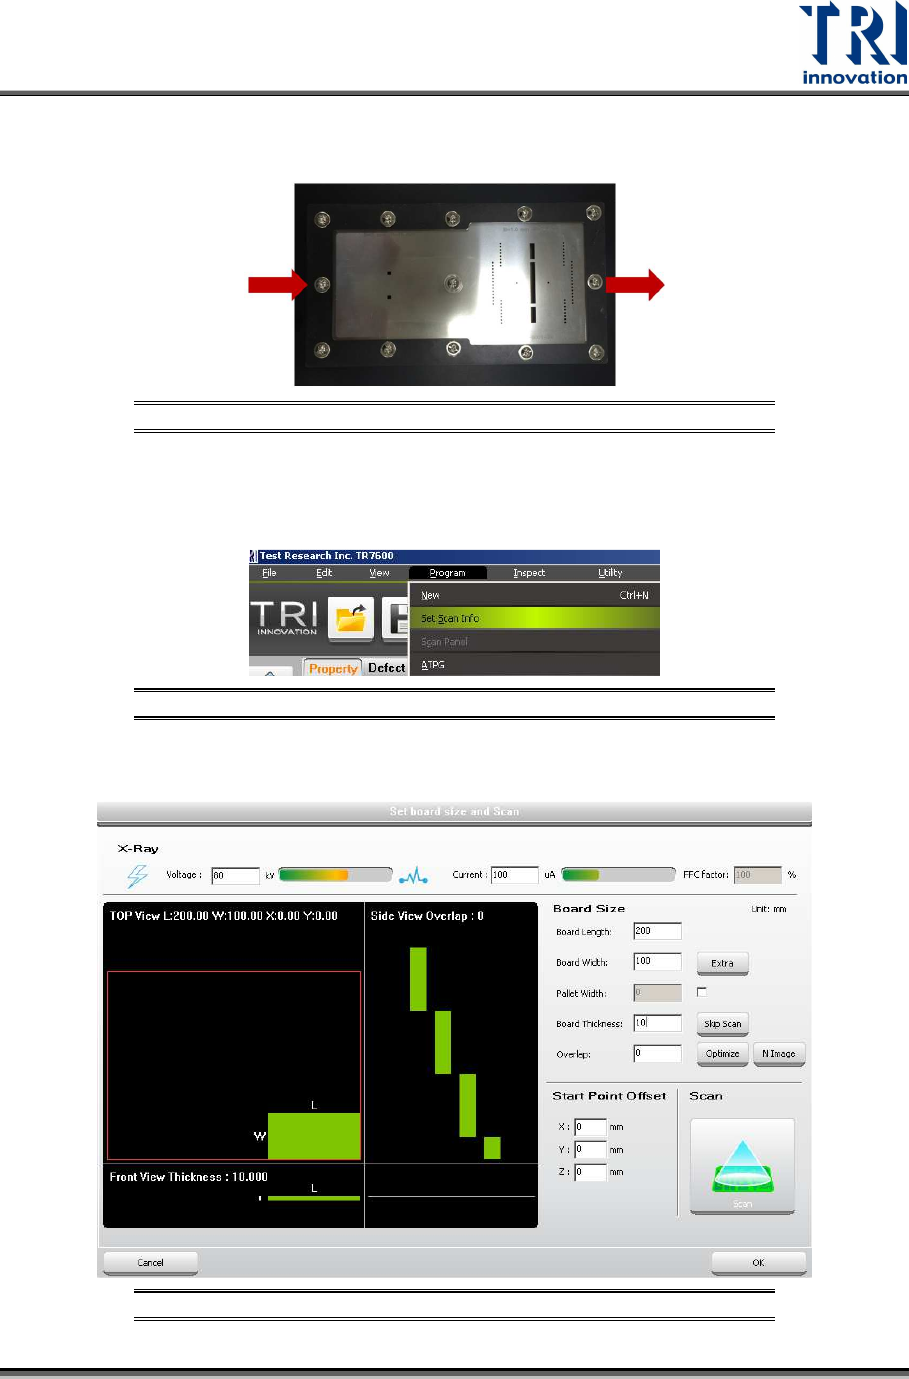
3) Under the left-in right-out board condition, please put the calibration board into the
machine shown as below.
Figure 6: Put the Calibration Board into the Machine
4) Set up the scan parameters:
a) Click [Program] [Set Scan Info].
Figure 7: Set Up Scan Info
b) Input the scan parameters and click [Scan] to scan the board. Click [Ok].
Figure 8: Set Up Scan Parameters