TR7600 SIII_Camera_Calibration_en_v_2_0_2.pdf - 第54页
Test Research, Inc. 48 TR7600 SI II Series User Guide – Camera Ca libration 11) Click on [P2(2D Stitch)]. 12) Click on [2D Stitch] and the s c reen wil l become darker. 13) Put a single c ircle at the center of the c ros…
Test Research, Inc.
TR7600 SIII Series User Guide – Camera Calibration 47
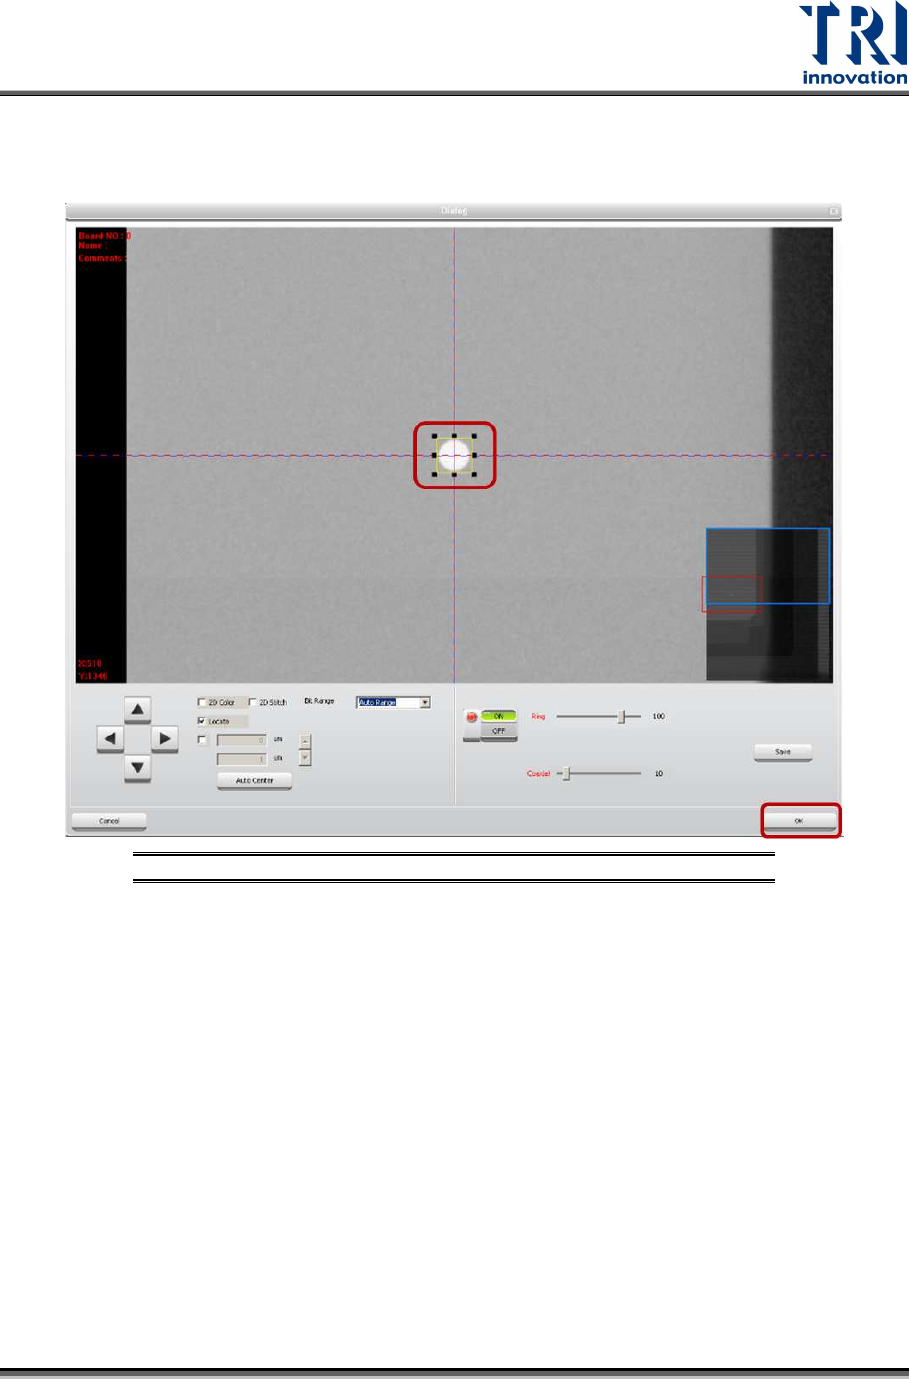
8) Click on [P1(XRay)].
9) Find a single circle. Put this circle at the center of the cross line and enlarge the
box to confine it.
Figure 79: Find a Single Circle and Drag the Frame
10) Click on [OK] to exit.
Test Research, Inc.
48 TR7600 SIII Series User Guide – Camera Calibration
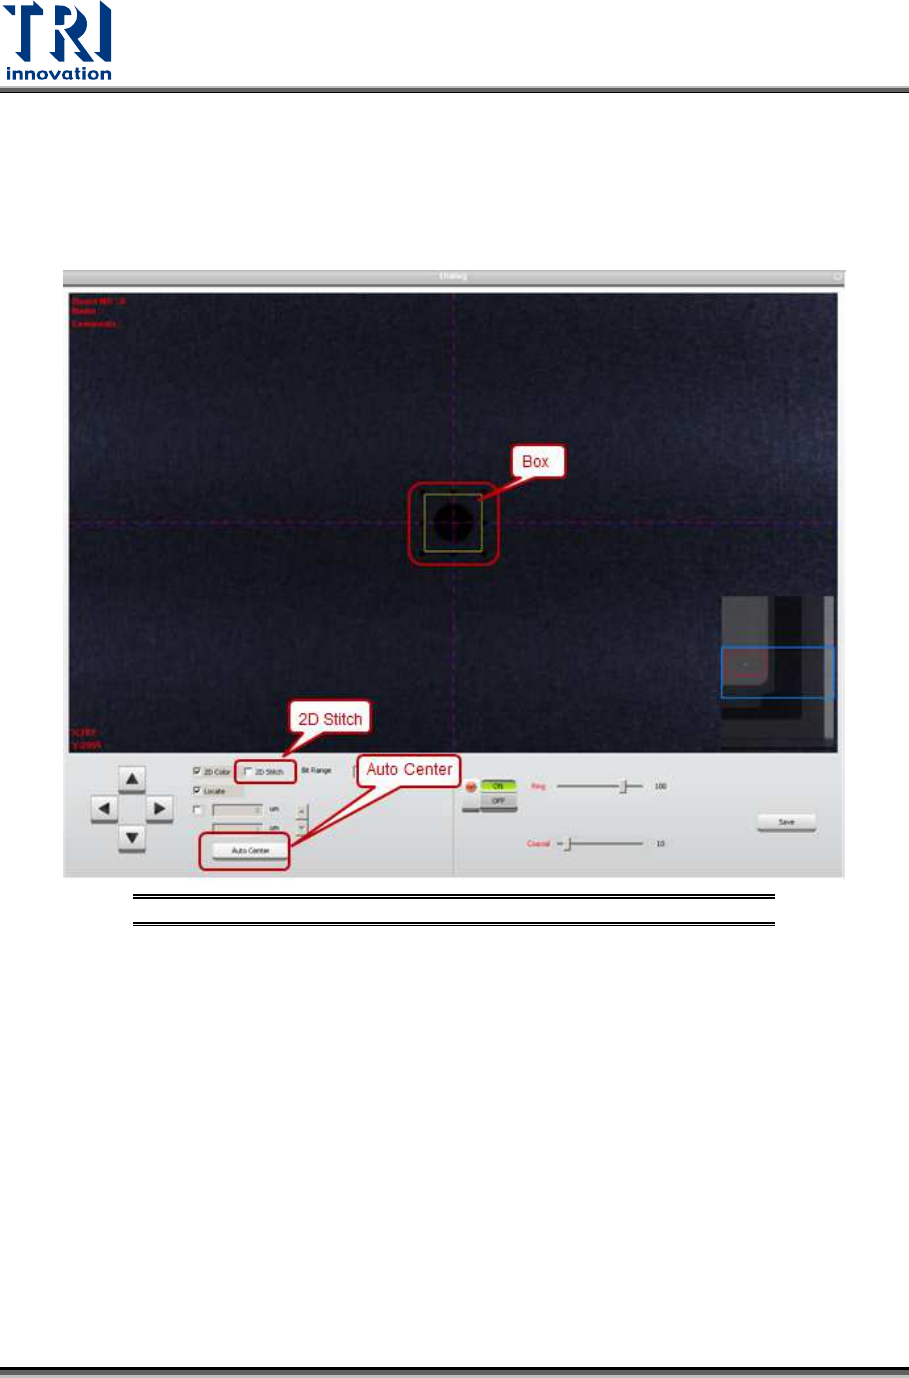
11) Click on [P2(2D Stitch)].
12) Click on [2D Stitch] and the screen will become darker.
13) Put a single circle at the center of the cross line. Enlarge the box to confine the
single circle. The box should be larger than the circle.
14) Click on [Auto Center] once or several times. The main program will calculate the
required data.
Figure 80: Find a Single Circle and Drag the Frame
15) Click on [OK] to exit.
16) Click on [Set] to save the data.
Test Research, Inc.
TR7600 SIII Series User Guide – Camera Calibration 49
17) In order to confirm the calibration is successful, click on [Scan(XRay)] to re-scan
the board.
18) Choose the same single circle and move it to the center of the box. Click on [2D
Stitch]. If the circle remains at the center of the box, the calibration is successful.
19) Repeat the steps above to perform the calibration for another 5 conditions.
20) Once Camera Dynamic Calibration completed, perform the calibration for Camera
Static.
21) Use condition 1 to set up the speed mode and resolution again.
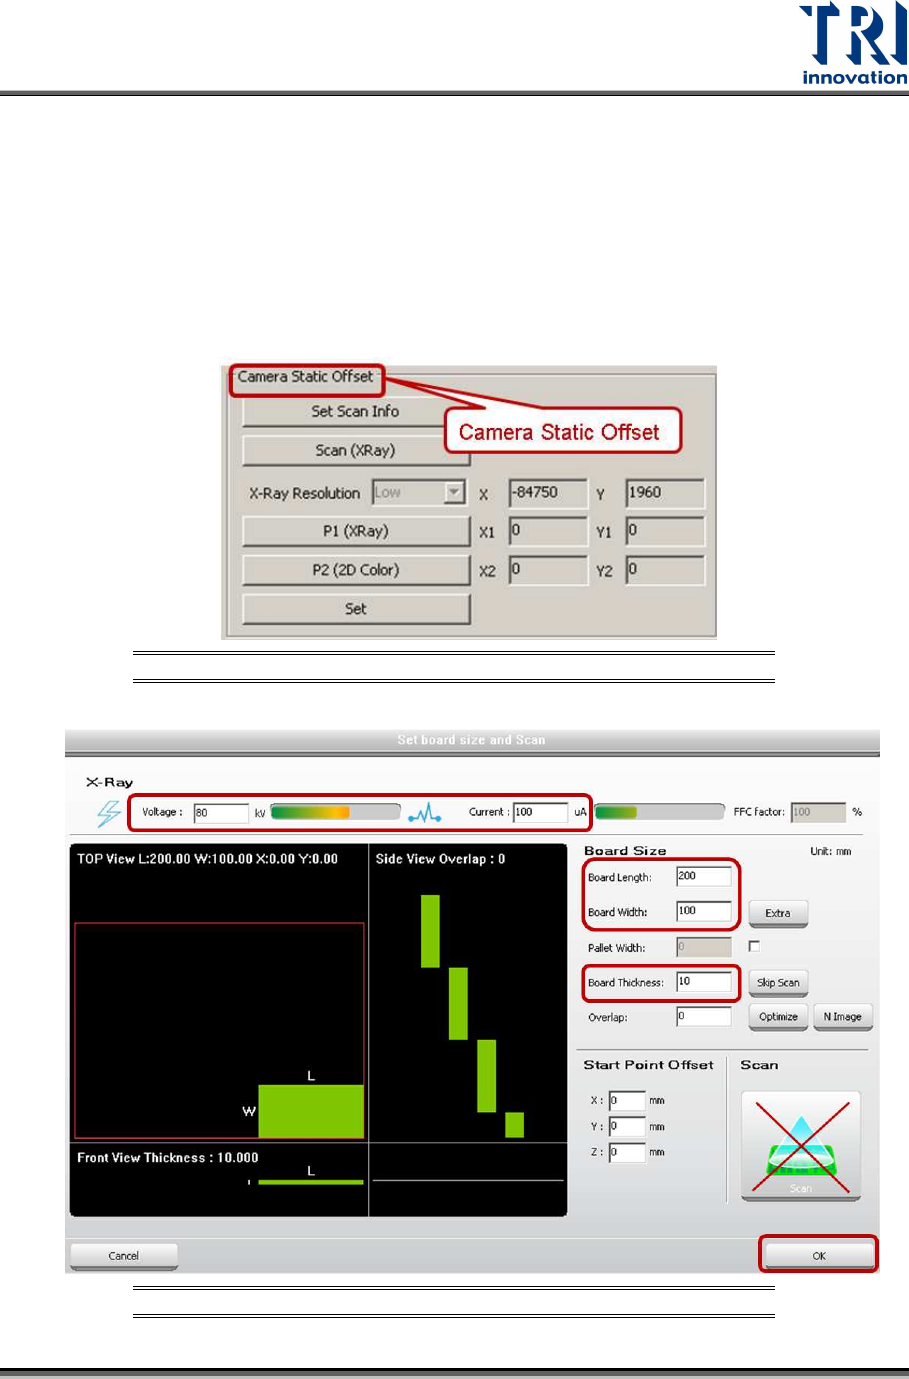
22) Under Camera Static Offset section, click on [Set Scan Info]. Input the scan
parameters and click on [OK].
Figure 81: Camera Static Offset Window
Figure 82: Set Scan Information